Monday, January 21, 2013

Sticky Toffee Pudding


So on a snowy Sunday night, what better way to spend an evening than snuggled up on the sofa watching a film and gorging on Sticky Toffee Pudding? That's my idea of a perfect night in right there. And that's exactly what I was doing last night. Bliss. I'd also like to point out here that Sticky Toffee Pudding is undoubtedly my favourite dessert. Ever. It even outdoes anything chocolatey-related in my opinion and I know that's quite a statement. So maybe now you'll understand why staying in was definitely my preferred place to be last night! 


Surprisingly, considering it's my all-time fave dessert, yesterday was actually the first time I'd ever made Sticky Toffee Pudding. I'm not entirely sure why, but I think I thought you had to make it by steaming it in a pudding dish and as I don't have one, it would have proved a bit tricky! But apparently, that's not always the case, as I soon found after a quick look in my Food Bible - Mary Berry's Complete Cook Book. You just make it like you would any other cake mixture and cook it like you would any other sort of cake. Easy. The only difference is that I cooked it in a square tin. On top of that, the toffee sauce is even easier to make and is oh-so-deliciously more-ish! Just extremely calorific, but we won't think about that right now! (Next time, I promise to make something a little more on the healthy side...) And actually, having said that, the sultanas (that I used instead of dates) and nuts surely go towards some of your five-a-day....? Maybe that's wishful thinking. Anyway, this dessert certainly lived up to my expectations and I can safely say that it still holds the number 1 spot in my list of favourite desserts. And as well as being light, spongy and wonderfully sweet, it warms you up on a chilly January evening! I shall look forward to another bowlful after a frosty walk home from dancing tonight. 
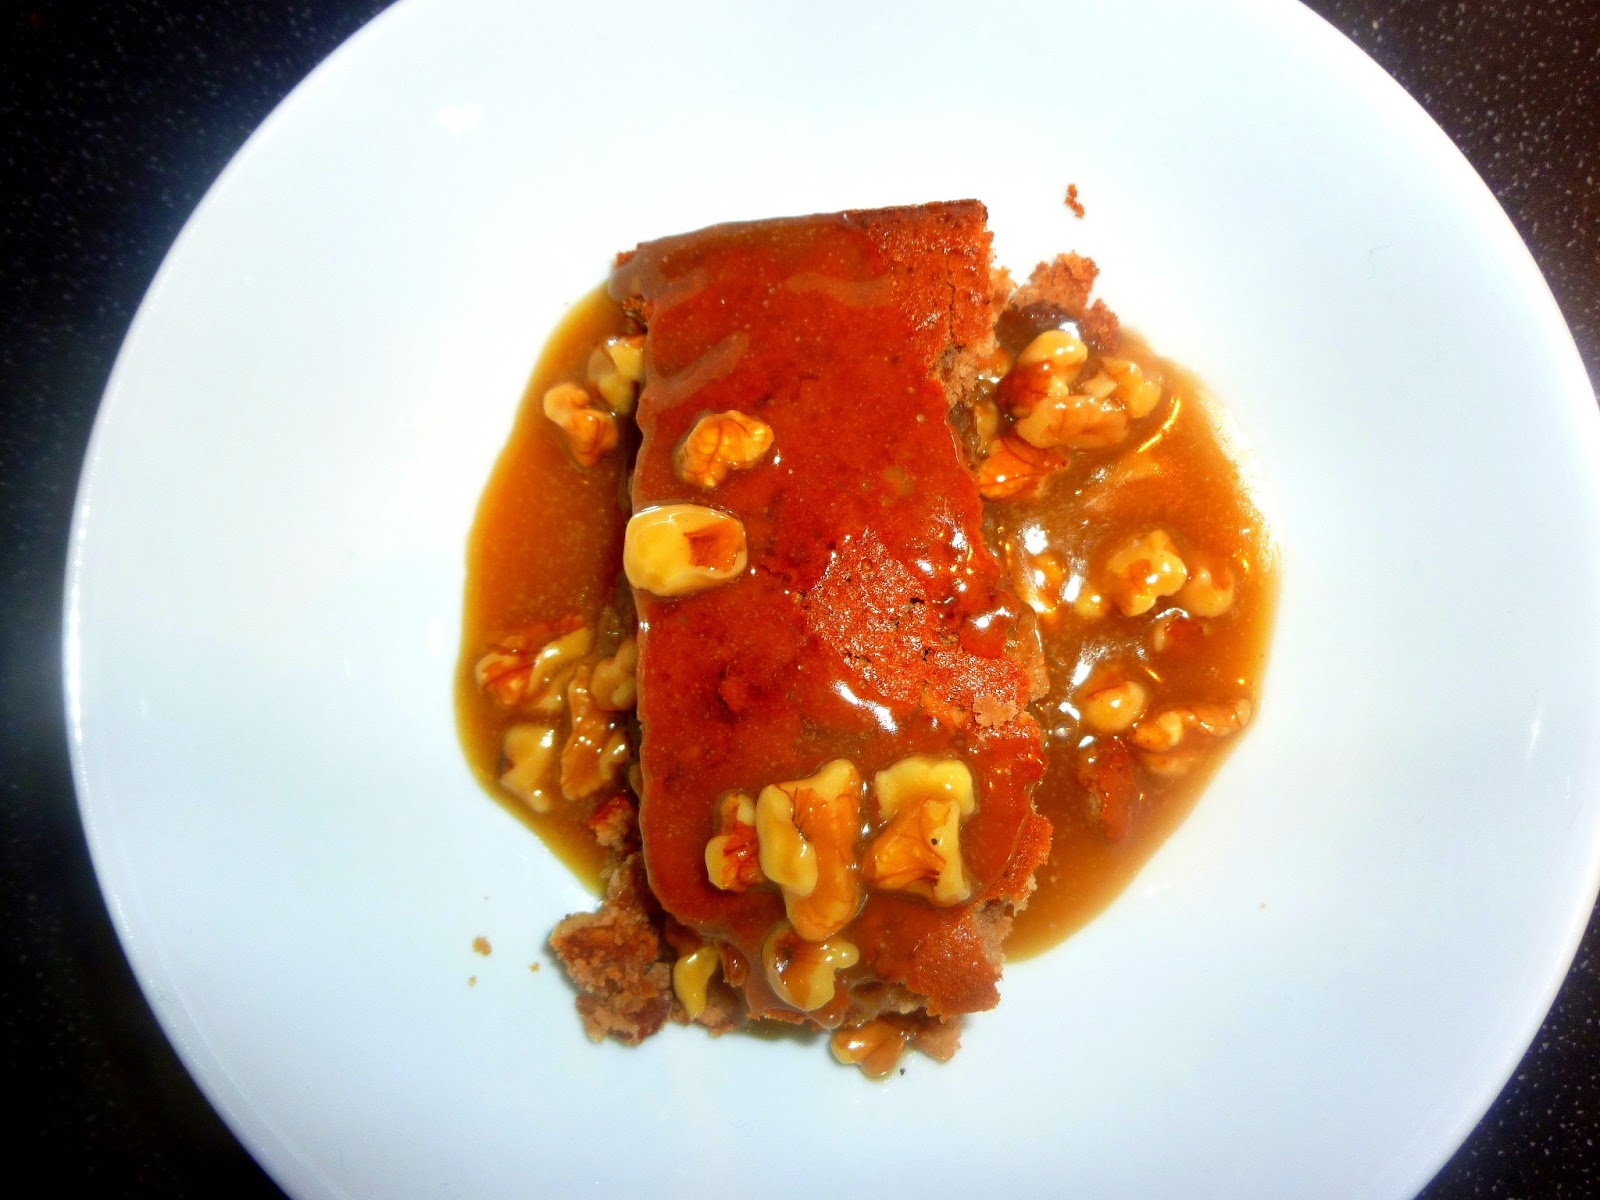

Sticky Toffee Pudding   (serves 8)

Ingredients:

For the sponge:
90g Butter
150g Light Brown Sugar
2 Eggs, beaten
1tbsp Coffee Extract
175g Self-Raising Flour
1tsp Baking Powder
175g Sultanas
90g Walnuts, roughly chopped
175ml Warm Water

For the sauce:
125g Butter
175g Light Brown Sugar
6tbsp Double Cream
60g Walnuts, roughly chopped

Method:
  1. Grease a square tin and preheat the oven to 180 degrees.
  2. Put the butter, sugar, eggs, coffee extract, flour and baking powder into a large bowl and beat until smooth and thoroughly combined (don't worry if it's very stiff and in one big blob at this point - it will loosen when you add the water!).
  3. Stir in the dates and walnuts, followed by the water.
  4. Pour the mixture into the tin.
  5. Bake for 45-50 minutes until the pudding is well rise, browned and springy to the touch. 
  6. About 10 minutes before the pudding is ready, make the sauce.
  7. Put the butter and sugar into a saucepan and heat gently until melted.
  8. Stir in the cream and walnuts and heat gently to warm through. 
  9. Cut the pudding into 8 and transfer to bowls.
  10. Pour over the toffee sauce and enjoy!

Sunday, January 13, 2013

Lemon Meringue Cupcakes


What better way to finish off the perfect weekend than baking lemon meringue cupcakes with the housemates? And they are literally THE most incredible things ever. Which actually isn't that surprising really, because the recipe was from one of the Hummingbird Bakery recipes books, so obviously I would have expected nothing less. One of my housemates got 'Cake Days' for Christmas, which doubtless to say I am extremely jealous of (Mum, take note!) and perhaps our challenge will be to work our way through it by the end of the year. I don't know how they manage it, but the sponge is possibly the moistest I've ever tasted and it's not even difficult to make.

No words are needed to describe this book. 
However, perhaps the best part of making these cupcakes was that we got to use my other housemate's blowtorch...! Now that was exciting and it worked a treat!! And it's made them look so professional. I'm very impressed with it anyway. This is what I wished I'd had last year when I made the raspberry version of these. The blowtorch was far more effective than baking the meringues in the oven and gives them that golden finish that makes them look so attractive. 

Charlotte in action with her blowtorch!

And of course, the hidden lemon curd inside makes a delicious attempt at balancing out the sweetness of the meringue topping. Which is virtually impossible considering the amount of sugar that's in them - you could really only have one of these at once. Actually, that's a lie. I could definitely persuade myself to have another. And it wouldn't take much persuading! These will not be in our kitchen for much longer. So, basically, you must give these a go and treat yourself to a little sugary goodness to brighten up your day!


Lemon Meringue Cupcakes (makes 12)

Ingredients:
80g Unsalted Butter
280g Caster Sugar
240g Plain Flour
1tbsp Baking Powder
1/4tsp Salt
1tsp Finely Grated Lemon Zest
2 Large Eggs
240ml Whole Milk
200g Caster Sugar
4 Egg Whites
70g Lemon Curd

Method:
  1. Preheat the oven to 180 degrees and line a muffin tin with muffin cases (or use silicone ones as I did).
  2. Beat together the butter, sugar, flour, baking powder, salt and lemon zest until they are incorporated and resemble breadcrumbs. 
  3. Break the eggs into a jug and whisk in the milk. 
  4. Pour three quarters of the egg mixture into the dry ingredients and beat together (using an electric whisk if you have one).
  5. Pour the remaining egg mixture in and beat again until combined and the batter is smooth.
  6. Spoon the batter into the cases so they about two thirds full. 
  7. Bake in the oven for 18-20 minutes until they have risen and are springy to touch.
  8. Leave to cool on a wire rack.
  9. To make the frosting, put the sugar into a saucepan along with 150ml water and bring to the boil. 
  10. Meanwhile, whisk the egg whites until just foamy.
  11. Allow the sugar to boil for 5-10 minutes, until when a drop of the syrup is placed in cold water, it forms a small ball on the surface.
  12. Pour the sugar syrup onto the egg whites and beat with an electric mixer on high until the meringue has quadrupled in size and is velvety smooth. 
  13. Once the cupcakes are fully cooled, hollow out the middle about 2cm deep and wide, using a knife.
  14. Fill the hole about half full with lemon curd and then place the hollowed out sponge back in. 
  15. Place about 1tbsp of meringue on the cupcakes, swirling it on.
  16. Using a blowtorch, lightly brown the meringue so it is golden in colour.
  17. Repeat with each cupcake and enjoy!

Monday, January 7, 2013

Very chocolatey chocolate brownies


New Year's Resolutions aren't usually my thing, as firstly, I can never normally think of any and secondly, I can never stick to them. But this year all that is about to change, because I'm going try and make a bit more effort to keep up with my baking and blogging, despite the fact that this term is probably going to be the busiest and most stressful yet. So I've more than likely set myself a challenge which is going to be a bit impossible to achieve, but I'm going to try and blog at least once a week. And actually, baking something yummy and having the pleasure of eating it afterwards is definitely one of the best de-stressing methods ever invented. In my opinion anyway.

So I have started as I mean to go on and yesterday, all I wanted to do was bake the most chocolatey thing I could think of. For my birthday I got Mary Berry's Complete Cookbook, which will be my food bible from now on I think, because it has literally every recipe imaginable in there. Including perhaps THE best chocolate brownies that I've ever made. In fact, she does call them 'Best-ever brownies' and I can vouch that this is definitely true. (Although I did make a few little alterations of my own to them!) Gooey and chocolatey and nutty and just so so delicious. You really have to make them and believe me, if you do, you will not be disappointed. Bake these brownies and all those stresses that suddenly appear again after Christmas will vanish instantly in a mouthful. Honest. 


Chocolate Brownies (makes 16)

Ingredients:
100g Milk Chocolate
200g Plain Chocolate
230g Margarine
2tsp Instant Coffee
2tbsp Hot Water
2 Eggs
250g Sugar
1tsp Vanilla Extract
90g Self-Raising Flour
150g Chopped Hazeknuts
100g Plain Chocolate Chips

Method:
  1. Grease a tin and preheat the oven to 170 degrees.
  2. Melt the chocolate and margarine in a pan on a low heat (in a bowl over a pan of boiling water is better if you have a heatproof one that is the right size!).
  3. Put the coffee in a bowl and pour in the hot water, stirring to dissolve.
  4. Add the eggs, sugar and vanilla extract.
  5. Gradually beat in the chocolate mixture.
  6. Fold in the flour and hazelnuts, followed by the chocolate chips.
  7. Pour the mixture into the prepared tin and bake for about 40-45 minutes (until firm to the touch but still gooey in the middle).
  8. Leave to cool in the tin, then cut into pieces and enjoy!


Thursday, December 27, 2012

Baked Cranberry Cheesecake


Okay, so I know Christmas is only just over and right now food is probably the last thing on your minds, if the amount I've consumed in the last few days is anything to go by! But I'm going to tell you about a recipe anyway. Because I've not blogged in forever and to be honest this cheesecake is so light and fluffy that it's basically like eating fresh air (but much tastier of course!) (and well actually, it's probably not like eating fresh air at all...!). Anyway, enough of my ramblings, it tasted damn good and that's all that matters.

As much as I love all the traditional Christmas desserts: pudding, cake, mince pies, stollen, etc. etc. I do get a bit sick of them after a while and they can be quite stodgy. So I thought about making something a bit different that's lighter and less rich and I came up with a cheesecake. But to make sure that it was still vaguely Christmassy I tried it with cranberries instead and I have to admit, I'm quite impressed with the result. Thankfully the rest of the fam were too! It was loosely based on this recipe here, but I made a few alterations and it tasted wonderful. So whilst cranberries are still hanging around in the supermarkets buy some and get baking!

Baked Cranberry Cheesecake (serves 10)

Ingredients:
100g Chocolate Digestives
50g Butter
1 1/2 cups of fresh Cranberries
1/2 cup Sugar
1tbsp Crème de Cassis (blackcurrant liqueur)   
3tbsp Water
1 cup Sugar
300g Reduced Fat Cream Cheese
1/2 Plain Fat-Free Greek Yoghurt
1tsp Vanilla Essence
Pinch Salt
2 Eggs
1 Egg White

Method:
  1. Wrap a cake tin with a double layer of foil around the bottom and sides and grease.
  2. Place biscuits in a food processor and mix until finely finely ground.
  3. Melt butter in a saucepan and stir in broken biscuits.
  4. Press the mixture into the cake tin and leave to cool.
  5. Place the cranberries, sugar, liqueur and water in a saucepan and boil.
  6. Cook for about 8 minutes until the cranberries start to pop and the mixture becomes syrupy.
  7. Cool for about 20 minutes and process in a food processor until smooth.
  8. Preheat oven to 160 degrees.
  9. Combine the sugar and cheese in a large bowl and beat until smooth.
  10. Beat in yoghurt, vanilla essence and salt.
  11. Add the whole eggs, beating well after each addition.
  12. In a separate bowl whisk the egg white until soft peaks form.
  13. Fold the egg white into the cheese mixture carefully.
  14. Pour the filling over the biscuit base.
  15. Spoon the majority of the cranberry mixture over the base and swirl together using the tip of a knife.
  16. Place the cake tin in a roasting dish and pour hot water into it so it is about 2 inches deep.
  17. Bake for about 40 minutes until the the centre of the cheesecake barely moves when you touch the pan.
  18. Allow the cheesecake to cool in the oven for about 30 minutes.
  19. Remove from the oven and run a knife around the outside edge.
  20. Take it out of the tin and cool on a wire rack.
  21. Chill for 8 hours.
  22. Just before serving spread a layer of the cranberry mixture over the top and enjoy!


Friday, October 19, 2012

Cinnamon Swirls

My lack of blogging recently is completely inexcusable I know, but I'm going to blame it on lack of Internet (yes, we had to wait OVER A MONTH to get connected!) and the shock of coming back to uni and actually having work to do (none of that swanning around exploring France I spent most of last year doing). Anyway, I'm back and in need of catching up on all that baking time I've lost!

So the other day I decided to make some rather heavenly cinnamon swirls that I found on Edd Kimber's blog. (For those of you that don't know who he is, he won the Great British Bake Off last year. For those of you that haven't heard of/watched the Great British Bake Off, you're seriously missing out!). What a great recipe is all I can say. Honestly, eating these straight out of the oven is definitely up there with my top food loves. Crispy sugar on the outside, a soft spongy dough on the inside and then the most delicious mouthful of cinnamon at the end. Me and my housemates were in the middle of watching a film when they were ready and I made them turn it off so we could all appreciate how wonderful they tasted! And of course, the smell that wafted through from the kitchen whilst they were baking was divine. 


The only downside I suppose is that they are a bit time-consuming to make. You use a quick croissant dough, which isn't difficult, it just involves a lot of waiting around while the dough rests. Basically it's not the kind of thing to make if you've only got a couple of hours. Having said that, all the faffing around rolling out the dough and putting it in the fridge, prooving it and leaving it to rest, is 100% worth it as soon as you take a bite. Whether that's as a snack with a coffee or reheated in the microwave for breakfast, you must try these lovelies!

Cinnamon Swirls (makes 12)

Ingredients:

For the croissant dough:
600ml milk
65ml water
250g plain flour
6g dry active yeast
30g caster sugar
1/2 tsp salt
150g butter, diced and chilled

For the cinnamon swirls:
110g light brown sugar
1tbsp ground cinnamon
50g butter
granulated sugar for coating

Method:

For the croissant dough:
  1. Place the milk and water into a bowl.
  2. In a separate bowl, combine the flour, yeast, sugar and salt.
  3. Add the butter pieces and stir through with a knife until the pieces of butter become smaller, but still remain in pieces.
  4. Tip the butter mixture onto the liquid mixture.
  5. Fold everything together, but not too much so that the butter pieces become too small.
  6. Cover the bowl with clingfilm and keep in the fridge over night.
  7. In the morning, remove the dough from the fridge and place on a well-floured surface.
  8. Roll out into a rectangle roughly 20cm x 40cm.
  9. Fold into thirds. 
  10. Rotate 90 degrees so that the folds are facing you.
  11. Repeat this process twice more so that you have turned it three times. 
  12. Wrap the dough in clingfilm and leave at least for a couple of hours before using for the cinnamon rolls.
For the cinnamon rolls:
  1. Grease a tray and coat with sugar.
  2. Place the dough on a floured surface and roll out into a rectangle about 30cm x 35cm.
  3. In a small bowl mix together the sugar and cinnamon.
  4. Lightly brush the dough with the melted butter.
  5. Sprinkle the dough with the sugar mixture in an even layer.
  6. Roll the dough into a tight sausage and cut into 12 equal slices.
  7. Place the slices onto the baking tray and lightly cover with clingfilm.
  8. Leave to proove at room temperature for a couple of hours until they have doubled in size.
  9. Preheat the oven to 180 degrees and when the buns are ready bake in the oven for 20-30 minutes. 
  10. Allow the rolls to cool slightly before rolling in granulated sugar.
  11. Serve slightly warm and enjoy!

Saturday, August 25, 2012

A Basket of Bread Rolls


After watching this week's episode of The Great British Bake Off (which I am seriously addicted to already by the way!), I suddenly developed an urge to make bread. I wasn't particularly fussed which sort to be honest, I just knew I wanted to make some. Mainly because I was salivating at the thought of being drawn into the kitchen by the smell of fresh bread cooking away in the oven and being able to eat it afterwards. You just can't beat fresh bread straight from the oven spread with a layer of butter that melts the moment it touches the bread. I should know, having lived across the road from a boulangerie for a year where I could pick up a baguette that was sometimes still warm virtually whenever I wanted to. In hindsight, I was probably a bit spoilt and I wish I hadn't taken it for granted so much, because living in England (or where I live anyway) it is near-on impossible to pick up a loaf as fresh as that. Well certainly not within walking distance.

But the thing is, making bread at home, especially if you just want to make a basic loaf or roll, is ridiculously easy. I don't understand why more people don't do it! Plus, you will not be able to get bread any fresher, as you literally have to travel to your kitchen to pick it up. On top of that, it hardly needs any ingredients: flour, water, yeast, salt, a bit of sugar and you're there. So if you ever hear anything about the struggles of making bread, dismiss them straight away! 

I suppose the only slight downside of making bread is that it can be a bit fiddly and time-consuming, what with all the kneading and proving, but it's really not that horrendous! These rolls I made only needed kneading (!) for ten minutes, which is nothing really. And just think of all those calories you're burning while your arms are hard at work. As for the proving, these proved for just over an hour, and as long as you know right from the start that they've got to rest for that long, then you can get on with something else whilst they're busy doubling in size. 

And that's basically all there is to it. Bread really can be that simple to make. It's certainly a staple part of my diet, because when I think about it I probably eat some type of bread pretty much every day. So why not learn how to make it for yourself, then it can be there whenever you want it, fresher than bread from a bakery! I came across this particular recipe in Lorraine Pascale's recipe book, Home Cooking Made Easy, although I changed the white bread flour to brown. She names them after her Home Economics teacher, because that's when she first made them, and in actual fact, as I was making these, I was transported back to my Food Technology room at school when I made bread for the first time. I remember being given the option of creating whatever shape we wanted, but my favourites have to be the twists with two strands. Although it doesn't really matter what shape you form them into, because they taste delicious whether they're a round roll or a spiral. As long as they're hollow on the bottom, golden on top and soft on the inside you've made a pretty decent bread roll that is just asking to be eaten!


Brown Bread Rolls       makes 12 mini rolls

Ingredients:
280g Strong Brown Bread Flour
1tsp Salt
11/2tsp Fast-action Dried Yeast
1tsp Soft Light Brown Sugar
190ml Warm Water
1 Egg, lightly beaten 
3tbsp Poppy Seeds

Method:
  1. Put the flour, salt, yeast and sugar in a bowl.
  2. Make a well in the centre and pour in the water.
  3. Use a wooden spoon to stir it all together and once it starts getting stiff, replace the spoon with hands and bring it altogether into a ball.
  4. If it's too stiff, add a couple more teaspoons of water.
  5. Knead for ten minutes.
  6. Weigh it and divide the number by 12 to create 12 rolls of an even size.
  7. Roll each one into a ball or a shape of your choice.
  8. Place the rolls on a large baking tray and cover with oiled cling film so it's airtight but not taut.
  9. Leave the rolls in a warm place for about an hour or until they have doubled in size.
  10. Preheat the oven to 200 degrees.
  11. Brush the rolls with the beaten egg and sprinkle with poppy seeds.
  12. To create a steamy atmosphere in the oven, either spray a few squirts of water inside or place a bowl of water on the bottom shelf.
  13. Place the rolls in the oven and bake for about 15-20 minutes, until they are golden brown and sound hollow when they are tapped on the bottom.
  14. Enjoy (preferably with a good layer of butter straight from the oven!).


Friday, August 17, 2012

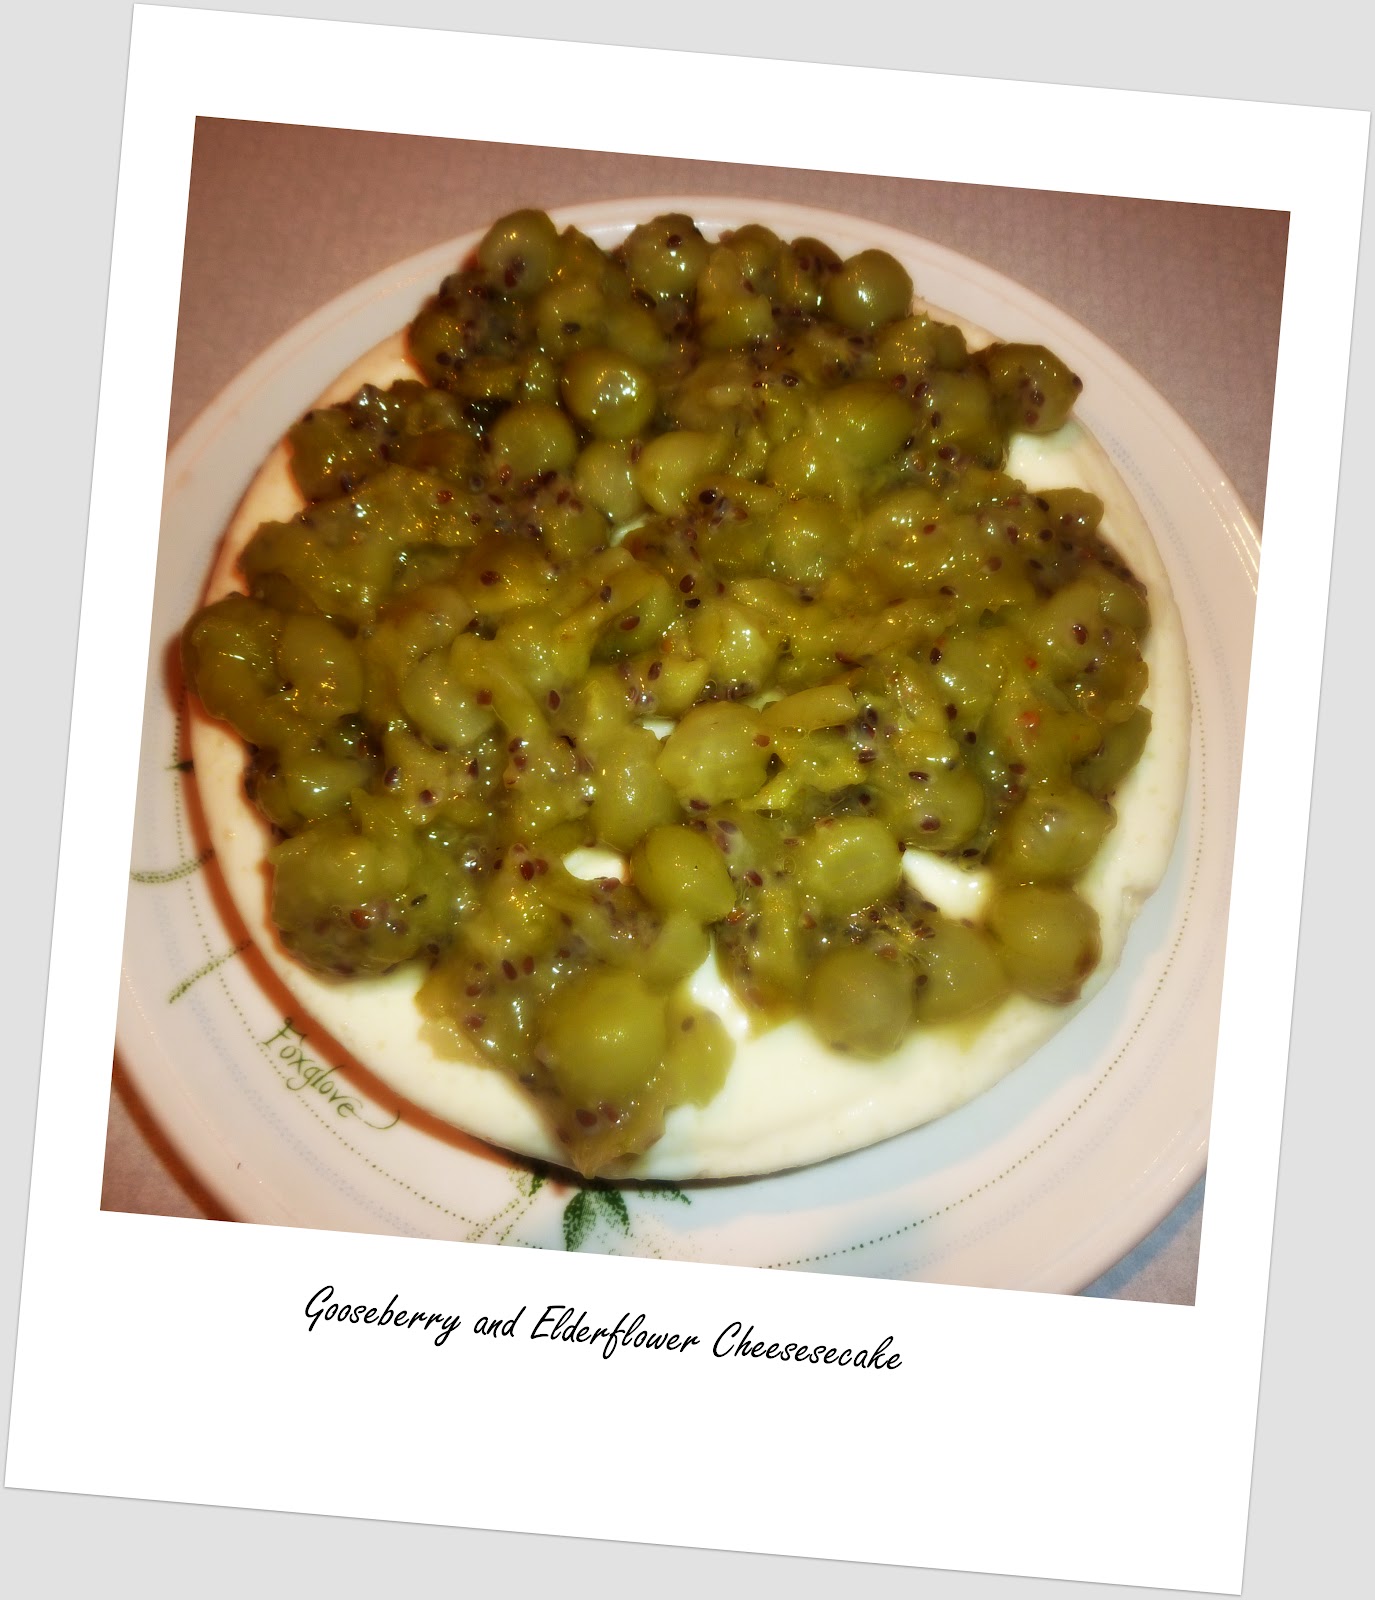
Gooseberry and Elderflower Cheesecake


I thought I was going to be spending my summer blogging away to my heart's content with nothing to do but bake and blog. Time has just been disappearing though, because for some reason I seem to have been far busier than I intended. Not that I'm complaining by any means, as being busy and having a full diary is what I like!  But I've missed baking! Anyway, the other day I finally found my way back to the kitchen and set myself the challenge of cooking up something with gooseberries. Why gooseberries, I hear you ask? I have asked my Dad this same question on several occasions, because he is the one to blame for the influx of gooseberries we have growing in our garden. And the task seems to have fallen on me to come up with a dish that can be made from them. Personally, I would have probably chosen to grow anything but these odd little berries if I had the choice, but apparently they are easy to grow as we just keep finding more and more in the garden every summer. Sour, unattractive and often forgotten about, this fruit doesn't really have a lot going for it, but after a bit of searching I eventually came upon this rather wonderful recipe for a gooseberry and elderflower cheesecake. It is even low in fat (if a cheesecake can ever be low in fat that is!). Bonus. And perhaps my opinion has been swayed so I can in fact thank my Dad for making the decision to grow these odd little berries. Because when put with the right ingredients and given something sweet, gooseberries can possibly be made into the perfect desserts.  

Speaking of desserts, I came across this quote the other day in a café which made me smile.

"Desserts is stressed in reverse...coincidence?"

I am utterly convinced that this is no coincidence at all and desserts were invented purely to take away our stresses! How brilliant would it be if all it took was a dessert to make us feel relaxed and stress-free?! If only... Although actually, as I'm sure I've mentioned before, baking and eating is enough to put me in a better mood instantly. So on that note, get baking and try this delicious gooseberry and elderflower cheesecake!


Gooseberry and Elderflower Cheesecake (serves 6-8)

Ingredients:
10 Digestive Biscuits
60g Melted Butter
250g Quark
250g Light Cream Cheese
150g Icing Sugar
1tsp Vanilla Extract
3tbsp Elderflower Cordial
1 Sachet Powdered Gelatine
350g Gooseberries (topped and tailed)
2dsp Sugar (or to taste)
2tbsp Elderflower Cordial

Method:
  1. Crush the biscuits in a blender until they resemble fine bread crumbs.
  2. Mix with the melted butter.
  3. Spoon into a greased and lined cake tin and place in the fridge for an hour to chill. 
  4. Whisk together the quark, cream cheese, icing sugar and vanilla. 
  5. Put the cordial in a heat-proof bowl and heat in the microwave until hot it starts to bubble. 
  6. Sprinkle the powdered gelatine over the top, leave for a minute or so and stir until it dissolves.
  7. Add this to the cheese mixture and stir thoroughly.
  8. Pour into the cake tin and place in the fridge to set for a couple of hours or overnight.
  9. For the gooseberries, place the berries in a small pan with the sugar.
  10. Heat until they start to burst and release juice.
  11. If there is too much excess liquid, drain it off as it doesn't want to be too watery.
  12. Stir the berries so they are a bit squashed and not whole.
  13. Add the elderflower cordial and taste - it should still be sharp but not too sour.
  14. Leave to cool, then chill the mixture in the fridge.
  15. When ready to serve, spoon the berries over the cheesecake mixture, sprinkling some flaked almonds over if you like and enjoy!