Thursday, July 21, 2016

Banana and Strawberry Frozen Yoghurt


I'm not quite sure how it's happened, but somehow I've left it nearly a whole year again to write another blog post! Actually, that's a lie. I know exactly how it happened. A crazy final year of Speech and Language Therapy training, moving house and goodness knows what else has got a little bit in the way of blogging. Because whilst I've still found the time to bake (obviously...!), uploading pics and a recipe on here takes a little bit more effort. But now I'm all finished with studying (forever I hope - I can't face the thought of revising ever again) and officially a qualified Speech and Language Therapist (!!!), I have a little bit of spare time to blog. I hope, anyway. In between applying for jobs and making the most of the summery weather while it lasts, I intend to share some of the things I've been baking...


Although actually, this recipe I'm sharing isn't baking at all! Because honestly, who wants to be baking in this ridiculously hot weather? Climbing down three flights of stairs every morning when it's 30 degrees outside completely zaps me of my energy, so I want whatever I'm making to require as little effort as possible! This Frozen Yoghurt recipe definitely ticks that box. Take the four ingredients, stir them together, pop it in the freezer and then a couple of hours later you can sit down and enjoy a few icy scoops. Just what I fancy eating on a hot day. And I guess it's a little bit healthier than ice cream too, because you can chuck in any fruit you have to hand and there you go - you've just eaten one of your five a day right there. It might not taste quite as good as the froyo you can buy in the shops, but then again who knows how much sugar they add to each scoop... And obviously, you don't have the satisfaction of knowing that you made it yourself or the ease of not having to leave the house to eat it!!


So be creative...! Experiment with the type of fruit that works best. Enjoy the heatwave we're having whilst eating a bowlful of frozen yoghurt...!


Banana and Strawberry Frozen Yoghurt

Ingredients:
1 frozen banana
1 handful of strawberries
1/3 of a large pot of natural yoghurt
Sugar (to taste - I probably added around 2 tbsp)

Recipe:
1. Take the banana out of the freezer to defrost slightly.
2. Pour the yoghurt into a bowl.
3. Cut the strawberries into small pieces and blend in a processor to a purée. Add to the yoghurt.
4. When the banana is soft enough, peel and cut it into small pieces, careful to remove all the peel. Add to the yoghurt.
5. Sprinkle your desired amount of sugar on top and stir ingredients together.
6. When combined, pour into a tupperware and place in the freezer for a couple of hours until firm.
7. Remove from the freezer just before eating, so it's soft enough to scoop.
8. Add a couple of fresh strawberries and enjoy!  


Sunday, July 26, 2015

Pistachio and Lime Cake


Hello again! I thought it was about time I shared another recipe, because it has been OVER A YEAR since I last blogged!! How has that happened?! Time flies...! It's been a busy year though: moving to London and training to be a Speech and Language Therapist has meant that blogging has not been my top priority. Of course, those of you that know me will know that I have not stopped baking - it would take a lot for that to happen...but London life can be a little hectic and I don't seem to have a lot of free time at the moment. Not that I'm complaining...I love being busy! Anyway, a couple of weeks ago I finished for summer, so I might have a little more time to bake and blog over the next couple of months.... We'll see! I'm promising nothing...!

The cake I'm sharing with you today comes from the lovely Kate over at The Little Loaf. I can't remember when I first came across Kate's blog, but I was instantly hooked and have been following it ever since. I want to make EVERYTHING she posts and when she announced she was publishing a book full of her fabulous recipes I knew I had to buy it as soon as it came out. So I did exactly that and I would urge any other baking fans out there to do the same! It's called Homemade Memories and contains the most delicious bakes all photographed so beautifully - when I got it I didn't know where to start...! Gradually, I WILL make my way through it. So far I've made the mini milk lollies (when it was a bit more summery than today!), the nectarine upside down cake and now this divine pistachio and lime cake. Which was actually meant to be a loaf, but I improvised and used a square baking tin due to my limited equipment!! And actually, it meant it didn't need to bake for quite as long, which is always a bonus, as it means less time to wait until you get to eat what you've made! 


If I make this again though, I will endeavour to buy shelled pistachios, because 65g of pistachios means A LOT of shelling and I ended up with shells and pistachios all over the kitchen and a broken nail. Not that I'm complaining...it was definitely worth it, but it was very fiddly! A wise owl has since told me though that using another shell to de-shell is the way forward, which would hopefully limit any future nail injuries!! 

I was saying to a friend today, when I was younger I would have always thought that chocolate cake was my favourite, but really a cake with fruit in is a hands down winner in my eyes. Banana, carrot, blueberry, raspberry, pear...I could go on - whatever the fruit, put it in a cake and it's bound to work out! The fruit makes it extra moist and kind of makes you think you're eating something a little bit healthier (although I'm 99% certain it's not!). This cake is really a variation on the lemon drizzle - but perhaps a little more sophisticated and a little zingier (is that a word?!).  Actually, I've decided in fact that this cake may have beaten the lemon drizzle. Limes seem to have a much stronger flavour than lemons and the pistachios not only add a deeper flavour, but they give it a beautiful colour too. My Grannie's lemon drizzle cake is a regular request in the Goodhand family, but if I request one any time soon, I might point her in the direction of The Little Loaf and ask her to use limes instead...! 


Pistachio and Lime Cake (barely adapted from The Little Loaf's Homemade Memories)  

Ingredients:
For the Cake:
60g Shelled Pistachios
180g Self-raising Flour
Pinch Salt
175g Softened Butter
175g Caster Sugar
Finely Grated Zest of 3 Limes
3 Eggs, lightly beaten
1-2tbsp Milk
For the Glaze:
65g Dried Apricots, roughly chopped
2tbsp Honey
Juice of 3 Limes
30g Pistachios, roughly chopped

Method:
  1. Preheat oven to 150 degrees (fan, 170 degrees without fan).
  2. Grease a square baking tin and line with baking paper.
  3. Put the shelled nuts in a food processor and blitz to a fine powder. 
  4. Place in bowl and stir in flour and salt.
  5. Cream together butter and sugar in separate bowl.
  6. Add lime zest and cream until pale and fluffy.
  7. Gradually beat in eggs with a bit of flour mixture with each addition.
  8. Fold in remaining flour mixture until just combined.
  9. Fold in the milk until it drops gently off spoon (you might not need to use it all).
  10. Put batter in tin and smooth top.
  11. Bake for 30-40 mins until risen, golden and firm to touch (a skewer inserted should come out fairly clean).
  12. Remove from oven and leave to cool in tin for 10 mins,
  13. Make syrup by combining apricots, honey and lime juice in a saucepan. 
  14. Bring to a simmer then cook for 3-4 mins until apricots have softened and mixture is syrupy.
  15. Stir in pistachios.
  16. Transfer cake to wire rack.
  17. Poke holes in top (not all the way through) and pour over the warm syrup.
  18. Make sure pistachios and apricots are evenly distributed.
  19. Leave to cool and cut into 12 pieces.


Sunday, June 15, 2014

Rhubarb and Custard Tart

  
Well, it's that time of year again when all the weird and wonderful fruit and veg that my dad has decided to grow in our garden is ready to pick and we are suddenly faced with a glut of something peculiar that needs using immediately! But to be honest, rhubarb isn't that weird and in fact, I quite enjoy the challenge of coming up with a new recipe to go with whatever's in season. Actually, I've decided that I quite like rhubarb too. Put it with some ginger and something sweet and I enjoy its kick of sourness. When I spotted a recipe for rhubarb and custard tart it leapt out at me, because as I've said countless times before, anything with custard in is a winner for me!! 


This summery tart was certainly no exception. The rhubarb still had a bit of bite to it, the custard was the perfect amount of vanilla-y-ness and the pastry was flaky and crisp (Mary Berry would have been proud of it!). I was actually planning on being lazy and buying ready-made pastry, but if you make your own it always tastes better (even if it is a bit of a faff to make), which was definitely true for this recipe! Anyway, the rest of the tart was very easy to make, because despite it having custard in, you don't actually have to make it in a saucepan before hand, which is a bit of a relief, because there's always a risk it might curdle... Thankfully, this is avoided putting it in the oven and it came out looking pretty perfect and tasted pretty perfect too! I guess you could have it with cream or ice cream, but I prefer it just as it is, either as a pick-me-up mid-afternoon with a cup of tea or as a dessert. Next year I will not need to search hard for a recipe with rhubarb, because I will absolutely be making this one again!!  


Rhubarb and Custard Tart

Ingredients
Pastry:
280g Plain Flour
60g Custard Powder
200g Butter
4tbsp Caster Sugar
2 large Egg Yolks
Filling:
350g Rhubarb
1/2tsp Ground Ginger
100g Golden Caster Sugar
1 Large Egg and 1 Egg Yolk
1tsp Vanilla Extract
1tbsp Plain Flour
284ml Single Cream 

Method
  1. For the pastry place the flour, custard powder and a pinch of salt in a large bowl followed by the cubed butter.
  2. Rub together until mixture resembles fine breadcrumbs.
  3. Stir in the sugar.
  4. Add the egg yolks and 3-4tbsp of water and quickly mix together.
  5. Shape into a ball, cover in cling film and chill for 30 minutes.
  6. Cut the rhubarb into bite-sized pieces and place in a frying pan with the ginger and half the sugar.
  7. Warm through just until the sugar dissolves.
  8. Preheat the oven to 180 degrees.
  9. Roll out the pastry and line a 24cm tin with it.
  10. Line with greaseproof paper and baking beans and bake for 15 minutes, removing the beans for the final 5.
  11. Beat together the egg and egg yolk, vanilla extract, remaining sugar and the flour. 
  12. Gradually whisk in the cream and any juice from the rhubarb.
  13. Spoon the rhubarb into the prepared pastry case and pour over the cream mixture.
  14. Place in the oven and bake for 20 minutes until the custard is very lightly set.
  15. Remove from the oven, serve warm or at room temperature and enjoy!

Monday, March 17, 2014

Berry Coconut Marshamallows


I MADE MARSHMALLOWS! Yes I did...! And they actually taste like marshmallows, with all the stretchy, fluffiness you associate with them. Except these taste a million times better than shop-bought ones and I don't feel like I'm stuffing my face with additives and goodness knows what else. Because my marshmallows were delicately flavoured with fruity berry goodness and a sprinkling of dessicated coconut, which means that you have a perfectly formed gooey square of just the right amount of sweetness to satisfy that sugar craving. 


You may be wondering why I decided to make marshmallows and, to be honest, as I'm not really a massive fan of marshmallows (unless they're toasted on a campfire), I could well ask myself the same question. A few months ago I saw a recipe somewhere for homemade marshmallows and I was intrigued, as I'd never even thought about the idea of making your own marshmallows... I saw that the recipe required a sugar thermometer though and it wasn't until I requested one at Christmas that the recipe popped into my head again. Since then a sugar thermometer has been sitting in my room waiting to be used, but when some of my friends were pestering me at the weekend to bake something new and adventurous, it was lucky enough to have its first outing and my homemade marshmallows were born. So girls (you know who you are!), I hope these live up to your expectations and are a suitable level of difficulty...! 


Despite the initial unknown of boiling sugar to a specified temperature and the novelty of using my sugar thermometer, they were surprisingly easy to make! There's no actual baking involved, as it's the gelatine that you add which sets it. And the beauty of the recipe is that you can flavour them with whatever ingredients you want (within reason, of course!). I dissolved the gelatine in a berry smoothie and added a little red food colouring to enhance the pinkness, but you could use any fruit paste you like or any other flavouring. I'd never thought of flavouring marshmallows before and yet the possibilities are endless. They would even make cute little gifts wrapped up nicely. So I may well be making them again and if you want a bit of a challenge, try making some marshmallows!


Berry Coconut Marshmallows (makes 36 squares)

Ingredients:
60ml Berry Smoothie
1 Sachet (12g)  Gelatine
220g Caster Sugar
80ml Golden Syrup
100g Dessicated Coconut
Vegetable Oil (for greasing)

Method:

  1. Toast the coconut and allow to cool.
  2. Line a baking tray with cling film and grease with oil.
  3. Sprinkle a layer of coconut on cling film.
  4. Pour the smoothie into a bowl and sprinkle with gelatine to allow it to absorb the liquid.
  5. Put the golden syrup and caster sugar in a pan and pour in enough water to cover.
  6. Stir thoroughly.
  7. Cook over a low heat until sugar has dissolved and then bring to the boil (don't stir).
  8. Wait for the thermometer to read 115 degrees Celsius take the pan off the heat and allow to cool for one minute.
  9. Whisk the gelatine on a medium speed and gradually add the sugar syrup - the mixture should grow in volume.    
  10. Continue to whisk until the mix becomes really thick and stretchy bubbles begin to form on the surface.
  11. Transfer to the lined baking tray and sprinkle with coconut.
  12. Leave to set for 1-2 hours until it feels firm to touch.
  13. Once set, remove from the tray and peel off the cling film.
  14. Cut into cubes with a lightly greased knife.
  15. Coat the sticky sides in more coconut and enjoy!

Sunday, February 9, 2014

Parsnip and Pecan Pieces


How is it February 2014 and the last time I blogged was October? Sorry I've been a bit AWOL these past few months, but I promise you I have been baking I've just been a little preoccupied let's just say. But last week I got some pretty exciting news and I found out that I've been accepted at City University London to study Speech and Language Therapy!!! So finally after all my applications, interviews, volunteering and madly rushing around trying to do a million things at once, I can actually relax because I know what I'll be doing in September. Relief is an understatement and I still don't think it's quite sunk in that I don't have to constantly be worrying about what I'll be doing next. My future is coming together which means I have a bit more time on my hands for now and for me some of that time will be filled with baking :)


So this weekend Abbey came to stay and I have not seen her in FOREVER. Inevitably, we had to make sure we fitted in some baking at some point, so we spent some of our lazy Sunday making these delicious Parsnip and Pecan Pieces from Lorraine Pascale's cookbook, A Lighter Way to Bake. I've made loads of recipes from it already despite only getting it at Christmas, so I can safely say it was a good buy! And it makes me feel a tiny bit better about myself knowing that what I'm baking isn't quite as calorific as it could be...!


I'm always intrigued by cake recipes that have vegetables in the title and this was no exception. Carrot cake has to be one of my favourites and I figured that using parsnip might create something a little similar. I was right. It is delicious: moist, perfectly spiced and extremely moreish. It is also really quick and easy to make. I have to say, the cream cheese frosting is what makes it and I will definitely be recreating this recipe at a later date. I certainly need no more convincing that vegetables make great cakes, but I might just have to eat a few more Parsnip and Pecan Pieces to double check I like it... It's my way of saying congratulations to myself, right?


Parsnip and Pecan Pieces (makes 16 small squares)

Ingredients:
For the sponge:
225g Parsnips, peeled and grated
200g Wholemeal Flour
100g Soft Brown Sugar
75g Butter
50ml Vegetable Oil
50g Pecan Nuts, roughly chopped
5tbsp Milk
2tbsp Honey
3 Eggs
2tsp Baking Powder
1tbsp Ginger
Pinch of Cinnamon
1/4tsp Ground Nutmeg
1tsp Vanilla Extract
For the frosting:
200g Low-Fat Cream Cheese
4tbsp Icing Sugar
2 Knobs Stem Ginger, finely chopped
1tsp Vanilla Extract

Method:
  1. Preheat oven to 180 degrees.
  2. Grease and line a tray.
  3. Put all the ingredients for the sponge into a bowl and mix well to combine.
  4. Spoon the mixture into the tin and bake for 30-35 minutes until springy to touch and an inserted skewer comes out clean.
  5. Once cooked, remove from oven and leave to cool in tin.
  6. Whilst cake is cooking make the frosting by mixing all the ingredients together (don't overmix). Leave in the fridge until needed.
  7. Remove the cake from the tin and spread the frosting on top evenly.
  8. Cut into squares and enjoy!


Sunday, October 27, 2013

Coconut Orange Cake


I had an urge to bake a cake yesterday. As you do. Well as I do anyway and after getting so wrapped up in The Great British Bake Off recently but not having enough time to bake, ignoring this urge was just not an option. I think seeing all their wonderful cake creations on there inspired me to make a cake just for the sake of it! Because who says a cake has to be for a special occasion? I definitely don't need an excuse to eat cake...

The question was what to put in it. For some reason, I got it into my head that I wanted to make a coconut-y cake, but with something a little more unusual. My inspiration came from some orange and coconut tea that my mum tried the other day and said worked beautifully together. I'd never have put orange with coconut but after trying this cake, I can safely say it definitely works. I think there's something a bit autumnal about oranges too and the dessicated coconut inside the cake just gives it a bit of extra crunch. Actually, the recipe comes from my very trusty Be-Ro book that I am sure I must have mentioned before. It basically has every basic baking recipe in there that you could possibly ever want, in particularly simple steps! I just changed it slightly and used coconut milk instead of ordinary cow's milk to bring out the coconut flavour a little bit more. But I have to say, my favourite part has to be the icing. It's loosely based on a coconut icing from the Hummingbird Bakery 'Home Sweet Home' book, with the addition of orange zest and juice. I spent several minutes scraping the bowl very carefully after I'd iced the cake to make sure I hadn't left any icing in the bowl that I could have eaten!! 


The end result was not a disappointment and I think this will be something I will be making again. Sitting down to a slab of coconut orange cake and a cup of tea whilst listening to the wind howling around outside is my idea of a Sunday afternoon...


Coconut Orange Cake

Ingredients:
Cake:
225g Self Raising Flour
Pinch Salt
100g Margarine
100g Soft Dark Brown Sugar
50g Dessicated Coconut
1 Egg
3tbsp Coconut Milk
1 Orange, grated rind and juice
Icing:
250g Icing Sugar
80g Unsalted Butter
2tbsp Coconut Milk
1tbsp Orange juice
Zest of half an orange

Method:

  1. Grease and line 2 cake tins.
  2. Preheat oven to 180 degrees.
  3. Mix flour and salt together and rub in margarine.
  4. Stir in sugar, coconut and orange zest.
  5. Beat together eggs, orange juice and coconut milk.
  6. Mix together to a soft consistency.
  7. Place in prepared tins for about half an hour, until an inserted skewer comes out clean.
  8. Remove from tins and allow to cool.
  9. Whilst cakes are cooling make the icing by mixing the icing sugar and butter together with an electric whisk until combined.
  10. Add the coconut milk, orange juice and zest and mix again until light and fluffy.
  11. Once cakes have cooled, spread just under half the icing on top of one of the cakes.
  12. Sandwich the other cake on top and spread the top and sides with the remaining icing.
  13. Sprinkle with some orange zest and toasted coconut then cut yourself a generous slice and enjoy!  

Wednesday, October 9, 2013

Spiced Iced Apple Buns


This post has been ready to write for a while now - it's just finding the time to get round to it! Anyway, here goes... As I mentioned in my previous post, we've had a glut of apples from our apple tree so I tried to be experimental and find something a bit out of the ordinary to make with them. With the help of my best friend foodgawker (which if you love to salivate over lots of delicious-looking recipes, is definitely the website for you!) I came across this very autumnal recipe for baked doughnuts. The combination of cinnamon, apple and maple syrup instantly appealed to me and I just had to give it a go! I don't think you can beat these flavours put together, especially at this time of year as the weather is starting to feel a bit more blustery and the leaves are starting to turn those beautiful shades of red and orange. I do love Autumn. 


But you may be wondering why I've not actually called these little buns doughnuts. Well that's because they didn't really taste much like doughnuts, not like any doughnuts I've ever tasted anyway! Don't get me wrong, they tasted wonderful and it was like taking a bite of autumn with every mouthful, but they just weren't quite how I'd imagined. As my cousin (who is 11) said to me after eating one, they failed as doughnuts, but they tasted even nicer! I like how he put that and I think it was a quick comeback after seeing my hurt face after he'd said the word 'failed'! But I have to agree with him - they did fail as doughnuts, although they did succeed as iced buns!!


I'm not quite sure how you can make doughnuts taste like doughnuts if you're not frying them, but when it said they were baked I was intrigued...I will be on the lookout for another baked doughnut recipe I think. Another good thing about them I guess, is that they really are quite healthy. Aside from the maple syrup you use to sweeten them, the tiny bit of oil and the icing sugar on the glaze, there's really not a lot of anything you shouldn't be eating in there. Which gives you an excuse to make lots of them! Oh and if you're wondering how I got the holes in the middle since I don't have a doughnut pan, I used a muffin tin and put a ball of foil in each cup which kind of worked for most of them....It was all a bit of an experiment anyway, but I definitely urge you to give them a go! 


Spiced Iced Apple Buns

Ingredients:
Buns
130g Plain Flour
1 1/2 tsp Baking Powder
1/2 tsp Cinnamon
1/8 tsp Nutmeg
1/8 tsp Allspice
1/4 tsp Salt
100g Maple Syrup
60ml Apple Cider
90g Apple Sauce
1tbsp Vegetable Oil
1 tsp Vanilla Extract
Icing
130g Icing Sugar
2 tbsp Apple Cider
Cinnamon Sugar Topping
50g Granulated Sugar
1/2 tsp Cinnamon
1/8 tsp Nutmeg

Method:
  1. Preheat the oven to 180 degrees.
  2. Grease muffin tin and place foil balls inside each cup.
  3. Combine flour, baking powder, spices and salt in a bowl.
  4. In a separate bowl, whisk together the maple syrup, apple cider, apple sauce, oil and vanilla extract.
  5. Add wet ingredients to dry ingredients and mix until just combined.
  6. Spoon or pipe mixture into muffin cups.
  7. Bake for 8-10 minutes, until the dough springs back when pressed.
  8. Remove from oven and allow to cool before removing and placing on a cooling rack to cool completely.
  9. To make the glaze mix the cider and icing sugar together in a small bowl.
  10. In another bowl combine the sugar and spices for the topping.
  11. Dip the top of each bun into the glaze and sprinkle with the sugar topping.
  12. Allow to set and enjoy!


Sunday, September 15, 2013

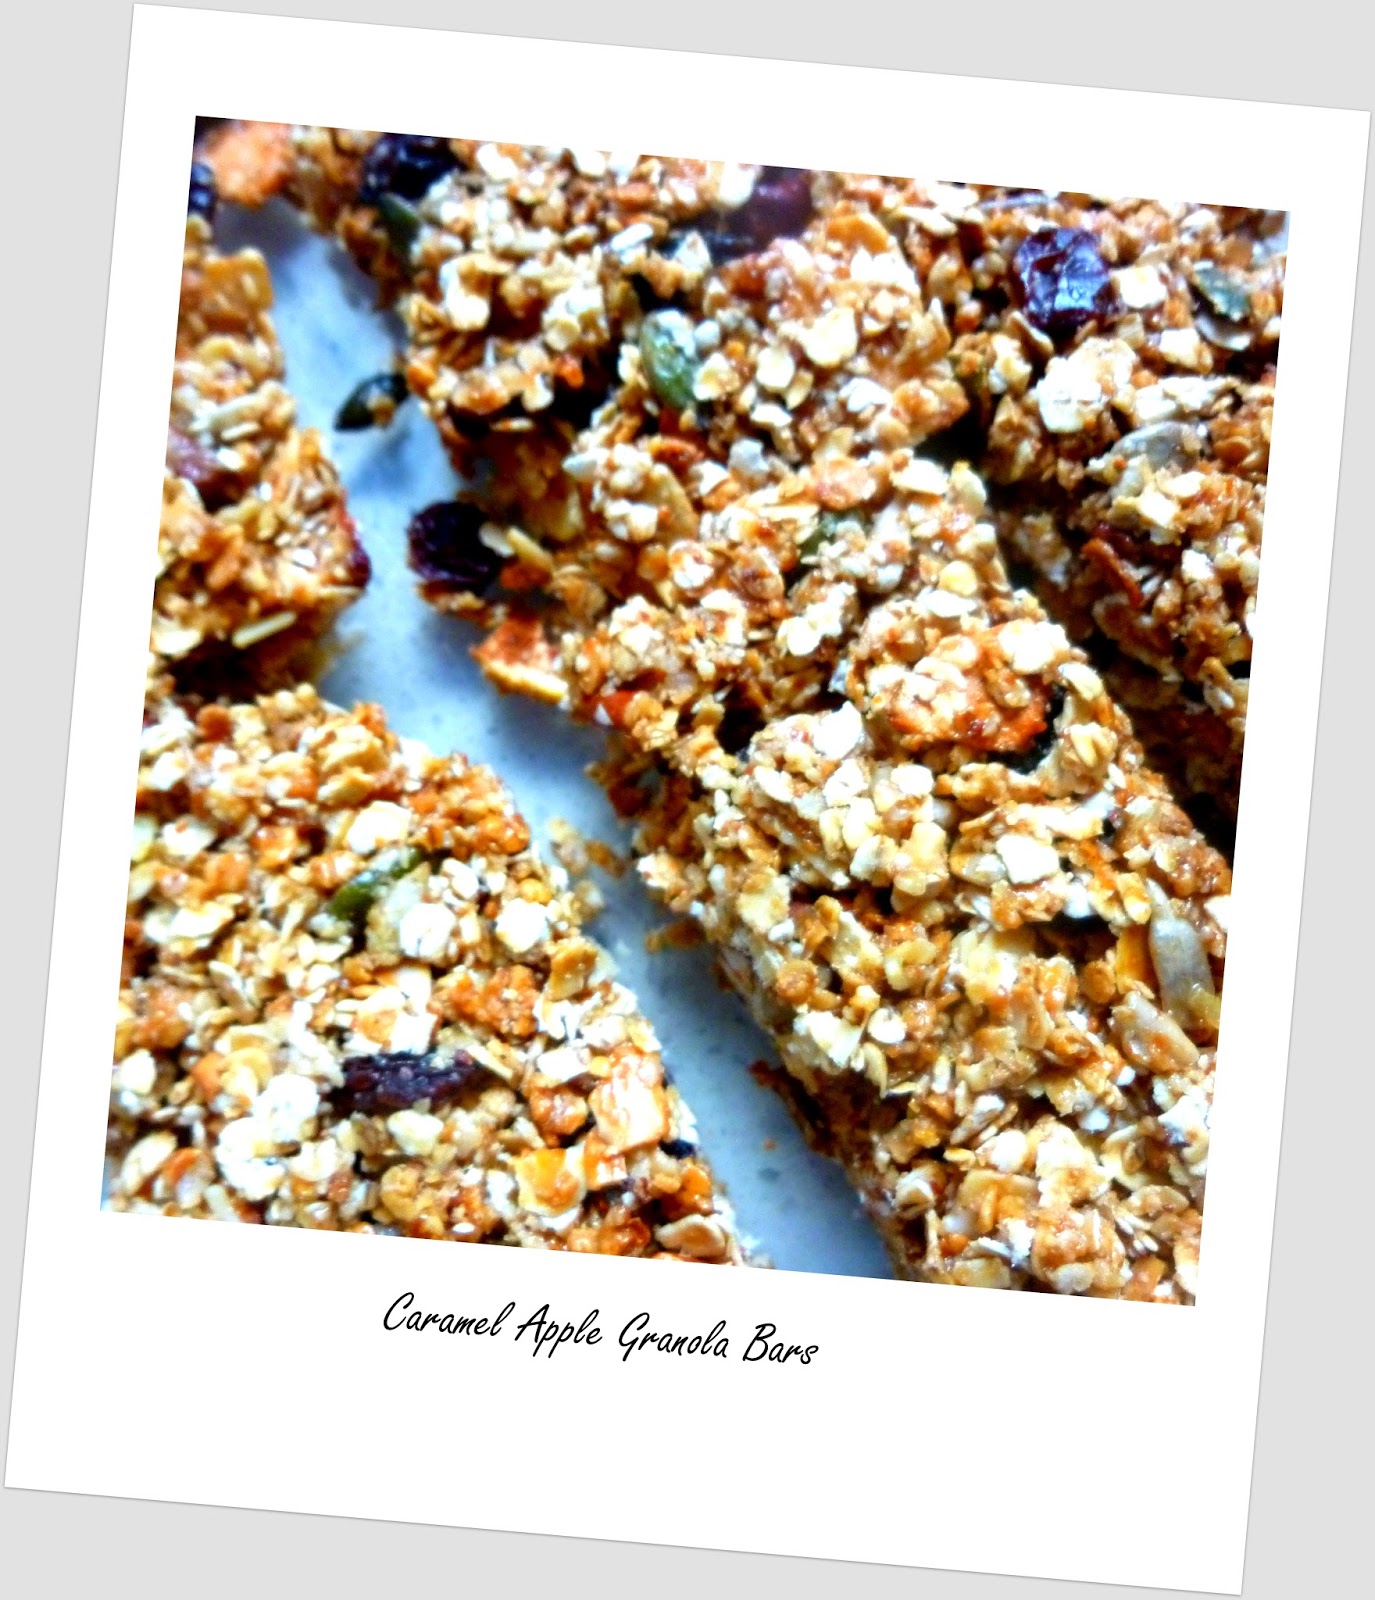
Caramel Apple Granola Bars


Well hello there! I'm back! After over a month of living in France I feel just about settled into the English way of life once again. In fact, ma vie comme au pair seems like a very distant memory now. Was it really less than 2 weeks ago that I was drinking a panaché with beautiful views of a lake and never-ending mountain ranges, thankful that the sun had set so I would no longer be in the blistering heat? Looking outside at the dreary skies now, it's difficult to believe, but yes, I was. Take me back....! 


It wasn't all as perfect as that though. I mean, Provence can be as pretty as it likes but when you're looking after a stroppy 4 year old and trying for the millionth time not to get in an argument with him, there are suddenly more important things to focus your attention on than the stunning scenery! One thing I did miss when I was in France was baking. Which goes without saying of course. Somehow the family I was au pairing for managed to live in a flat without an oven so even if I'd had the time to bake for them, it would have been pretty impossible!! I did have my fair share of sweet patisseries though which did make up for it, but I was quite excited to get back to a spacious kitchen with an oven when I came back home!


As you know, my Dad likes to grow various fruit and veg in the garden and at the moment the apple tree is laden with fruit just waiting to be eaten. Of course, they're not eating apples so I have happily volunteered to come up with some baked treats that have apples in them. As much as I love apple pies and crumbles, I wanted to come up with something a bit less conventional and I must admit it was a bit of experiment! An experiment that worked though thankfully. I've wanted to have a go at making some kind of 'healthy' granola bars for a while now and I will definitely be having a go at trying other flavours in them as they have certainly proved a hit! They wouldn't really win any awards for their looks as they're a bit crumbly and are not particularly easy to eat, but they taste delicious and wholesome. I think they'd be perfect as a morning snack with a coffee or equally as good for breakfast, crumbled over some natural yoghurt and fresh berries. And I'd like to think they're good for you as well, but with the caramel sauce I'm not sure about that one...! But we all deserve a little sweet treat every day and when summer's over we need something to cheer us up - I can guarantee that these little bites of goodness will do just that!!


Caramel Apple Granola Bars      (makes 15 bars)

Ingredients:
3 Cooking Apples
4tsp Granulated Sugar
2tsp Cinnamon 
30g Butter
30ml Golden Syrup (I used one with maple flavouring but it doesn't have to be!)
240g Porridge Oats
40g Flaked Almonds
40g Pecan Nuts, chopped
25g Pumpkin Seeds
25g Sunflower Seeds
40g Raisins
100g Caster Sugar
60ml Double Cream
20g Butter

Recipe:
  1. Begin by making the baked apple chips and preheat the oven to 90 degrees.
  2. Core the apples and slice thinly.
  3. Place on a prepared baking sheet and sprinkle with the sugar and cinnamon.
  4. Bake in the oven for an hour.
  5. Turn the slices over and bake for another hour.
  6. Turn the oven off but leave the apple in there until completely cool.
  7. Next make the caramel sauce by placing the sugar in a pan and adding 1 1/2 tbsp water.
  8. Heat on a medium heat until the sugar has dissolved.
  9. Turn the heat right up and bubble for 4-5 minutes until it turns a caramel colour.
  10. Take off the heat and carefully stir in the cream and butter.
  11. Set aside to cool.
  12. In a small pan, melt the butter and golden syrup.
  13. In a large bowl mix the oats, almonds, pecans, pumpkin seeds and sunflower seeds together.
  14. Pour the melted butter and golden syrup over the dry ingredients and mix until combined.
  15. Spread the granola out onto a baking tray in a thin even layer.
  16. Bake for 20 mins until golden brown, stirring every now and then so it doesn't stick.
  17. Remove from the oven and allow to cool completely.
  18. Pour into a large bowl and stir through the caramel sauce, apple slices chopped into small pieces and raisins. 
  19. Press the granola into a lined baking tray and put aside to completely set.
  20. Once set, remove from baking tray, cut into slices and enjoy!


Thursday, July 18, 2013

Rhubarb and custard ice cream.


As promised, I am back to share with you another rhubarb recipe. And another one equally as appropriate for this heatwave we are currently experiencing! On a day like today, all I have the energy for is finding a cool shady spot to sit in with a good book. And of course, a bowl of ice cream wouldn't go amiss either. That's where this recipe comes in. I've always wanted to have a go at making ice cream, and now the weather is finally right for it, I thought it would be the perfect opportunity. What with the abundance of rhubarb we've had in our garden as well, I decided to stir some through and see what it would be like. I was not disappointed!


Usually to make ice cream, you have to have an ice cream maker, or at least remember to take it out of the freezer every half hour or so to give it a good stir. As I do not have an ice cream maker, nor do I have the energy to use my arms more than I have to when I am melting even in the shade, I was a bit stuck! Luckily, I managed to find a recipe that didn't require an ice cream maker though and there was no stirring required during freezing. Bonus. And actually, it was really easy to make and tasted just like the dairy ice cream you can buy from little farm shops in the countryside. The ice cream itself was very sweet, so a touch of tartness from the rhubarb complemented it just nicely. And I had a bit of caramel sauce left over from another recipe I made so I stirred that through as well. You can't eat a lot of this at once, as it is quite rich, but a couple of scoops as a treat is just perfect. Well, I say you can't, but the tub in our freezer has gone down surprisingly quickly.... I think that says it all!

Rhubarb and custard ice cream  (basic ice cream recipe from Mary Berry)

Ingredients:
4 eggs, separated
100g caster sugar
300ml double cream
1 cup chopped rhubarb
1/2 cup caster sugar
2tbsp caramel sauce (optional)

Method:
  1. Begin by making the rhubarb purée.
  2. Add the rhubarb, 1/2 cup sugar and 4tbsp of water to a pan and simmer gently until the rhubarb is soft.
  3. Blend with a hand mixer until smooth.
  4. Set aside to cool.
  5. Whisk the egg whites in a large bowl until stiff peaks form.
  6. Slowly whisk in the caster sugar and continue to whisk until the mixture is stiff and glossy.
  7. In a separate bowl whisk the cream until stiff peaks form. 
  8. Fold the cream, egg yolks and rhubarb purée into the egg white mixture until well combined.
  9. Stir through the caramel sauce, if using.
  10. Freeze for at least 2 hours and enjoy!


Tuesday, July 16, 2013

Rhubarb Lemonade


I'm dedicating this week's posts to rhubarb. Yes, those green and pink stalks that hide beneath their umbrella leaves that surely don't deserve to have their own week devoted to them. And I was guilty too of ignoring this somewhat forgotten plant, because let's face it, it's inedible unless it has been cooked with far too much sugar and the only time I ever eat it is in a crumble with custard. But let's not forget, I think anything tastes good with custard. Yet since we my dad has started growing it in the garden, I've discovered that I actually like its delicate flavour and there's a surprising number of recipes that you can use it in. So put aside your rhubarb prejudices, as today I am going to share with you this refreshing rhubarb lemonade - perfect for a blissful English summer day, that the weather has finally decided to provide lots of recently...! 


Strictly speaking, I guess I shouldn't really be including this recipe on here, because it doesn't actually involve any baking. But when it's this hot, who actually wants to be stuck inside next to a hot oven? No, I'd much rather prefer to be sitting in the shade, reading a book and sipping a cooling drink, making the most of not having anything to do for once! Making this lemonade is so easy, that I promise even in this debilitating heat when the thought of any sort of exercise makes you just feel tired, you'll be able to muster up the strength to make this. What's even better about this drink is that with a splash or two of rum, it turns into a wonderfully delicious cocktail, the perfect remedy after a hard day sitting in the sunshine. Try this and you will change your mind about how you feel towards rhubarb. Promise. 


Oh, and depending on the exact type of rhubarb you use, I like to add a few drops of red food colouring to make it look a bit more appetising. Mine was mostly green and looked more like dirty water than a fancy cocktail when I'd finished it, so I cheated with the colour! Whoever said looks don't matter was lying a little bit, because nobody really wants to drink anything that looks like it's been taken from a muddy pond...!

Rhubarb Lemonade (from thebitehouse.com)

Ingredients:
6 cups of water
1 cup rhubarb stems, chopped
3/4 cup sugar
Juice of 2 lemons
A few drops of red food colouring
A small handful of fresh mint

Method:
  1. In a saucepan, simmer the rhubarb, sugar and lemon juice until soft on a medium heat. 
  2. Transfer to a bowl and blend with a hand mixer. 
  3. Add the water and a few drops of food colouring and stir.
  4. Cool in the fridge.
  5. Serve with a few sprigs of mint, lots of ice and enjoy!


Wednesday, June 26, 2013

Une Baguette Française


For those of you that know me well or are regulars on my blog, you'll know (and are perhaps sick of hearing!) how much I love France. After spending my year abroad there last year, I became even more besotted with it and August can't come quick enough so I can spend another month there, basking in the warm sunshine of southern France (in between looking after a 4 year old French boy, which may be somewhat less relaxing!). I am desperate to spend a Saturday morning in the bustling market square of a Provençal town, taking in the sights and smells of all the wonderfully local produce, and I can almost taste the refreshing demi pêche waiting for me in a bar that will forever bring back happy memories of my year abroad. But most importantly, I cannot wait to have that first bite of baguette, fresh from the local boulangerie! That's when I'll know I'm back in France. Roll on the next few weeks...!


So, to get me in the French mood, the other day I decided to have a go at making the famous baguette to see if I create one anywhere near as good as the French ones...! I'd been meaning to make some bread for quite a while, but just not got round to it. It's not that it's difficult or anything, it just takes ages to make what with all the proving, resting, etc. But being the jobless, penniless citizen that I have recently become, I have a lot of free time on my hands at the moment, so there was no excuse to give it a go! It wasn't identical to the proper French baguette, but it was close and I was quite impressed. It tasted far more like the real thing than any I've tasted from supermarkets, which always look very similar, but just end up being a bit disappointing. (Gosh, I sound obsessed with baguettes haha - I'm not really, but I like to consider myself a bit of an expert on them after living so close to a boulangerie last year and eating one virtually every day last year!). (Not a whole baguette every day, I'd like to point out!!). Anyway, I found a recipe from Paul Hollywood (more of a  bread expert than me, perhaps?) and I think it's pretty authentic. I may have made mine a bit too small, which meant they weren't quite as doughy in the middle as I'd have liked them to be, but the crust was perfect and I thought I was back in France for a second! Of course, it didn't quite live up to the French version, but as I don't have the proper French oven or the French flour, maybe I can be forgiven. I'd definitely make them again though, because they were really easy to make and it has satisfied my French food craving until August!


Baguette (makes 2)    From Paul Hollywood

Ingredients:
250g strong white bread flour
5g salt
5g instant yeast
185ml cool water
Olive oil for kneading

Method:

  1. Lightly oil a Tupperware.
  2. Put the flour, salt and yeast in a bowl (don't put the salt directly on top of the yeast).
  3. Add the water and mix with a wooden spoon.
  4. As the dough starts to come together add the remaining water and bring it together with your hands.
  5. Tip onto a lightly oiled surface and knead for about 10 minutes until it is glossy and elastic (it may be quite wet, but can still be kneaded).
  6. Tip the dough into the prepared Tupperware and cover with a tea towel.
  7. Leave until it's doubled in size at least, which should take about an hour.
  8. Line a tray with greaseproof paper.
  9. Coat the surface with a little olive oil, then tip the dough onto it.
  10. Handle it gently to retain the airiness and divide into 2.
  11. Shape each piece into an oblong by flattening the dough and folding the sides into the middle.
  12. Roll each into a sausage shape so the join runs along the length of the base.
  13. Beginning in the middle, gently roll out each sausage with your hands so they are the length of the oven tray. 
  14. Place the baguettes on the tray.
  15. Cover and leave to cool for about an hour, until they have doubled in size.
  16. Preheat your oven to 220 degrees and put a roasting tray in the bottom to heat up.
  17. When the baguettes are risen and light, dust them lightly with flour.
  18. Slash each one three times along its length on the diagonal, using a sharp knife.
  19. Fill the roasting tray with hot water and put the bread in the oven.
  20. Bake for 25 minutes until the baguettes are golden brown and have a light sheen.
  21. Cool on a wire rack, then enjoy!


Tuesday, June 25, 2013

Lemon and Raspberry Cake


So it was my Dad's birthday last week and, of course, I couldn't let it go by without baking him a cake. I mean, it would have been quite rude, right?! Anyway, whether he wanted it or not, I always prefer to bake with a specific purpose in mind and I think a birthday screams cake more than any other occasion! It was also the perfect excuse to try out another recipe from my Hummingbird Bakery cookbook and, as usual, it did not disappoint! After baking (and eating) their cake recipes, I don't think I could ever try an alternative now. The sponge is just so moist and light with the addition of buttermilk, that I would feel as if I was betraying the cake gods if I made a cake any other way now! The basic marg, sugar, flour, eggs recipe that I used to stick to when I was growing up does not live up to my cake expectations these days. Basically, I've been spoilt by Hummingbird and now there's no turning back...!


The only difficult part of baking this cake was deciding which recipe to choose! To be honest, I don't think there'd be any cake I wouldn't like from the Hummingbird cookbook, but I thought lemon and raspberries seemed most suitable for summer. I rarely say no to chocolate, but last week's surprisingly warm and sunny weather didn't make me feel like it for once. The tartness of the lemons and raspberries was just what I fancied (regardless of what the birthday boy wanted!), so this recipe jumped out at me. And with raspberries being possibly one of my favourite fruits, this cake was the perfect choice. I have to say though, I think it's the icing that makes this cake! Don't be put off when you start making it and it just looks like breadcrumbs that look as if they'll never come together to make a fluffy icing, because I promise you, it does work and it does taste wonderful. When you add the cream cheese, be careful not to over-stir, as I have had bad experience on this front where the icing has just ended up as one big sloppy mess (remember this recipe?), which does not work too well when trying to cover a cake with it! Anyway, other than that, it's very easy to make and tastes especially beautiful sat outside in glorious sunshine with a large cup of tea. Let's just hope that some more sunny days are heading our way...! 


Lemon and Raspberry Cake 

Ingredients:
For the sponge:
55g unsalted butter, softened
190g caster sugar
160g plain flour
2tsp baking powder
160ml buttermilk
Zest of a lemon
2 medium eggs
40g raspberry jam
For the frosting:
450g icing sugar
Zest of 3/4 lemon
75g unsalted butter, softened
190g full-fat cream cheese
Grated zest of 1/2 lemon
A few raspberries

Method:
  1. Preheat the oven to 170 degrees and line the cake tins with greaseproof paper.
  2. With a hand-held electric whisk, mix the butter, sugar, flour and baking powder together until it forms a sand-like consistency.
  3. In a large jug, mix together the buttermilk, lemon zest and eggs.
  4. With the whisk on medium speed, gradually pour half the liquid into the crumb mixture.
  5. Mix thoroughly until the batter is thick and smooth. Once the lumps have gone, add the rest of the liquid.
  6. Mix until combined.
  7. Divide the batter between the two tins and bake for 20-30 minutes until golden brown and an inserted skewer comes out clean.
  8. Meanwhile, make the frosting by gradually mixing the icing sugar, lemon zest and butter together on a low speed with the electric whisk until combined and there are no large lumps of butter.
  9. Add a little cream cheese to loosen up the mixture and beat until smooth.
  10. Add the rest of the cream cheese and beat the frosting until it is light and fluffy.
  11. Once the sponges are cool, assemble the cake by placing one layer on a large plate.
  12. Spread with a layer of raspberry jam and top with 3-4tbsp of frosting, smoothing out with a palette knife.
  13. Sandwich the second layer on top and frost the sides and top of the cake so no sponge is showing.
  14. Decorate with a few raspberries, some lemon zest and a sprinkling of icing sugar. 
  15. Cut a large slice and enjoy!