Showing posts with label Raspberry. Show all posts

Tuesday, June 25, 2013

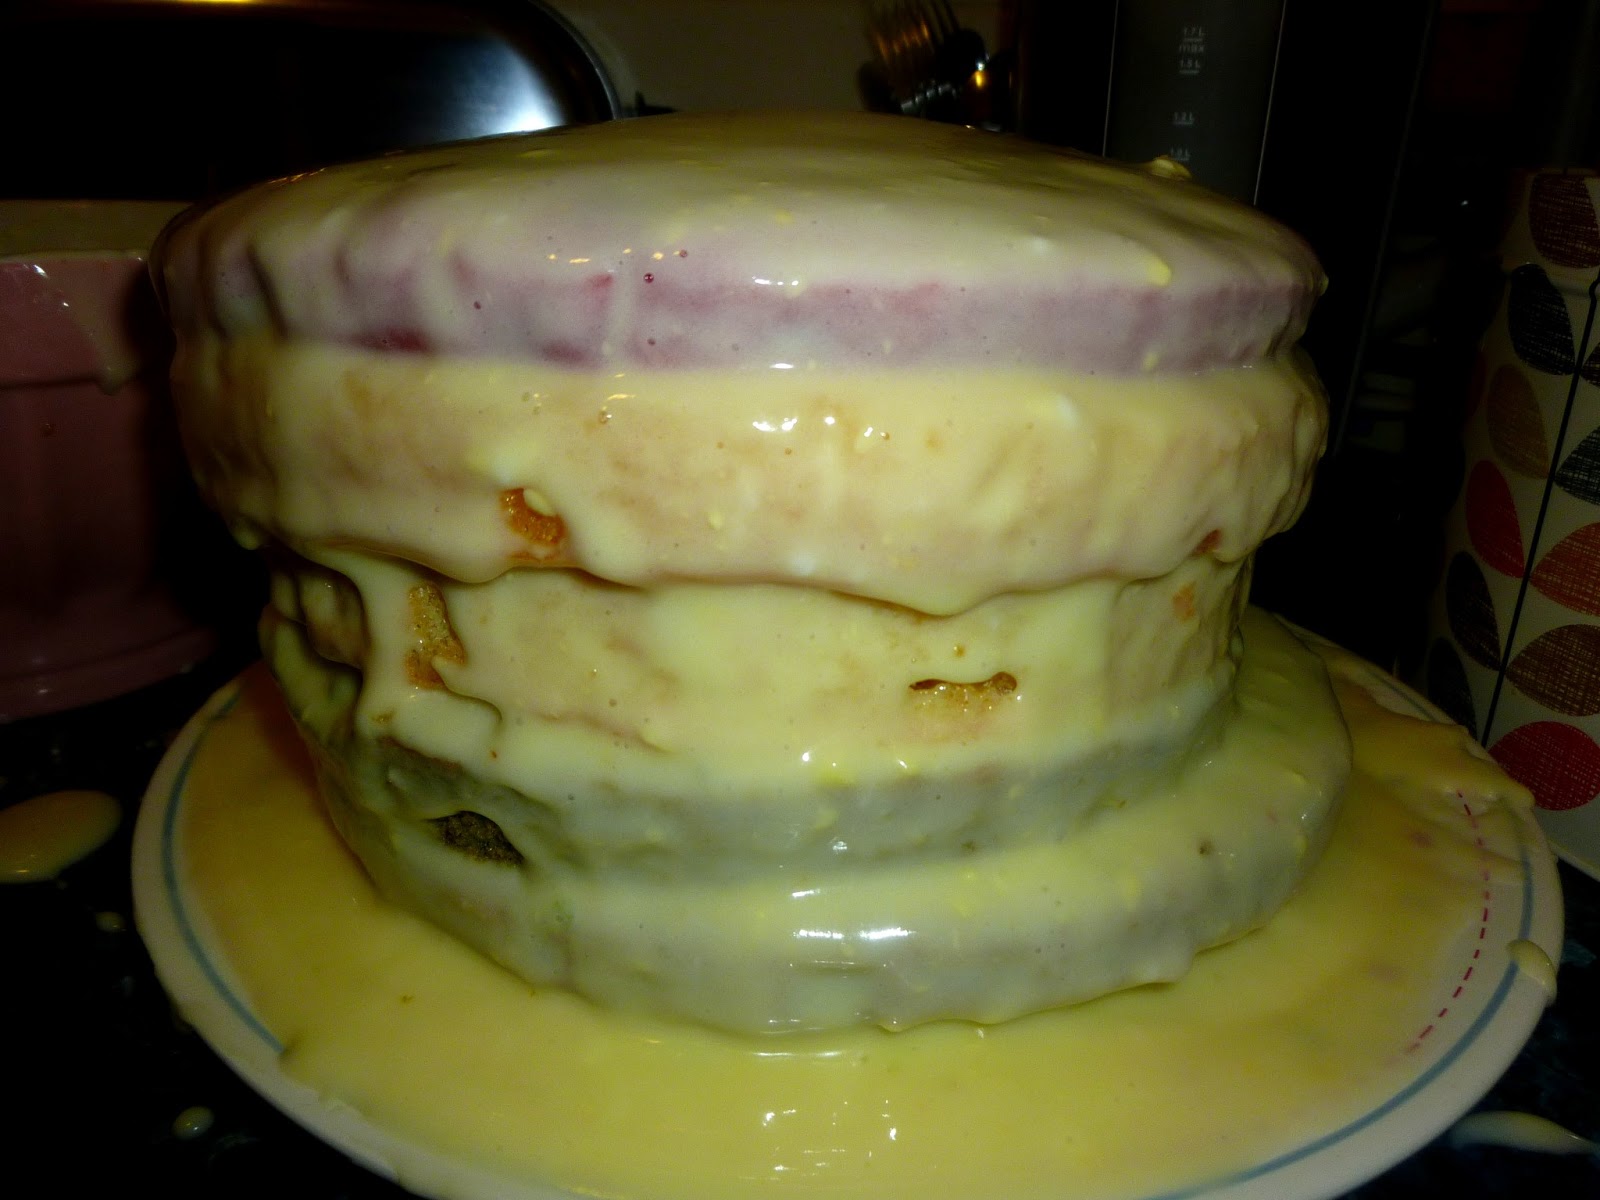
Lemon and Raspberry Cake


So it was my Dad's birthday last week and, of course, I couldn't let it go by without baking him a cake. I mean, it would have been quite rude, right?! Anyway, whether he wanted it or not, I always prefer to bake with a specific purpose in mind and I think a birthday screams cake more than any other occasion! It was also the perfect excuse to try out another recipe from my Hummingbird Bakery cookbook and, as usual, it did not disappoint! After baking (and eating) their cake recipes, I don't think I could ever try an alternative now. The sponge is just so moist and light with the addition of buttermilk, that I would feel as if I was betraying the cake gods if I made a cake any other way now! The basic marg, sugar, flour, eggs recipe that I used to stick to when I was growing up does not live up to my cake expectations these days. Basically, I've been spoilt by Hummingbird and now there's no turning back...!


The only difficult part of baking this cake was deciding which recipe to choose! To be honest, I don't think there'd be any cake I wouldn't like from the Hummingbird cookbook, but I thought lemon and raspberries seemed most suitable for summer. I rarely say no to chocolate, but last week's surprisingly warm and sunny weather didn't make me feel like it for once. The tartness of the lemons and raspberries was just what I fancied (regardless of what the birthday boy wanted!), so this recipe jumped out at me. And with raspberries being possibly one of my favourite fruits, this cake was the perfect choice. I have to say though, I think it's the icing that makes this cake! Don't be put off when you start making it and it just looks like breadcrumbs that look as if they'll never come together to make a fluffy icing, because I promise you, it does work and it does taste wonderful. When you add the cream cheese, be careful not to over-stir, as I have had bad experience on this front where the icing has just ended up as one big sloppy mess (remember this recipe?), which does not work too well when trying to cover a cake with it! Anyway, other than that, it's very easy to make and tastes especially beautiful sat outside in glorious sunshine with a large cup of tea. Let's just hope that some more sunny days are heading our way...! 


Lemon and Raspberry Cake 

Ingredients:
For the sponge:
55g unsalted butter, softened
190g caster sugar
160g plain flour
2tsp baking powder
160ml buttermilk
Zest of a lemon
2 medium eggs
40g raspberry jam
For the frosting:
450g icing sugar
Zest of 3/4 lemon
75g unsalted butter, softened
190g full-fat cream cheese
Grated zest of 1/2 lemon
A few raspberries

Method:
  1. Preheat the oven to 170 degrees and line the cake tins with greaseproof paper.
  2. With a hand-held electric whisk, mix the butter, sugar, flour and baking powder together until it forms a sand-like consistency.
  3. In a large jug, mix together the buttermilk, lemon zest and eggs.
  4. With the whisk on medium speed, gradually pour half the liquid into the crumb mixture.
  5. Mix thoroughly until the batter is thick and smooth. Once the lumps have gone, add the rest of the liquid.
  6. Mix until combined.
  7. Divide the batter between the two tins and bake for 20-30 minutes until golden brown and an inserted skewer comes out clean.
  8. Meanwhile, make the frosting by gradually mixing the icing sugar, lemon zest and butter together on a low speed with the electric whisk until combined and there are no large lumps of butter.
  9. Add a little cream cheese to loosen up the mixture and beat until smooth.
  10. Add the rest of the cream cheese and beat the frosting until it is light and fluffy.
  11. Once the sponges are cool, assemble the cake by placing one layer on a large plate.
  12. Spread with a layer of raspberry jam and top with 3-4tbsp of frosting, smoothing out with a palette knife.
  13. Sandwich the second layer on top and frost the sides and top of the cake so no sponge is showing.
  14. Decorate with a few raspberries, some lemon zest and a sprinkling of icing sugar. 
  15. Cut a large slice and enjoy!


Sunday, February 3, 2013

Rainbow Cake


Ok, so I realise I promised that my next bake would be something healthier than the last few. Well, I hate to admit it, but I've broken my promise. And not just a bit either. Completely and utterly, sugary and buttery broken. But it had to be done. And it was 100% worth it. I don't even feel a tiny bit guilty. Because in all honesty, when the idea for this cake was first born I was very dubious as to whether or not it would actually work. Which is why, after slaving in the kitchen for a grand total of 6 hours (I kid you not!), I jumped around with joy (literally) when I saw the finished result. It worked!! It actually looked like a rainbow!! It was a small miracle. No it wasn't. It was a massive miracle. A little lopsided perhaps, but a miracle all the same. I couldn't stop looking at it, taking photos of it, dancing around it. Definitely a proud moment!


It all began last weekend when for some reason I found myself gazing longingly at beautiful photos of rainbow cakes on the internet. I casually mentioned to Nicky that I would love to make one, but didn't really think anything of it. I mean, I knew I had nothing celebratory to make a cake for, so there'd be no reason to bake a cake, right? But do you need a reason to make a cake? Stupid question. Of course you don't. So when Nicky said let's actually do this, I didn't say no. And that's how our Friday night came to be a night filled with baking. My perfect kind of night really.

Now, making a 6-tiered cake is quite a feat in itself, but we didn't stop the challenge there. No, we decided it would be a good idea to flavour each individual layer, so not only would the rainbow be colourful, but every tier would have a different taste. So eventually, we came up with 6 different flavourings that would not only colour the cake, but taste magical as well. Most of them were fruity, which actually made the sponges extra moist, but one was green tea flavour (!). And we did cheat a little on the red and green with a few drops of food colouring. The icing was a bit of a disaster as well, because for some reason the cream cheese frosting just refused to thicken, so it turned into a bit of a sloppy mess! (I have since learnt that this was because we over-mixed the cream cheese, which made all the air disappear, so it lost its shape...I'll know for next time!). After a few pretty decorations though, you wouldn't notice, and I have to say it tasted amazing! I think the blueberry layer was my favourite.


I would say give this a go if you fancy a challenge, but I think the recipe needs refining a bit first! We basically had a Victoria Sponge recipe and made just over double the quantities, which seemed just about right, then split the mixture into 6 (electronic scales come in very handy here!). And as I said, the icing needs some alterations, so I won't include that! The fruit fillings were wonderful though, but I may be inclined to cheat a bit next time and add some more food colouring to the other layers. Anyway, we had soooo much fun making it and will definitely be making challenging baking a Friday night regular occurrence I think! Nothing will phase us now, that's for sure!! 

Rainbow Cake (serves A LOT!)

Ingredients:

Sponge (basically 1 and a half times the quantity for 1 Victoria Sponge cake roughly):
550g Butter
550g Caster Sugar
10 Eggs
3tsp Vanilla Extract
550g Plain Flour
5tsp Baking Powder      

Flavourings:
Pack of raspberries
Tin of peaches
Zest of 3 lemons, juice of 2
The tea from 3 green tea bags
3/4 pack of blueberries
Handful of grapes and a few glugs of Ribena
Red and green food colouring

Method:

  1. Grease and line 6 cake tins.
  2. Preheat oven to 180 degrees.
  3. Cream butter and sugar together in a large bowl.
  4. Gradually beat in the eggs.
  5. Add vanilla extract.
  6. Stir in flour and baking powder so it is thoroughly combined.
  7. Weigh the mixture using electronic scales.
  8. Divide it by 6 and split into 6 different bowls (we actually only did three at a time!).
  9. Purée the raspberries, blueberries, peaches (minus juice) and grapes.
  10. Zest and juice the lemons.
  11. Add each flavouring/colouring to each separate mixture and stir through.
  12. Pour into cake tin and bake in the oven for about 35-40 minutes, until a knife inserted comes out clean.
  13. Leave until cool enough to handle and then remove from tin and place on a cooling rack.
  14. Once completely cool, sandwich together using your desired icing and ice the top and sides.
  15. Decorate as you wish!
  16. Cut a slice, be amazed and enjoy! 


You can see the consistency of the cream cheese frosting here...bit of a sloppy mess!
Soon resurrected though with pretty sprinkles...!


The moment of truth...
...it worked!! Yayyyy!

I can sing a rainbow....sing a rainbow...sing a rainbow tooooo!

Beyond excited. And VERY proud!


Tuesday, March 13, 2012

Hang onto your stale bread...!

First of all, apolgies for my absence on here the last week or so! Although I do love baking, when the sun is shining and it's 20 degrees outside (yes, that's right - in March!), that's where I'd rather be. This is why I chose to live in the south of France! Gone are the days of snow and wanting to be wrapped up inside with a café au lait to warm me up. Now I want to be sitting in the sunshine with a demi pêche in my hand watching the world go by.  

I just thought I'd share this little breakfast treat with you though, because as you know, I like to spice things up a bit sometimes when it comes to breakfast. It's also perfect if, like me, you hate wasting food! Because although baguettes really are delicious when you buy them fresh from the boulangerie, they literally last a couple of hours before going stale. And I mean, I do like bread, but eating a whole baguette to myself in a day is a bit much really! But wait, I have a solution which means not throwing it away!! And actually, the staler the better. In English we call it French toast, but here they call it pain perdu. I think I've just discovered my perfect breakfast! I wondered why it was called pain perdu at first, because perdu translates as 'lost'. Lost bread? No, that can't be right! Of course, it has another meaning too that makes far more sense which is 'spoiled', so basically keep hold of your stale bread and get cooking!


It's a bit like a sweet eggy bread really, but the cinnamon gives it that extra special flavour. And it tastes even better the longer you leave the bread to soak in the egg mixture. You could serve it with any fruit you like - I just chose raspberries and banana because it was what I had, but I think strawberries would go wonderfully too. Sprinkling some pecan nuts on top might be nice too to give it some extra bite and even a drizzle of maple syrup if you're feeling extravagant. And of course, the nutella that I stuffed in the middle of the bread finished it off beautifully! Once you've had this for breakfast once, you'll want it every day. Have a play around and add whatever extras you fancy. I'm afraid the quantities of ingredients are guess-work, as I didn't follow a recipe exactly, but this is roughly what I used. It's so easy though, that you won't go wrong. I hope you enjoy this breakfast as much as I did!


Nutella stuffed pain perdu with raspberries and banana

Ingredients:
Half a stale baguette (or equivalent in thick sliced bread)
1 Egg
1/4 cup Milk
1/2 tsp Vanilla Essence
1/2/ tsp Cinnamon
2 tbsp Butter
1 tbsp Plain Flour
Nutella
Handful of Raspberries
1 Banana

Method:
  1. Whisk the egg and milk together in a shallow bowl.
  2. Melt 1 tbsp of butter and add to egg mixture.
  3. Add vanilla essence, cinnamon and flour and whisk until combined.
  4. Cut bread into thick slices.
  5. Make a hole in the crust of each bread slice, big enough to fit a tsp of Nutella in.
  6. Put a tsp of Nutella into each hole.
  7. Put each bread slice into the egg mixture for about a minute on each side to soak up as much of the mixture as possible. 
  8. Melt 1tbsp butter in a frying pan and once melted, add the slices of bread.
  9. Cook for about 1-2 minutes on each side, until golden.
  10. Remove from the heat and place on plate.
  11. Serve with raspberries and bananas or whatever fruit/toppings you fancy and enjoy!

Sunday, February 12, 2012

Raspberry Meringue Cupcakes!

The diiiivine patisserie

I just could not seem to stop baking this weekend! And this next recipe I must admit I am very proud of. It is based on possibly the best patisserie that I've had since I've been in France this year, from a Brioche Dorée in Montepellier a few weeks ago. Imagine a lemon meringue pie, swap the lemon for raspberry and shrink it...et voila, you have a tartelette aux framboises meringuée. It might even have overtaken the tarte aux fraises in the running for best French pastry. Its only downfall is that I've hardly seen it in any patisseries. But I am still on the look-out!

Anyway, I wanted to try and recreate this beautiful patisserie in cupcake form. And judging from people's reactions, I think it was a success! I made raspberry cupcakes, topped them with home-made raspberry curd and then a final layer of meringue. Of course, again, I'm going to mention my beloved oven and tell you that with a better oven (or better yet, a grill!) these cakes would end up even yummier, because the idea is that once the cupcakes are cooked they go back under the grill for 2-3 minutes to just cook the meringue. Having said that, they tasted pretty damn good. The cake part was quite tart, but the curd and the meringue were sweet enough to make you forget about that sourness in a second. They are quite fiddly to make, but believe me, it's worth it, because it will be hard to just eat one of these little packages of loveliness!


Raspberry Meringue Cupcakes makes 12

For the raspberry curd...
Ingredients:
50g Butter
1/2 cup Raspberries (if frozen, thawed)
2 Egg Yolks, lightly beaten
150g Sugar

Method:
  1. Once raspberries are fully thawed, slightly mash with a fork and strain to separate the seeds to get the juice.
  2. Beat together the butter and sugar in a saucepan.
  3. Pour in the egg yolks and mix until combined.
  4. And in the raspberry juice and mix together.
  5. On a low heat, heat until the butter is melted.
  6. Once the butter is melted turn up the heat to medium, while constantly stirring. 
  7. Cook for 15 minutes.
  8. Allow to cool for about 15 minutes and then cover with clingfilm right to the surface of the curd to prevent a skin from forming. 
  9. Refrigerate for at least a couple of hours so it can finish setting.
For the raspberry cupcakes...
Ingredients:
1 cup Butter
1 cup Sugar
2 Eggs
1/2 cup Milk
2 tsp Vanilla Extract
2 tsp Baking Powder
1 1/2 cups Plain Flour
2 cups Raspberries (fresh or frozen)

Method:
  1. Preheat oven to 180 degrees and line cake tin with cases or grease cupcake holders.
  2. Melt butter over low heat. 
  3. Remove from heat and whisk in sugar until combined. 
  4. Allow to cool for about 5 minutes, so it is lukewarm.
  5. Whisk in the eggs.
  6. Add the milk, vanilla and baking powder and whisk again to combine.
  7. Whisk in the flour until just combined.
  8. Fold in the raspberries.
  9. Fill each cupcake holder with mixture and bake for about 20-25 minutes, until a skewer inserted into the middle of the cupcake comes out clean.
  10. Allow to cool.
  11. If using cupcake holders, remove from holders.
A lovely rasberry mess.


For the meringue...
Ingredients:
2 Egg Whites
100g Sugar

Method:
  1. Whisk egg whites until soft peaks form when the whisk is removed.
  2. Gradually add the sugar and whisk continuously until stiff peaks form when the whisk is removed and the mixture is thick and glossy.
The coveted 4€ whisk from Casino...literally made my life!

And look! I got to use my brand spanking new hand-held whisk that made me oh-so-happy when it was bought for me!! Here's it in action...and look at its brilliant results. It certainly works!


For the raspberry meringue cupcakes...
Method:
  1. Spread a thin layer of the raspberry curd on the completely cooled cupcakes.
  2. Place a dollop of meringue on top of the curd.
  3. Ideally, place under the grill for 2-3 minutes until the top is lightly golden. If you don't have access to a grill, place in the oven at the highest temperature until lightly golden.
  4. Enjoy these wonderful raspberry treats!


Again, unfortunately I don't think you can appreciate the loveliness of these cupcakes to the full extent from these photos and they certainly wouldn't win any awards for beauty. But hey, it's not about what you look like on the outside, what's more important is what you're like on the inside right? And that's sooooo true for these beauties. Please please please take my word for it and prepare to be amazed by these little raspberry explosions!!


WARNING! A sweet tooth is necessary to fully appreciate these little raspberry wonders.
 

Thursday, January 26, 2012

Go on, spoil yourself...make some raspberry and white chocolate blondies!


Ok so you HAVE to try these. They are diiiivine. That is if you like raspberry and white chocolate, of course. But really, who doesn't? Personally, I think they go together brilliantly, as the tartness of the raspberries balances out the sweetness of the chocolate just perfectly. And white chocolate is very sweet, which is probably why I like it so much. I've always wanted to try making brownies with white chocolate and I'm so glad I did! Brownies in general are just delicious - it's that combination of biting down on a cracked crust on the outside, but then the middle is still all gooey and scrummy. Mmmm...heavenly. The trick is to take them out of the oven before you think you should (which proves a little difficult when you're using an outdate French oven which you have to light with a match! Yes, a match. And never seems to get quite hot enough. Sometimes it does feel like I'm living in the last century here). Apart from that, they're really easy to make. Just hard to stop eating!

Oh, and I have some exciting news! Self-raising flour does exist in France, under the guise of farine de blé avec poudre levante pour gâteaux. Well it's not much of a guise actually, because it literally translates as 'wheat flour with baking powder for cakes', so I don't know why I couldn't find it. It's just a bit of a mouthful! Anyway, I digress. Get baking!


Raspberry and White Chocolate Blondies makes about 12

Ingredients:

150g white chocolate
100g butter 
3 eggs
175g caster sugar (although I just used granulated and it worked)
1 tsp vanilla essence
200g self-raising flour
1 tsp baking powder
175g raspberries (preferably fresh, but I used frozen which didn't seem to matter) 


Method:

  1. Preheat oven to 180 degrees.
  2. Line baking tin with greaseproof paper.
  3. Break chocolate into a pan and add butter.
  4. Melt. 
  5. Remove from heat and stir in sugar thoroughly.
  6. Add eggs one at a time and then vanilla essence, along with the raspberries. 
  7. Stir in flour and baking powder.
  8. Pour into prepared tin.
  9. Bake for 30-35 minutes - it should be ready when a skewer inserted still comes out a bit sticky. 
  10. Allow to cool.
  11. Remove from tin and peel off paper, then cut into squares.
  12. Try one...or maybe two, because be warned, they are very moreish!!