Showing posts with label Cake. Show all posts

Sunday, July 26, 2015

Pistachio and Lime Cake


Hello again! I thought it was about time I shared another recipe, because it has been OVER A YEAR since I last blogged!! How has that happened?! Time flies...! It's been a busy year though: moving to London and training to be a Speech and Language Therapist has meant that blogging has not been my top priority. Of course, those of you that know me will know that I have not stopped baking - it would take a lot for that to happen...but London life can be a little hectic and I don't seem to have a lot of free time at the moment. Not that I'm complaining...I love being busy! Anyway, a couple of weeks ago I finished for summer, so I might have a little more time to bake and blog over the next couple of months.... We'll see! I'm promising nothing...!

The cake I'm sharing with you today comes from the lovely Kate over at The Little Loaf. I can't remember when I first came across Kate's blog, but I was instantly hooked and have been following it ever since. I want to make EVERYTHING she posts and when she announced she was publishing a book full of her fabulous recipes I knew I had to buy it as soon as it came out. So I did exactly that and I would urge any other baking fans out there to do the same! It's called Homemade Memories and contains the most delicious bakes all photographed so beautifully - when I got it I didn't know where to start...! Gradually, I WILL make my way through it. So far I've made the mini milk lollies (when it was a bit more summery than today!), the nectarine upside down cake and now this divine pistachio and lime cake. Which was actually meant to be a loaf, but I improvised and used a square baking tin due to my limited equipment!! And actually, it meant it didn't need to bake for quite as long, which is always a bonus, as it means less time to wait until you get to eat what you've made! 


If I make this again though, I will endeavour to buy shelled pistachios, because 65g of pistachios means A LOT of shelling and I ended up with shells and pistachios all over the kitchen and a broken nail. Not that I'm complaining...it was definitely worth it, but it was very fiddly! A wise owl has since told me though that using another shell to de-shell is the way forward, which would hopefully limit any future nail injuries!! 

I was saying to a friend today, when I was younger I would have always thought that chocolate cake was my favourite, but really a cake with fruit in is a hands down winner in my eyes. Banana, carrot, blueberry, raspberry, pear...I could go on - whatever the fruit, put it in a cake and it's bound to work out! The fruit makes it extra moist and kind of makes you think you're eating something a little bit healthier (although I'm 99% certain it's not!). This cake is really a variation on the lemon drizzle - but perhaps a little more sophisticated and a little zingier (is that a word?!).  Actually, I've decided in fact that this cake may have beaten the lemon drizzle. Limes seem to have a much stronger flavour than lemons and the pistachios not only add a deeper flavour, but they give it a beautiful colour too. My Grannie's lemon drizzle cake is a regular request in the Goodhand family, but if I request one any time soon, I might point her in the direction of The Little Loaf and ask her to use limes instead...! 


Pistachio and Lime Cake (barely adapted from The Little Loaf's Homemade Memories)  

Ingredients:
For the Cake:
60g Shelled Pistachios
180g Self-raising Flour
Pinch Salt
175g Softened Butter
175g Caster Sugar
Finely Grated Zest of 3 Limes
3 Eggs, lightly beaten
1-2tbsp Milk
For the Glaze:
65g Dried Apricots, roughly chopped
2tbsp Honey
Juice of 3 Limes
30g Pistachios, roughly chopped

Method:
  1. Preheat oven to 150 degrees (fan, 170 degrees without fan).
  2. Grease a square baking tin and line with baking paper.
  3. Put the shelled nuts in a food processor and blitz to a fine powder. 
  4. Place in bowl and stir in flour and salt.
  5. Cream together butter and sugar in separate bowl.
  6. Add lime zest and cream until pale and fluffy.
  7. Gradually beat in eggs with a bit of flour mixture with each addition.
  8. Fold in remaining flour mixture until just combined.
  9. Fold in the milk until it drops gently off spoon (you might not need to use it all).
  10. Put batter in tin and smooth top.
  11. Bake for 30-40 mins until risen, golden and firm to touch (a skewer inserted should come out fairly clean).
  12. Remove from oven and leave to cool in tin for 10 mins,
  13. Make syrup by combining apricots, honey and lime juice in a saucepan. 
  14. Bring to a simmer then cook for 3-4 mins until apricots have softened and mixture is syrupy.
  15. Stir in pistachios.
  16. Transfer cake to wire rack.
  17. Poke holes in top (not all the way through) and pour over the warm syrup.
  18. Make sure pistachios and apricots are evenly distributed.
  19. Leave to cool and cut into 12 pieces.


Sunday, February 9, 2014

Parsnip and Pecan Pieces


How is it February 2014 and the last time I blogged was October? Sorry I've been a bit AWOL these past few months, but I promise you I have been baking I've just been a little preoccupied let's just say. But last week I got some pretty exciting news and I found out that I've been accepted at City University London to study Speech and Language Therapy!!! So finally after all my applications, interviews, volunteering and madly rushing around trying to do a million things at once, I can actually relax because I know what I'll be doing in September. Relief is an understatement and I still don't think it's quite sunk in that I don't have to constantly be worrying about what I'll be doing next. My future is coming together which means I have a bit more time on my hands for now and for me some of that time will be filled with baking :)


So this weekend Abbey came to stay and I have not seen her in FOREVER. Inevitably, we had to make sure we fitted in some baking at some point, so we spent some of our lazy Sunday making these delicious Parsnip and Pecan Pieces from Lorraine Pascale's cookbook, A Lighter Way to Bake. I've made loads of recipes from it already despite only getting it at Christmas, so I can safely say it was a good buy! And it makes me feel a tiny bit better about myself knowing that what I'm baking isn't quite as calorific as it could be...!


I'm always intrigued by cake recipes that have vegetables in the title and this was no exception. Carrot cake has to be one of my favourites and I figured that using parsnip might create something a little similar. I was right. It is delicious: moist, perfectly spiced and extremely moreish. It is also really quick and easy to make. I have to say, the cream cheese frosting is what makes it and I will definitely be recreating this recipe at a later date. I certainly need no more convincing that vegetables make great cakes, but I might just have to eat a few more Parsnip and Pecan Pieces to double check I like it... It's my way of saying congratulations to myself, right?


Parsnip and Pecan Pieces (makes 16 small squares)

Ingredients:
For the sponge:
225g Parsnips, peeled and grated
200g Wholemeal Flour
100g Soft Brown Sugar
75g Butter
50ml Vegetable Oil
50g Pecan Nuts, roughly chopped
5tbsp Milk
2tbsp Honey
3 Eggs
2tsp Baking Powder
1tbsp Ginger
Pinch of Cinnamon
1/4tsp Ground Nutmeg
1tsp Vanilla Extract
For the frosting:
200g Low-Fat Cream Cheese
4tbsp Icing Sugar
2 Knobs Stem Ginger, finely chopped
1tsp Vanilla Extract

Method:
  1. Preheat oven to 180 degrees.
  2. Grease and line a tray.
  3. Put all the ingredients for the sponge into a bowl and mix well to combine.
  4. Spoon the mixture into the tin and bake for 30-35 minutes until springy to touch and an inserted skewer comes out clean.
  5. Once cooked, remove from oven and leave to cool in tin.
  6. Whilst cake is cooking make the frosting by mixing all the ingredients together (don't overmix). Leave in the fridge until needed.
  7. Remove the cake from the tin and spread the frosting on top evenly.
  8. Cut into squares and enjoy!


Sunday, October 27, 2013

Coconut Orange Cake


I had an urge to bake a cake yesterday. As you do. Well as I do anyway and after getting so wrapped up in The Great British Bake Off recently but not having enough time to bake, ignoring this urge was just not an option. I think seeing all their wonderful cake creations on there inspired me to make a cake just for the sake of it! Because who says a cake has to be for a special occasion? I definitely don't need an excuse to eat cake...

The question was what to put in it. For some reason, I got it into my head that I wanted to make a coconut-y cake, but with something a little more unusual. My inspiration came from some orange and coconut tea that my mum tried the other day and said worked beautifully together. I'd never have put orange with coconut but after trying this cake, I can safely say it definitely works. I think there's something a bit autumnal about oranges too and the dessicated coconut inside the cake just gives it a bit of extra crunch. Actually, the recipe comes from my very trusty Be-Ro book that I am sure I must have mentioned before. It basically has every basic baking recipe in there that you could possibly ever want, in particularly simple steps! I just changed it slightly and used coconut milk instead of ordinary cow's milk to bring out the coconut flavour a little bit more. But I have to say, my favourite part has to be the icing. It's loosely based on a coconut icing from the Hummingbird Bakery 'Home Sweet Home' book, with the addition of orange zest and juice. I spent several minutes scraping the bowl very carefully after I'd iced the cake to make sure I hadn't left any icing in the bowl that I could have eaten!! 


The end result was not a disappointment and I think this will be something I will be making again. Sitting down to a slab of coconut orange cake and a cup of tea whilst listening to the wind howling around outside is my idea of a Sunday afternoon...


Coconut Orange Cake

Ingredients:
Cake:
225g Self Raising Flour
Pinch Salt
100g Margarine
100g Soft Dark Brown Sugar
50g Dessicated Coconut
1 Egg
3tbsp Coconut Milk
1 Orange, grated rind and juice
Icing:
250g Icing Sugar
80g Unsalted Butter
2tbsp Coconut Milk
1tbsp Orange juice
Zest of half an orange

Method:

  1. Grease and line 2 cake tins.
  2. Preheat oven to 180 degrees.
  3. Mix flour and salt together and rub in margarine.
  4. Stir in sugar, coconut and orange zest.
  5. Beat together eggs, orange juice and coconut milk.
  6. Mix together to a soft consistency.
  7. Place in prepared tins for about half an hour, until an inserted skewer comes out clean.
  8. Remove from tins and allow to cool.
  9. Whilst cakes are cooling make the icing by mixing the icing sugar and butter together with an electric whisk until combined.
  10. Add the coconut milk, orange juice and zest and mix again until light and fluffy.
  11. Once cakes have cooled, spread just under half the icing on top of one of the cakes.
  12. Sandwich the other cake on top and spread the top and sides with the remaining icing.
  13. Sprinkle with some orange zest and toasted coconut then cut yourself a generous slice and enjoy!  

Thursday, February 14, 2013

Yorks Bakery Café, Birmingham

Yorks Bakery Café
1-3 Newhall Street,
Birmingham,
B3 3NH.


Despite being in my 4th year at UOB, it has taken me up until now to find a decent café in Birmingham city centre. And for those of you reading this that know me well, you'll know that I love a good café! After trudging round the shops all day, finding the perfect place that serves a great coffee and a tasty treat to go with it is a necessity in my eyes. Well I think I've found just that place. One of those inviting little coffee shops, oozing with style and good food, that's right up my street (not literally, unfortunately, otherwise I'd be spending far too much money there).  It's just off New Street, but not too far away from all the shops, so it makes just the right spot to recharge your batteries!

 
My mum came to visit last weekend and I thought it was only right that we started the day off having a good old natter over a good cup of coffee. After a bit of research on the internet, I stumbled across Yorks Bakery Café which looked like my sort of thing and I was not disappointed. The coffee was just the right size, just the right strength and we shared the most delicious hazelnut and chocolate slice that kept us going til lunchtime. But actually, I'm sure I could have easily enjoyed all the cakes that were on offer (but that would have been greedy, I think). 


And actually, I just couldn't keep away, because yesterday Abbey and I went shopping and to warm ourselves up after the relentless snow showers, we treated ourselves to a little something. We both chose the lemon drizzle cake, which was very lemony - just how I like it! So I would certainly recommend this place to anyone next shopping in Brum and there's no doubt that I will be returning myself in the not so distant future! So glad I found this little hidden gem. 

Sunday, February 3, 2013

Rainbow Cake


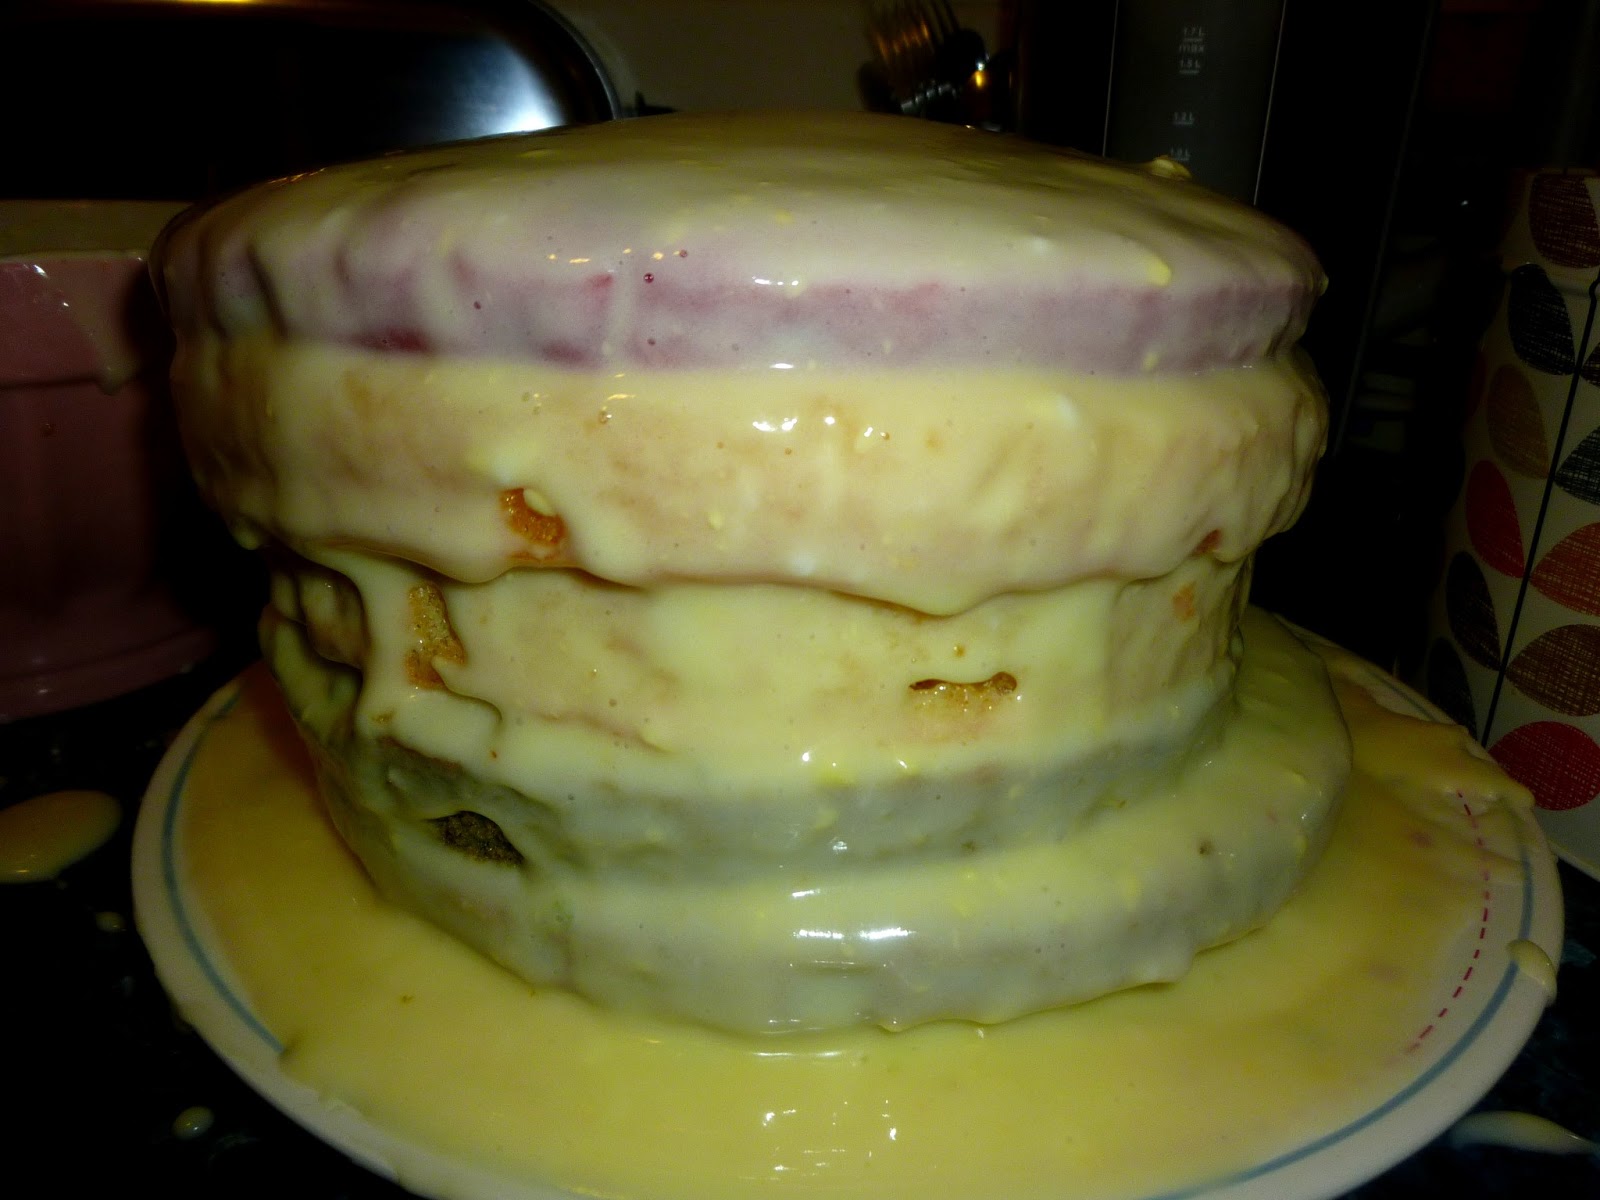
Ok, so I realise I promised that my next bake would be something healthier than the last few. Well, I hate to admit it, but I've broken my promise. And not just a bit either. Completely and utterly, sugary and buttery broken. But it had to be done. And it was 100% worth it. I don't even feel a tiny bit guilty. Because in all honesty, when the idea for this cake was first born I was very dubious as to whether or not it would actually work. Which is why, after slaving in the kitchen for a grand total of 6 hours (I kid you not!), I jumped around with joy (literally) when I saw the finished result. It worked!! It actually looked like a rainbow!! It was a small miracle. No it wasn't. It was a massive miracle. A little lopsided perhaps, but a miracle all the same. I couldn't stop looking at it, taking photos of it, dancing around it. Definitely a proud moment!


It all began last weekend when for some reason I found myself gazing longingly at beautiful photos of rainbow cakes on the internet. I casually mentioned to Nicky that I would love to make one, but didn't really think anything of it. I mean, I knew I had nothing celebratory to make a cake for, so there'd be no reason to bake a cake, right? But do you need a reason to make a cake? Stupid question. Of course you don't. So when Nicky said let's actually do this, I didn't say no. And that's how our Friday night came to be a night filled with baking. My perfect kind of night really.

Now, making a 6-tiered cake is quite a feat in itself, but we didn't stop the challenge there. No, we decided it would be a good idea to flavour each individual layer, so not only would the rainbow be colourful, but every tier would have a different taste. So eventually, we came up with 6 different flavourings that would not only colour the cake, but taste magical as well. Most of them were fruity, which actually made the sponges extra moist, but one was green tea flavour (!). And we did cheat a little on the red and green with a few drops of food colouring. The icing was a bit of a disaster as well, because for some reason the cream cheese frosting just refused to thicken, so it turned into a bit of a sloppy mess! (I have since learnt that this was because we over-mixed the cream cheese, which made all the air disappear, so it lost its shape...I'll know for next time!). After a few pretty decorations though, you wouldn't notice, and I have to say it tasted amazing! I think the blueberry layer was my favourite.


I would say give this a go if you fancy a challenge, but I think the recipe needs refining a bit first! We basically had a Victoria Sponge recipe and made just over double the quantities, which seemed just about right, then split the mixture into 6 (electronic scales come in very handy here!). And as I said, the icing needs some alterations, so I won't include that! The fruit fillings were wonderful though, but I may be inclined to cheat a bit next time and add some more food colouring to the other layers. Anyway, we had soooo much fun making it and will definitely be making challenging baking a Friday night regular occurrence I think! Nothing will phase us now, that's for sure!! 

Rainbow Cake (serves A LOT!)

Ingredients:

Sponge (basically 1 and a half times the quantity for 1 Victoria Sponge cake roughly):
550g Butter
550g Caster Sugar
10 Eggs
3tsp Vanilla Extract
550g Plain Flour
5tsp Baking Powder      

Flavourings:
Pack of raspberries
Tin of peaches
Zest of 3 lemons, juice of 2
The tea from 3 green tea bags
3/4 pack of blueberries
Handful of grapes and a few glugs of Ribena
Red and green food colouring

Method:

  1. Grease and line 6 cake tins.
  2. Preheat oven to 180 degrees.
  3. Cream butter and sugar together in a large bowl.
  4. Gradually beat in the eggs.
  5. Add vanilla extract.
  6. Stir in flour and baking powder so it is thoroughly combined.
  7. Weigh the mixture using electronic scales.
  8. Divide it by 6 and split into 6 different bowls (we actually only did three at a time!).
  9. Purée the raspberries, blueberries, peaches (minus juice) and grapes.
  10. Zest and juice the lemons.
  11. Add each flavouring/colouring to each separate mixture and stir through.
  12. Pour into cake tin and bake in the oven for about 35-40 minutes, until a knife inserted comes out clean.
  13. Leave until cool enough to handle and then remove from tin and place on a cooling rack.
  14. Once completely cool, sandwich together using your desired icing and ice the top and sides.
  15. Decorate as you wish!
  16. Cut a slice, be amazed and enjoy! 


You can see the consistency of the cream cheese frosting here...bit of a sloppy mess!
Soon resurrected though with pretty sprinkles...!


The moment of truth...
...it worked!! Yayyyy!

I can sing a rainbow....sing a rainbow...sing a rainbow tooooo!

Beyond excited. And VERY proud!


Saturday, July 7, 2012

Berry Lemon Cake


I can't remember the last time I woke up to blue skies. Yesterday I had to walk through what seemed like a lake on the way to the hairdresser's. England, where is the summer please?  Now this little cake I made will not magically make the sun appear unfortunately, but it will hopefully give you a taste of summer! My Dad has decided to grow redcurrants this year so after hunting around for something to do with them I came across this recipe, which was quite wonderful. I've not really had anything with redcurrants in before I don't think, but I may be on the look-out for more. Who could resist having a bite of something which was brimming with these vibrant red jewels? Certainly not me anyway.


If you couldn't get your hand on any red currants though, you could definitely get away with using another berry instead - either raspberries or cranberries would be best. But I guess you could subistitute any other fruit you wanted really. In fact, if you used a fruit that was a bit sweeter, you could probably reduce the amount of sugar you put in, because I dread to think what the the sugar content of these little beauties is! Good job they're only small squares! Anyway, these are possibly one of the moistest cakes I've tasted, which I imagine is largely because of the dash (or two) of cream that you put in and the lemon syrup that is drizzled over just as it comes out of the oven. Surprisingly, they're fairly light too, so when the rain continues to pour over the next few days I'll be able to stuff myself with my Berry Lemon Cake and not feel as if I'm about to burst. Because let's be honest, it's unlikely that the sun will return any time soon. And I don't know about you, but I'll need something to cheer me up... 

Berry Lemon Cake     

Ingredients
175g Plain Flour
1 1/2 tsp Baking Powder
Pinch Salt
150g Unsalted Butter
150g Caster Sugar
2 Eggs
3tbsp Cream
150g Redcurrants (washed and stalks removed)
Juice of 2 Large Lemons (about 100ml)
100g Demerara Sugar

Method
Preheat oven to 180 degrees. Grease and line a baking tin with greaseproof paper.
Mix together the flour, baking powder and salt in a bowl.
In a separate bowl cream the butter and caster sugar togther so it is light and fluffy. 
Beat in the eggs one at a time, folding in a spoonful of flour after each egg.
Fold in the remaining flour and gently stir in the redcurrants and cream.
Bake in the oven for about 25-30 minutes until golden and a skewer inserted comes out clean.
While the cake is baking, combine the lemon juice and demerara sugar. When the cake comes out of the oven, pour this mixture onto the cake.
Allow to cool for about half an hour, then cut into slices and put onto a wire rack to finish cooling.
Enjoy (with a nice cup of hot tea in this weather!). 


Saturday, June 30, 2012

Gorgonzola, Pear and Caramelised Onion Cake


Apologies once again for practically disappearing off the face of the earth! These past few weeks (which were my last in France) have passed by in such a blur, but now I'm settled back in England for the summer (sob) with plenty of time on my hands to cook up some tasty treats. To take my mind off pining for France and those glorious sunnny days that just do not seem to exist here, I will be busying myself in the kitchen. A kitchen which is far more pleasant to cook in than when I was in France! So there are pluses about being back...

Oddly enough, I have chosen to cook something which I would not consider to be typically French, but very delicious nonetheless! Once you've got your head round the fact that you're eating a savoury cake that is. I watched another one of Rachel Khoo's programmes the other day (just to make me feel more at home!) and her cheese, pistachio and prune cake caught my attention. However, I thought I'd mix things up a bit and decided to give it a go with a different filling. and in fact, what makes this cake so great is that you can experiment with whatever filling you fancy. I've recently discovered that I'm actually a fan of blue cheese in small doses and since I've been in France I've tried a variation of cheese on toast with pear. With this in mind, I decided to put it all in a cake along with some caramelised onions to balance out the bitterness of the cheese. And the result was a delight. Perhaps slightly on the oily side when it first came out of the oven, but with a side of salad it made the perfect light lunch and was a bit different to a standard sandwich. It would also be a lovely addition to a picnic in the countryside...that's if the weather decides to provide us with some sunshine of course!


Gorgonzola, Pear and Caramelised Onion Cake

Ingredients
250g Plain Flour
15g Baking Powder
150g Gorgonzola, sliced
1 Red Onion
1/2 Tbsp Olive Oil
1/2 Tbsp Butter
1 Tbsp Sugar
1 Tbsp Balsamic Vinegar
1 Pear (peeled, cored and sliced)
4 Eggs
150ml Olive Oil
100ml Milk
50g Plain Yoghurt
Seasoning

Recipe
  1. Begin by making the caramelised onion to give it time to cool.
  2. Slice the onion finely and add it along with the butter, olive oil, sugar and balsamic vinegar to a frying pan.
  3. On a medium heat, cook for 10-15 minutes until the onion has caramelised. Allow to cool.
  4. Preheat the oven to 180 degrees and line a loaf tin with greased proof paper.
  5. In a bowl, mix together the flour, baking powder, gorgonzola, caramelised onions and pear.
  6. In a separate bowl, whisk the eggs until pale and fluffy, then gradually whisk in the oil, milk and yoghurt. Season well.
  7. Fold the flour mixture into the whisked eggs, careful not to overbeat. 
  8. Pour the batter into the tin.
  9. Bake for 30-40 minutes until a skewer inserted into the centre of the cake comes out clean.
  10. Allow to cool in the tin and enjoy!

Thursday, March 15, 2012

A birthday means cake!


It was my friend's birthday today and my immediate thought was "let's bake a cake!!", so me and two other friends did just that. And it was beautiful. EXTREMELY sweet and chocolatey, but if you can't treat yourself on your birthday, when can you? The sponge was perfectly light and airy and the icing was (eventually) just the right consistency after a bit of trial and error with ingredients! I have to give all the credit  to Alex though for the decoration, who seems to be the queen of cake-decorating! We were in a bit of a rush and my hand is just not steady enough when under pressure - I think I need more practice at that. The birthday girl loved it though (I hope!) and it was a good excuse for the rest of us to sit in Parc Jourdan with a big slab of chocolate cake and a glass of champagne sparkling wine. The sun even decided to come out! I just won't mention the strange French chav who was practising his rapping techniques on a bench nearby - thankfully, we were too busy eating cake to take too much notice... 

Chocolate Birthday Cake serves 6 large slabs, for 6 greedy people!

Ingredients:
For the cake:
200g Butter
200g Caster Sugar
1 tsp Vanilla Essence
4 Eggs
150g Self-Raising Flour
50g Cocoa Powder
For the icing:
140g Butter
200g Icing Sugar
80g Cocoa Powder
3 tsp Nutella
Sprinkles or whatever decorations of your choice
[NB. I just guessed the quantities for the icing, but this is a real recipe that I found which is more exact!]

Method:
  1. Grease a cake tin (1 large or 2 small) and preheat the oven to 180 degrees.
  2. Cream the butter and sugar together in a large mixing bowl.
  3. Add the eggs and mix, one at a time.
  4. Add the vanilla essence, flour and cocoa powder and mix again. 
  5. Pour into cake tin and bake in the oven for about 20 minutes or until a knife comes out clean when inserted.
  6. Remove from oven and cool.
  7. If using one large cake tin, cut cake in half once completely cool.
  8. For the icing, cream the butter and gradually add the icing sugar and cocoa powder.
  9. Add vanilla essence and a spoonful of Nutella if you're feeling really extravagant!
  10. Spread half the icing on one of the cake layers evenly and sandwich together.
  11. Spread the rest on top of the cake.
  12. Decorate as you wish!