Monday, April 15, 2013

Cinnamon and Beetroot Muffins


I've always found the concept quite strange of putting carrots in cakes. Why would you put a vegetable you normally have with your Sunday dinner in a cake? But we do, and the thing is, it works! I absolutely love carrot cake - topped with a layer of cream cheese frosting, it's probably up there as one of my favourite afternoon treats. It has a wonderful flavour, it's beautifully moist and it's so sweet. And actually, I guess that answers my question. Carrots are sweet, so it makes perfect sense to put them in a cake. After all, sugar comes from a vegetable - sugar beet - and apparently carrots are pretty high up the scale in terms of their sugar content as well so why not substitute a bit of sugar for a slightly healthier option? In the past, when sugar was reserved only for the rich of society, it was far cheaper to grate a bit of carrot that you could grow in your own back garden than to use the much sought-after sugar. How times have changed...! A bag of sugar only costs 89p at Sainsbury's!


Anyway, I'm getting side-tracked and probably boring you with my historic ramblings. For a while now I've wanted to have a go at putting some kind of vegetable other than carrot into a cake mix, because I'm intrigued to know whether other vegetables work just as perfectly. Well last week I decided to satisfy my intrigue, as I came across a recipe for these beetroot muffins in a Sainsbury's magazine that ended up in our letterbox. I had a lot of fun making them and spent a good twenty minutes grating a lot of beetroot and getting a lot of red all over my hands and the kitchen! But to be honest...I'm not really sure what to make of them! They're definitely sweet enough to go in a cake that's for sure and the vibrant red of the beetroot makes the cakes look tantalisingly appetising! I couldn't stop going on about how red they were every time I ate one. And I even managed to use a bit of beetroot dye to colour the icing. But I think the colour may have been the best bit about them unfortunately. You could still definitely taste undertones of beetroot which you just don't get with carrot cake and beetroot is such an earthy vegetable that sometimes it did feel as if I was eating something that had come straight from the soil! My mum and dad said they liked them, but they were probably being polite, as I don't think they were that convinced. However, I am not going to let this put me off baking with vegetables and I will be persevering! Maybe with the addition of my best friend chocolate, because that always makes everything taste a hundred times better. Anyway, I urge you to make some for yourself and let me know what you think. Because even if you don't like them, I hope you'll be impressed by their astonishing red and the fact that you've just made a cake with beetroot in!    


Oh, and I have to explain the addition of the pink icing and mini eggs on top! I made them just before Easter (as you probably guessed) and felt like I had to decorate them with at least a bit of an Easter theme. But I actually prefer the plain red tops so you can show off that they have beetroot in them!


Cinnamon and Beetroot Muffins (makes 12) 

Ingredients:
500g Fresh Beetroot, peeled, trimmed and coarsely grated
300g Self-Raising Flour
100g Light Brown Soft Sugar
1tsp Baking Powder
1tsp Ground Cinnamon
180ml Sunflower Oil
3 Eggs

Method:

  1. Preheat the oven to 180 degrees.
  2. Line a muffin tin with 12 muffin cases.
  3. In a large mixing bowl, combine the beetroot, flour, baking powder and cinnamon together. 
  4. In a separate bowl, beat the eggs and stir in the oil.
  5. Pour this into the dry ingredients and mix together well. 
  6. Spoon the mixture into the paper cases so they are almost full.
  7. Bake in the oven for 25 minutes until just risen and an inserted skewer comes out clean.
  8. Allow to cool and enjoy!


Friday, March 29, 2013

Hot Cross Buns


I actually made these Hot Cross Buns last weekend during my baking extravaganza when all I wanted to do was be inside the warmth of a kitchen keeping out of the cold. But I thought I'd share them with you today as it's Good Friday and  if we're sticking with tradition, that's when you should be eating them. Not that tradition usually dictates when I eat something! I'd be happy to eat Hot Cross Buns all year round, but there is something special about saving them for Easter. Anyway, enough rambling about when we eat Hot Cross Buns, because in all honesty it doesn't make a bit of difference because they always taste delicious. That's if you choose the right recipe of course. And this recipe that I found ticked all the right boxes for me!


This was the first time I'd made Hot Cross Buns, but they're actually really quite easy to make, so it definitely won't be the last. And I've had a shop-bought one since and it just didn't quite compare. I seem to have turned into some kind of Hot Cross Bun snob! They did not contain anywhere near enough raisins and I could hardly taste the orange and lemon candied peel. Disgraceful! No, but seriously, this recipe I found over on Poires au Chocolat (which is a brilliant Food Blog, I must say!) was just perfect. Beautifully spiced, plenty of fruit and just the right Hot Cross Bun sort of texture. And they tasted wonderful toasted with a generous layer of butter. And a bit of raspberry jam too if you're feeling extravagant.  


I've always been intrigued as well how they make the iconic cross on top. Well now I know. All you need is some flour and water which you make into a paste and pipe in a cross shape on top. It's as easy as that. Actually, I think there are probably several ways of making it, but this method was pretty simple and looked effective too. As for the rest of the recipe, that was pretty straight forward as well. All you need is a bit of patience like all yeast-related things as you wait for them to prove. And the candied peel was a little faffy, but there's no question that it was worth it. They kept surprisingly well too, especially when popped in the toaster. A perfect start to your day or a lovely Easter snack! Well, not necessarily Easter. Just give them a go anyway, because they tasted divine. 


Hot Cross Buns (makes 16)

Ingredients:
For the candied peel:
1 Orange
1/2 Lemon
100ml Water
100g Granulated Sugar
For the dough:
225ml milk
50g Caster Sugar
7g Dried Instant Yeast
450g Strong White Bread Flour
1tsp Salt
1tsp Cinnamon
1/2tsp Ground Ginger
1/4tsp Nutmeg
1/2tsp Salt
100g Raisins
1 Egg, beaten
50g Butter
For the crosses:
1tbsp Plain Flour
1tbsp Water

Method:

  1. Begin by melting the butter in a pan along with the milk.
  2. Turn the heat up until the milk starts steaming.
  3. Pour into a bowl to cool.
  4. To make the candied peel, use a vegetable peeler to take bits of peel off the orange and lemon.
  5. Cut into small strips about 2-3mm.
  6. Place in a pan and cover with about 3-4cm of water.
  7. Bring to the boil and let bubble for a few minutes until the water turns yellow. 
  8. Strain into a bowl, draining the bitter yellow water away.
  9. Repeat the process twice.
  10. Combine the sugar and water in a pan and heat until the sugar has dissolved. 
  11. Turn up the heat and add the peel.
  12. Let it bubble until the skin becomes translucent, which should take between 8 and 10 minutes.
  13. Allow to cool for 5 minutes and drain the peel, but keep the syrup as well.
  14. To make the dough, sift the flour, sugar, yeast, cinnamon, ginger, salt and nutmeg into a bowl.
  15. Stir the peel into the milk.
  16. Add the raisins, peel and milk into the bowl and stir until it comes together.
  17. Turn out onto a floured surface and knead until smooth and bouncy.
  18. Place the dough into a large well-oiled bowl and cover with cling film, then leave somewhere warm until it doubles in size. 
  19. Turn the dough out again onto a floured surface and punch down.
  20. Cut into 16 pieces and shape into balls.
  21. Line a baking tray with greaseproof paper and arrange the buns on it.
  22. Cover with cling film and leave to prove again until puffy for about 45 minutes.
  23. Preheat the oven to 200 degrees.
  24. Combine the flour with the water until it forms a paste, then scoop into a piping bag.
  25. Uncover the buns and pipe crosses onto them with the paste.
  26. Bake for 15-20 minutes until they are golden and hollow when tapped.
  27. Brush the syrup left over from the peel on top of the buns.
  28. Toast, spread with a generous layer of butter and enjoy!


Best served toasted with a generous layer of butter! 

Monday, March 25, 2013

Caramel Pie


Firstly, sorry for my lack of posts recently! I seem to have spent the last few weeks either dancing or drowning in work. It's just that time of year. Anyway, I can't spend my whole life working and as it's been far too cold to venture out of the house these past few days (seriously, what is wrong with the weather at the moment?!), my Saturday afternoon was spent baking in the kitchen with the bestie. A far better option than essay-writing or braving the cold in my opinion!


So, the first thing we made was this heavenly Caramel Pie. It's from the latest Hummingbird Bakery Book 'Home Sweet Home', which I treated myself to on a whim, but which I do not regret! I could literally make everything in there. Anyway, I chose this pie, just because we were going to a friend's for dinner and as we were in charge of dessert, I thought this looked like the right choice. And we were certainly not disappointed! I don't think I've ever really tried one of these American-style pies and it wouldn't normally be something I'd go for, but after making this, I may have changed my mind! The custard caramel filling was delicious - just the right sort of comfort food you want on a cosy night in with the girls. If only I hadn't been so full, I could have eaten it forever...! I will definitely be trying some of the other pies in the future.


My only piece of advice would be to make a very concious effort to keep stirring your custard as you cook it, because mine did end up a bit lumpy. But it did taste great, and as a big custard-lover myself, it definitely tasted just like the sort of custard I like: thick enough to stand a spoon in with just the right amount of creaminess. And with the addition of caramel, you can't get custard much better than that! Yes, definitely my sort of pie!!


Caramel Pie

Ingredients:
For the pastry:
110g Butter, cubed
225g Plain Flour
80g Caster Sugar
1 Egg
For the filling:
400g Caster Sugar
60g Plain Flour
500ml Whole Milk
4 Egg Yolks
60g Cornflour
Pinch Salt
100ml Water
For the topping:
350ml Double Cream
2tbsp Icing Sugar
20g Dark Chocolate

Method:
  1. Place the butter and flour into a large mixing bowl and rub together until it resembles fine bread crumbs.
  2. Stir in the sugar.
  3. Add the egg and mix until it forms a dough.
  4. Bring together and form into a ball, flattening slightly.
  5. Wrap it in cling film and leave to rest in the fridge for about 30-40 minutes.
  6. Once rested, roll out onto a floured surface so it is about 5mm thick.
  7. Line a pie dish with the pastry.
  8. Trim any excess edges with a knife and allow to rest again in the fridge for about 20 minutes.
  9. Bake blind at a preheated 170 degree oven for 10 minutes with baking beans in.
  10. Remove the baking beans and bake for a further 15-20 minutes.
  11. Allow to cool.
  12. To make the filling, mix 200g sugar with the flour, milk, egg yolks, cornflour and salt in a pan.
  13. Bring to the boil, whisking continuously until it thickens.
  14. Boil it for 4-5 minutes so the flour can cook properly.
  15. Set aside and cover directly with cling film to prevent a skin from forming.
  16. In a small pan, mix the rest of the sugar with the water.
  17. On a low heat, stir gently until the sugar has dissolved.
  18. Bring the mixture to boil without stirring.
  19. Let it boil for 15-20 minutes until it turns a light caramel colour.
  20. Remove from the pan and leave to cool for a couple of minutes.
  21. Pour the hot caramel into the custard, stirring continuously, until it is evenly mixed through.
  22. Pour the filling into the baked pie crust.
  23. Place in the fridge and allow to set for about an hour.
  24. Whisk the cream until it forms soft peaks and stir through the icing sugar.
  25. Top the pie with the cream.
  26. Using a vegetable peeler, make chocolate shavings.
  27. Sprinkle on the pie and enjoy!


Saturday, February 23, 2013

Malteser Macarons


Last week, I felt like it was about time that I got on the bandwagon and made some macarons. Everybody seems to be making them at the moment and as I didn't want to feel left out, I thought I should too. And actually, I don't know anyone who wouldn't want to give these beautiful little sugary treats a try, because number 1, they taste heavenly, and number 2, they look wonderful once they're made. As this very tempting recipe popped up on my news feed the other day, I knew the time had come for me to venture into the world of the macaron...!


Although actually, this wasn't my first attempt, as I did give them a go last year whilst I was in France, because obviously, being in France and having the opportunity to eat the real deal made it all the more tempting. I didn't discover them properly though until the end of the year, after deciding to treat myself to one from Paul when the French had yet again infuriated me with their lack of organisation. Taking one mouthful of a delightful macaron though, was enough to make me forget why I was annoyed. Having food like that on tap would be enough to make anyone. Light, airy, almondy, crispy on the outside, soft on the inside - just pure heaven really. Ahhh take me back. Anyway, I gave them a go and my first attempt was a bit of a disaster.

They should look like this...
Pistachio flavour :)

Such a beautiful green!

Can't remember what flavour this was, but something delicious!


Unfortunately, my second most recent attempt wasn't much better. I'd heard all the rumours about how hard they were to make, and believe me, they were not wrong! Making the actual mixture isn't the hard bit, it's piping them onto the tray and cooking them where the difficulty lies. Piping is not my strong point, and I am very sad to say that my lovely piping bag may have to be thrown away as it has been attacked by our resident slugs, who have left slimy trails everywhere - including my piping bag! I don't think they can be rescued - I just don't like the thought of slugs crawling all over my things. Anyway, enough about slugs. Basically, it meant I had to use a plastic bag for piping and as I cut the hole too big I think, the mixture just came out in blobs on the tray which is why the macarons were all oddly-shaped and a bit on the large side. But appearance isn't everything, of course...


However, not only were they not the perfect circles they should be, but they stuck to the tray horrendously. I think this was probably because I didn't have any greaseproof paper to line the tray with, and being the poor student I am, just replaced it with foil which I had in the cupboard. This meant that half the outside of the macarons was still on the tray, which isn't ideal when you have to sandwich them together with a layer of ganache. On the plus side, at least you can't see the middles! They also lacked the signature macaron 'foot' (basically a technical term for the edge of the macaron) which apparently is from overbeating, so folding in carefully is extremely important.

Having said all that, they did taste delicious! Honestly, the texture was just how I remember them being in France and the white chocolate ganache I made, well....that's another story. Perhaps a bit too sweet, but really, when is anything too sweet for me? They're small enough so that it's not too much of a sugar overload! Anyway, I will not let this mini disaster deter me from making them again, because after all, I got the flavour and texture right, it's just their appearance that I need practice with. And actually, I would be happy to make these over and over again if it meant that I could eat these for the rest of my life. Although even I might get a bit sick of them after a while! But watch this space for another attempt, because I do not give up that easily!


Malteser Macarons (adapted from The Little Loaf's recipe)

Ingredients:
For the macarons:
110g Icing Sugar
50g Ground Almonds
25g Horlicks Powder
2 Medium Eggs
40g Granulated Sugar

For the white chocolate ganache:
200g White Chocolate, finely chopped
100ml Double Cream
Handful of crushed Maltesers

Method:
  1. Preheat the oven to 180 degrees. 
  2. Line 2 baking trays with greaseproof paper (not foil like I did!).
  3. Sift the icing sugar, ground almonds and Horlicks into a bowl.
  4. In a separate bowl, whisk together the eggs and sugar until it forms stiff white peaks (not too dry though).
  5. Fold a third of the meringue mix into the almond mix.
  6. Fold in the rest of the meringue mix until fully combined - be careful not to knock too much air out of the mixture.
  7. Fill a piping bag (preferably without slug trails) with the mix and pipe small shallow disks onto the baking trays.
  8. Tap the tray firmly on a hard surface (this levels out the disks) and leave to rest for 15 minutes.
  9. Bake in the oven for 10-12 minutes.
  10. They should be done when the top is firm but not too coloured.
  11. While they are left to cool, make the ganache.
  12. Place the chocolate into a microwavable bowl.
  13. Heat the cream until it just starts to boil. 
  14. Pour over the chocolate and leave to stand for 2 minutes.
  15. Stir until smooth - if all the chocolate has not melted, put in the microwave for 30 seconds and stir.
  16. To assemble, spread a layer of ganache on the smooth side of one macaron shell and sprinkle some of the crushed Maltesers on top.
  17. Sandwich together with another macaron shell and repeat with rest of shells. 
  18. Enjoy!


Thursday, February 14, 2013

Yorks Bakery Café, Birmingham

Yorks Bakery Café
1-3 Newhall Street,
Birmingham,
B3 3NH.


Despite being in my 4th year at UOB, it has taken me up until now to find a decent café in Birmingham city centre. And for those of you reading this that know me well, you'll know that I love a good café! After trudging round the shops all day, finding the perfect place that serves a great coffee and a tasty treat to go with it is a necessity in my eyes. Well I think I've found just that place. One of those inviting little coffee shops, oozing with style and good food, that's right up my street (not literally, unfortunately, otherwise I'd be spending far too much money there).  It's just off New Street, but not too far away from all the shops, so it makes just the right spot to recharge your batteries!

 
My mum came to visit last weekend and I thought it was only right that we started the day off having a good old natter over a good cup of coffee. After a bit of research on the internet, I stumbled across Yorks Bakery Café which looked like my sort of thing and I was not disappointed. The coffee was just the right size, just the right strength and we shared the most delicious hazelnut and chocolate slice that kept us going til lunchtime. But actually, I'm sure I could have easily enjoyed all the cakes that were on offer (but that would have been greedy, I think). 


And actually, I just couldn't keep away, because yesterday Abbey and I went shopping and to warm ourselves up after the relentless snow showers, we treated ourselves to a little something. We both chose the lemon drizzle cake, which was very lemony - just how I like it! So I would certainly recommend this place to anyone next shopping in Brum and there's no doubt that I will be returning myself in the not so distant future! So glad I found this little hidden gem. 

Sunday, February 10, 2013

Cinnamon and Raisin Bagels


As promised, here's a recipe that's a little bit more on the healthy side this week. To start with, there's only 3/4tbsp of sugar in the whole recipe and there's some fruit in it too. Bonus. I can kid myself that this makes up for all the calorific recipes I've made in the last few weeks, but in reality, I'll probably have to cut sugar out of my diet for the next few months if I want to make up for all that! 


Anyway, I've been meaning to bake bagels for a while now, because you just can't beat a buttered bagel in the morning for breakfast with a generous layer of jam. And why buy them, when you can make them yourself for far less money. They're so fun to make as well! Not only do you get to spin them around on a wooden spoon to make the hole in the middle, but it fascinates me as well that they have to be boiled before you bake them in the oven. That's what makes their surface so perfectly smooth. Well, in the case of mine, not so smooth and more rustic-looking! But appearance isn't everything. I used this recipe as my starting point and made a few of my own alterations because I just can't seem to get enough of cinnamon and raisins at the moment. And in my opinion, they're the best type of bagels. They go together wonderfully and the smell when they're cooking is divine. I think I possibly may have cooked mine for a little too long, as they were perhaps a bit too crunchy on the outside, but the inside was still soft and eating a fresh bagel straight out of the oven was a lovely start to my day! I froze the ones I didn't eat immediately so hopefully they'll still taste just as fresh defrosted. Give them a go and try something different to wake up to!


Cinnamon and Raisin Bagels (makes 4)

Ingredients:
1tsp Quick-acting Yeast
3/4tbsp Light Brown Sugar
150ml Warm Water
250g Strong White Flour
1/2tsp Salt (I actually didn't add this, but you should!)
1tsp Cinnamon
3tbsp Raisins

Method:
  1. Combine all the ingredients together in a bowl with a wooden spoon so it forms a dough.
  2. Tip out onto a floured surface and knead for about 10 minutes.
  3. Place in a lightly oiled bowl covered with cling film and put in a warm place for roughly an hour or until it has doubled in size. 
  4. Punch down and leave to rest for 10 minutes.
  5. Divide into 4 equal size pieces and shape into a ball with your hands.
  6. Make a hole in the centre of each piece and spin on a wooden spoon to enlarge the hole (so it's about 1/3 of the diameter of the whole bagel).
  7. Place on a lightly oiled baking sheet and cover with cling film for 10 minutes.
  8. Preheat the oven to 220 degrees.
  9. Fill a large pan with water and bring to the boil.
  10. Keep it at a low simmer and lower 1-2 bagels into the water.
  11. Boil for about a minute, turning half way through.
  12. Remove and get rid of any excess water, then place on a baking sheet.
  13. When they have all been boiled, bake in the oven for 20 minutes, until they are golden in colour.
  14. Remove and cool on a wire rack, then enjoy!  


Sunday, February 3, 2013

Rainbow Cake


Ok, so I realise I promised that my next bake would be something healthier than the last few. Well, I hate to admit it, but I've broken my promise. And not just a bit either. Completely and utterly, sugary and buttery broken. But it had to be done. And it was 100% worth it. I don't even feel a tiny bit guilty. Because in all honesty, when the idea for this cake was first born I was very dubious as to whether or not it would actually work. Which is why, after slaving in the kitchen for a grand total of 6 hours (I kid you not!), I jumped around with joy (literally) when I saw the finished result. It worked!! It actually looked like a rainbow!! It was a small miracle. No it wasn't. It was a massive miracle. A little lopsided perhaps, but a miracle all the same. I couldn't stop looking at it, taking photos of it, dancing around it. Definitely a proud moment!


It all began last weekend when for some reason I found myself gazing longingly at beautiful photos of rainbow cakes on the internet. I casually mentioned to Nicky that I would love to make one, but didn't really think anything of it. I mean, I knew I had nothing celebratory to make a cake for, so there'd be no reason to bake a cake, right? But do you need a reason to make a cake? Stupid question. Of course you don't. So when Nicky said let's actually do this, I didn't say no. And that's how our Friday night came to be a night filled with baking. My perfect kind of night really.

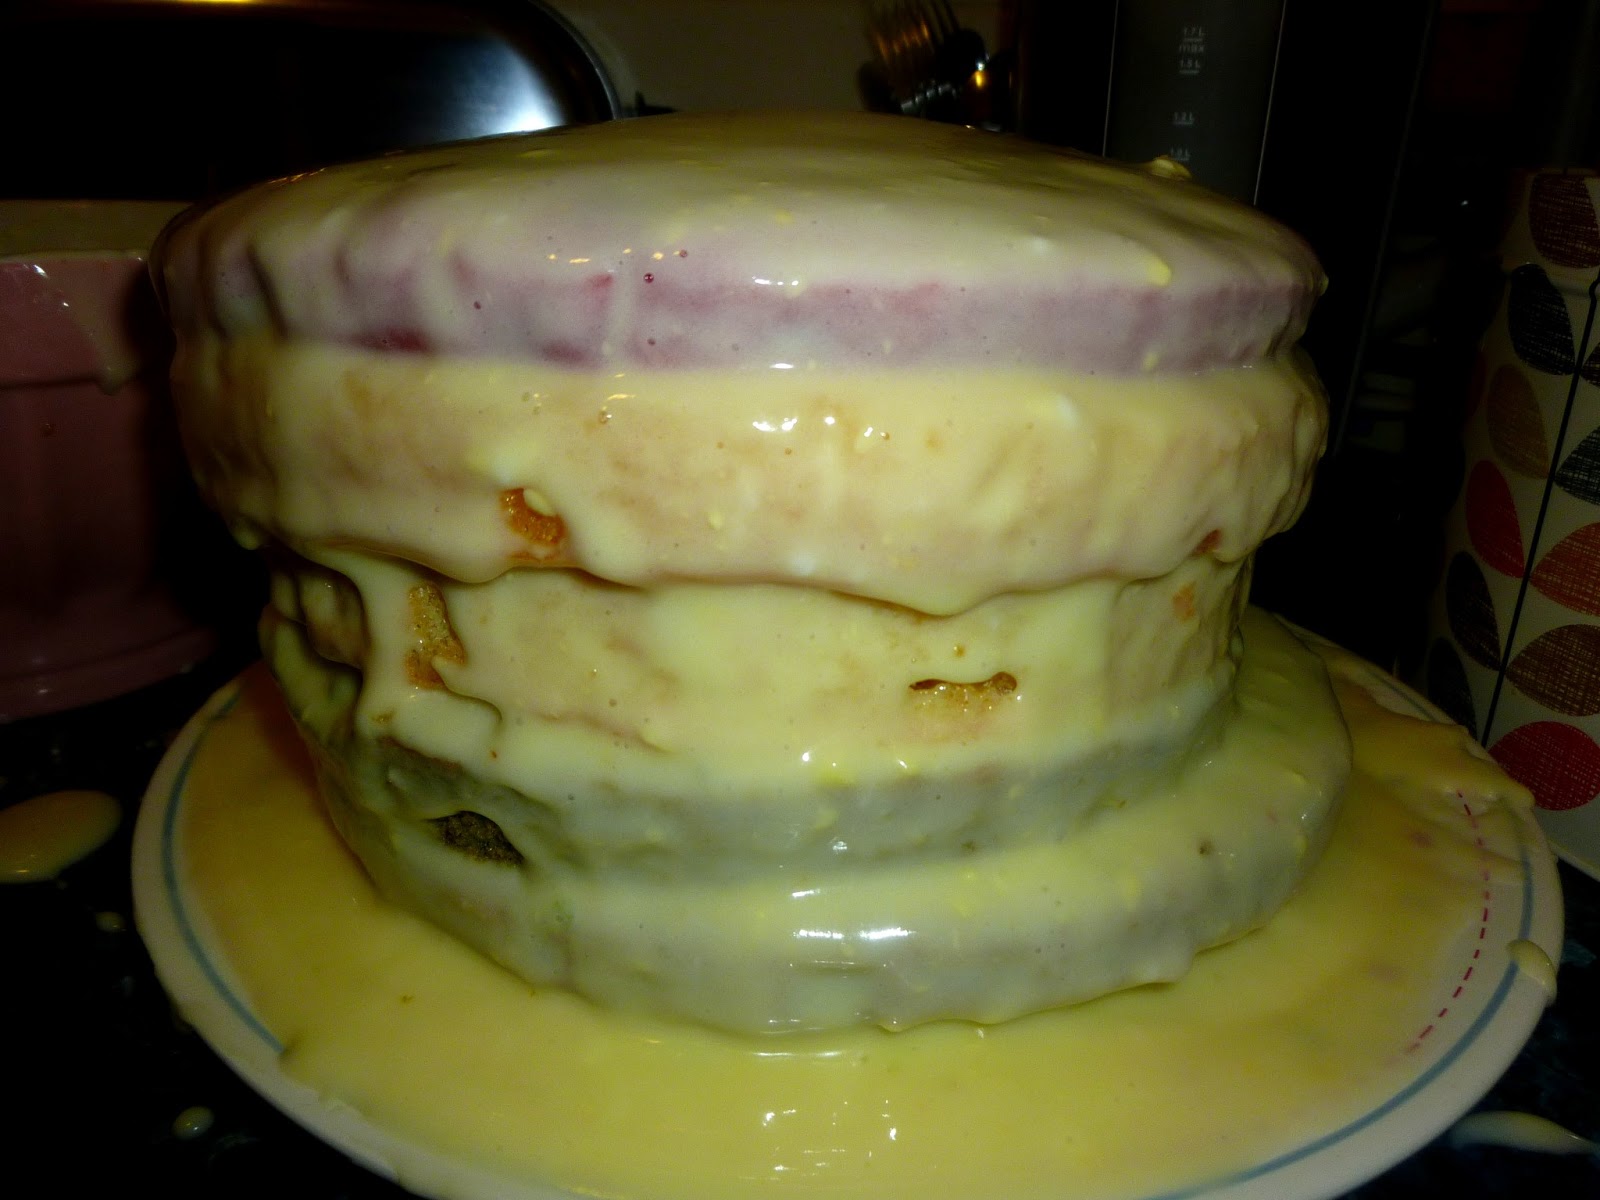
Now, making a 6-tiered cake is quite a feat in itself, but we didn't stop the challenge there. No, we decided it would be a good idea to flavour each individual layer, so not only would the rainbow be colourful, but every tier would have a different taste. So eventually, we came up with 6 different flavourings that would not only colour the cake, but taste magical as well. Most of them were fruity, which actually made the sponges extra moist, but one was green tea flavour (!). And we did cheat a little on the red and green with a few drops of food colouring. The icing was a bit of a disaster as well, because for some reason the cream cheese frosting just refused to thicken, so it turned into a bit of a sloppy mess! (I have since learnt that this was because we over-mixed the cream cheese, which made all the air disappear, so it lost its shape...I'll know for next time!). After a few pretty decorations though, you wouldn't notice, and I have to say it tasted amazing! I think the blueberry layer was my favourite.


I would say give this a go if you fancy a challenge, but I think the recipe needs refining a bit first! We basically had a Victoria Sponge recipe and made just over double the quantities, which seemed just about right, then split the mixture into 6 (electronic scales come in very handy here!). And as I said, the icing needs some alterations, so I won't include that! The fruit fillings were wonderful though, but I may be inclined to cheat a bit next time and add some more food colouring to the other layers. Anyway, we had soooo much fun making it and will definitely be making challenging baking a Friday night regular occurrence I think! Nothing will phase us now, that's for sure!! 

Rainbow Cake (serves A LOT!)

Ingredients:

Sponge (basically 1 and a half times the quantity for 1 Victoria Sponge cake roughly):
550g Butter
550g Caster Sugar
10 Eggs
3tsp Vanilla Extract
550g Plain Flour
5tsp Baking Powder      

Flavourings:
Pack of raspberries
Tin of peaches
Zest of 3 lemons, juice of 2
The tea from 3 green tea bags
3/4 pack of blueberries
Handful of grapes and a few glugs of Ribena
Red and green food colouring

Method:

  1. Grease and line 6 cake tins.
  2. Preheat oven to 180 degrees.
  3. Cream butter and sugar together in a large bowl.
  4. Gradually beat in the eggs.
  5. Add vanilla extract.
  6. Stir in flour and baking powder so it is thoroughly combined.
  7. Weigh the mixture using electronic scales.
  8. Divide it by 6 and split into 6 different bowls (we actually only did three at a time!).
  9. Purée the raspberries, blueberries, peaches (minus juice) and grapes.
  10. Zest and juice the lemons.
  11. Add each flavouring/colouring to each separate mixture and stir through.
  12. Pour into cake tin and bake in the oven for about 35-40 minutes, until a knife inserted comes out clean.
  13. Leave until cool enough to handle and then remove from tin and place on a cooling rack.
  14. Once completely cool, sandwich together using your desired icing and ice the top and sides.
  15. Decorate as you wish!
  16. Cut a slice, be amazed and enjoy! 


You can see the consistency of the cream cheese frosting here...bit of a sloppy mess!
Soon resurrected though with pretty sprinkles...!


The moment of truth...
...it worked!! Yayyyy!

I can sing a rainbow....sing a rainbow...sing a rainbow tooooo!

Beyond excited. And VERY proud!