Showing posts with label Lemon. Show all posts

Tuesday, July 16, 2013

Rhubarb Lemonade


I'm dedicating this week's posts to rhubarb. Yes, those green and pink stalks that hide beneath their umbrella leaves that surely don't deserve to have their own week devoted to them. And I was guilty too of ignoring this somewhat forgotten plant, because let's face it, it's inedible unless it has been cooked with far too much sugar and the only time I ever eat it is in a crumble with custard. But let's not forget, I think anything tastes good with custard. Yet since we my dad has started growing it in the garden, I've discovered that I actually like its delicate flavour and there's a surprising number of recipes that you can use it in. So put aside your rhubarb prejudices, as today I am going to share with you this refreshing rhubarb lemonade - perfect for a blissful English summer day, that the weather has finally decided to provide lots of recently...! 


Strictly speaking, I guess I shouldn't really be including this recipe on here, because it doesn't actually involve any baking. But when it's this hot, who actually wants to be stuck inside next to a hot oven? No, I'd much rather prefer to be sitting in the shade, reading a book and sipping a cooling drink, making the most of not having anything to do for once! Making this lemonade is so easy, that I promise even in this debilitating heat when the thought of any sort of exercise makes you just feel tired, you'll be able to muster up the strength to make this. What's even better about this drink is that with a splash or two of rum, it turns into a wonderfully delicious cocktail, the perfect remedy after a hard day sitting in the sunshine. Try this and you will change your mind about how you feel towards rhubarb. Promise. 


Oh, and depending on the exact type of rhubarb you use, I like to add a few drops of red food colouring to make it look a bit more appetising. Mine was mostly green and looked more like dirty water than a fancy cocktail when I'd finished it, so I cheated with the colour! Whoever said looks don't matter was lying a little bit, because nobody really wants to drink anything that looks like it's been taken from a muddy pond...!

Rhubarb Lemonade (from thebitehouse.com)

Ingredients:
6 cups of water
1 cup rhubarb stems, chopped
3/4 cup sugar
Juice of 2 lemons
A few drops of red food colouring
A small handful of fresh mint

Method:
  1. In a saucepan, simmer the rhubarb, sugar and lemon juice until soft on a medium heat. 
  2. Transfer to a bowl and blend with a hand mixer. 
  3. Add the water and a few drops of food colouring and stir.
  4. Cool in the fridge.
  5. Serve with a few sprigs of mint, lots of ice and enjoy!


Tuesday, June 25, 2013

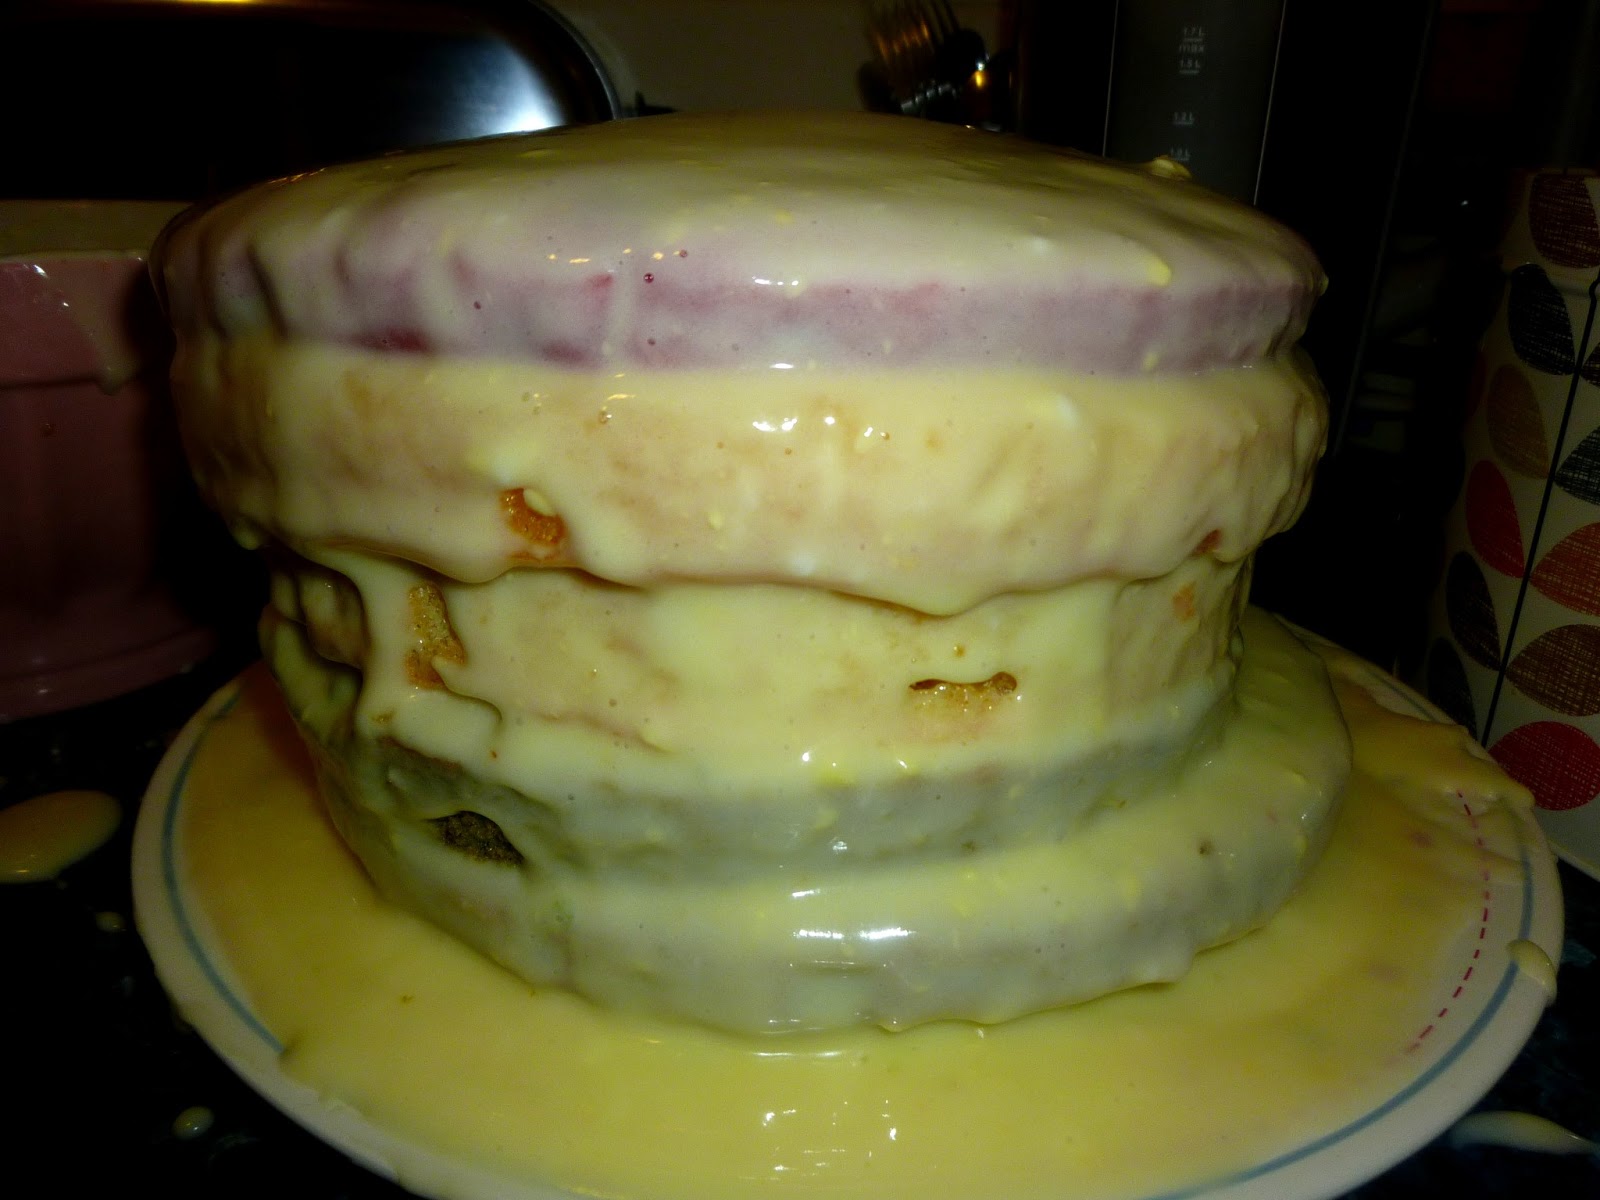
Lemon and Raspberry Cake


So it was my Dad's birthday last week and, of course, I couldn't let it go by without baking him a cake. I mean, it would have been quite rude, right?! Anyway, whether he wanted it or not, I always prefer to bake with a specific purpose in mind and I think a birthday screams cake more than any other occasion! It was also the perfect excuse to try out another recipe from my Hummingbird Bakery cookbook and, as usual, it did not disappoint! After baking (and eating) their cake recipes, I don't think I could ever try an alternative now. The sponge is just so moist and light with the addition of buttermilk, that I would feel as if I was betraying the cake gods if I made a cake any other way now! The basic marg, sugar, flour, eggs recipe that I used to stick to when I was growing up does not live up to my cake expectations these days. Basically, I've been spoilt by Hummingbird and now there's no turning back...!


The only difficult part of baking this cake was deciding which recipe to choose! To be honest, I don't think there'd be any cake I wouldn't like from the Hummingbird cookbook, but I thought lemon and raspberries seemed most suitable for summer. I rarely say no to chocolate, but last week's surprisingly warm and sunny weather didn't make me feel like it for once. The tartness of the lemons and raspberries was just what I fancied (regardless of what the birthday boy wanted!), so this recipe jumped out at me. And with raspberries being possibly one of my favourite fruits, this cake was the perfect choice. I have to say though, I think it's the icing that makes this cake! Don't be put off when you start making it and it just looks like breadcrumbs that look as if they'll never come together to make a fluffy icing, because I promise you, it does work and it does taste wonderful. When you add the cream cheese, be careful not to over-stir, as I have had bad experience on this front where the icing has just ended up as one big sloppy mess (remember this recipe?), which does not work too well when trying to cover a cake with it! Anyway, other than that, it's very easy to make and tastes especially beautiful sat outside in glorious sunshine with a large cup of tea. Let's just hope that some more sunny days are heading our way...! 


Lemon and Raspberry Cake 

Ingredients:
For the sponge:
55g unsalted butter, softened
190g caster sugar
160g plain flour
2tsp baking powder
160ml buttermilk
Zest of a lemon
2 medium eggs
40g raspberry jam
For the frosting:
450g icing sugar
Zest of 3/4 lemon
75g unsalted butter, softened
190g full-fat cream cheese
Grated zest of 1/2 lemon
A few raspberries

Method:
  1. Preheat the oven to 170 degrees and line the cake tins with greaseproof paper.
  2. With a hand-held electric whisk, mix the butter, sugar, flour and baking powder together until it forms a sand-like consistency.
  3. In a large jug, mix together the buttermilk, lemon zest and eggs.
  4. With the whisk on medium speed, gradually pour half the liquid into the crumb mixture.
  5. Mix thoroughly until the batter is thick and smooth. Once the lumps have gone, add the rest of the liquid.
  6. Mix until combined.
  7. Divide the batter between the two tins and bake for 20-30 minutes until golden brown and an inserted skewer comes out clean.
  8. Meanwhile, make the frosting by gradually mixing the icing sugar, lemon zest and butter together on a low speed with the electric whisk until combined and there are no large lumps of butter.
  9. Add a little cream cheese to loosen up the mixture and beat until smooth.
  10. Add the rest of the cream cheese and beat the frosting until it is light and fluffy.
  11. Once the sponges are cool, assemble the cake by placing one layer on a large plate.
  12. Spread with a layer of raspberry jam and top with 3-4tbsp of frosting, smoothing out with a palette knife.
  13. Sandwich the second layer on top and frost the sides and top of the cake so no sponge is showing.
  14. Decorate with a few raspberries, some lemon zest and a sprinkling of icing sugar. 
  15. Cut a large slice and enjoy!


Thursday, February 14, 2013

Yorks Bakery Café, Birmingham

Yorks Bakery Café
1-3 Newhall Street,
Birmingham,
B3 3NH.


Despite being in my 4th year at UOB, it has taken me up until now to find a decent café in Birmingham city centre. And for those of you reading this that know me well, you'll know that I love a good café! After trudging round the shops all day, finding the perfect place that serves a great coffee and a tasty treat to go with it is a necessity in my eyes. Well I think I've found just that place. One of those inviting little coffee shops, oozing with style and good food, that's right up my street (not literally, unfortunately, otherwise I'd be spending far too much money there).  It's just off New Street, but not too far away from all the shops, so it makes just the right spot to recharge your batteries!

 
My mum came to visit last weekend and I thought it was only right that we started the day off having a good old natter over a good cup of coffee. After a bit of research on the internet, I stumbled across Yorks Bakery Café which looked like my sort of thing and I was not disappointed. The coffee was just the right size, just the right strength and we shared the most delicious hazelnut and chocolate slice that kept us going til lunchtime. But actually, I'm sure I could have easily enjoyed all the cakes that were on offer (but that would have been greedy, I think). 


And actually, I just couldn't keep away, because yesterday Abbey and I went shopping and to warm ourselves up after the relentless snow showers, we treated ourselves to a little something. We both chose the lemon drizzle cake, which was very lemony - just how I like it! So I would certainly recommend this place to anyone next shopping in Brum and there's no doubt that I will be returning myself in the not so distant future! So glad I found this little hidden gem. 

Sunday, February 3, 2013

Rainbow Cake


Ok, so I realise I promised that my next bake would be something healthier than the last few. Well, I hate to admit it, but I've broken my promise. And not just a bit either. Completely and utterly, sugary and buttery broken. But it had to be done. And it was 100% worth it. I don't even feel a tiny bit guilty. Because in all honesty, when the idea for this cake was first born I was very dubious as to whether or not it would actually work. Which is why, after slaving in the kitchen for a grand total of 6 hours (I kid you not!), I jumped around with joy (literally) when I saw the finished result. It worked!! It actually looked like a rainbow!! It was a small miracle. No it wasn't. It was a massive miracle. A little lopsided perhaps, but a miracle all the same. I couldn't stop looking at it, taking photos of it, dancing around it. Definitely a proud moment!


It all began last weekend when for some reason I found myself gazing longingly at beautiful photos of rainbow cakes on the internet. I casually mentioned to Nicky that I would love to make one, but didn't really think anything of it. I mean, I knew I had nothing celebratory to make a cake for, so there'd be no reason to bake a cake, right? But do you need a reason to make a cake? Stupid question. Of course you don't. So when Nicky said let's actually do this, I didn't say no. And that's how our Friday night came to be a night filled with baking. My perfect kind of night really.

Now, making a 6-tiered cake is quite a feat in itself, but we didn't stop the challenge there. No, we decided it would be a good idea to flavour each individual layer, so not only would the rainbow be colourful, but every tier would have a different taste. So eventually, we came up with 6 different flavourings that would not only colour the cake, but taste magical as well. Most of them were fruity, which actually made the sponges extra moist, but one was green tea flavour (!). And we did cheat a little on the red and green with a few drops of food colouring. The icing was a bit of a disaster as well, because for some reason the cream cheese frosting just refused to thicken, so it turned into a bit of a sloppy mess! (I have since learnt that this was because we over-mixed the cream cheese, which made all the air disappear, so it lost its shape...I'll know for next time!). After a few pretty decorations though, you wouldn't notice, and I have to say it tasted amazing! I think the blueberry layer was my favourite.


I would say give this a go if you fancy a challenge, but I think the recipe needs refining a bit first! We basically had a Victoria Sponge recipe and made just over double the quantities, which seemed just about right, then split the mixture into 6 (electronic scales come in very handy here!). And as I said, the icing needs some alterations, so I won't include that! The fruit fillings were wonderful though, but I may be inclined to cheat a bit next time and add some more food colouring to the other layers. Anyway, we had soooo much fun making it and will definitely be making challenging baking a Friday night regular occurrence I think! Nothing will phase us now, that's for sure!! 

Rainbow Cake (serves A LOT!)

Ingredients:

Sponge (basically 1 and a half times the quantity for 1 Victoria Sponge cake roughly):
550g Butter
550g Caster Sugar
10 Eggs
3tsp Vanilla Extract
550g Plain Flour
5tsp Baking Powder      

Flavourings:
Pack of raspberries
Tin of peaches
Zest of 3 lemons, juice of 2
The tea from 3 green tea bags
3/4 pack of blueberries
Handful of grapes and a few glugs of Ribena
Red and green food colouring

Method:

  1. Grease and line 6 cake tins.
  2. Preheat oven to 180 degrees.
  3. Cream butter and sugar together in a large bowl.
  4. Gradually beat in the eggs.
  5. Add vanilla extract.
  6. Stir in flour and baking powder so it is thoroughly combined.
  7. Weigh the mixture using electronic scales.
  8. Divide it by 6 and split into 6 different bowls (we actually only did three at a time!).
  9. Purée the raspberries, blueberries, peaches (minus juice) and grapes.
  10. Zest and juice the lemons.
  11. Add each flavouring/colouring to each separate mixture and stir through.
  12. Pour into cake tin and bake in the oven for about 35-40 minutes, until a knife inserted comes out clean.
  13. Leave until cool enough to handle and then remove from tin and place on a cooling rack.
  14. Once completely cool, sandwich together using your desired icing and ice the top and sides.
  15. Decorate as you wish!
  16. Cut a slice, be amazed and enjoy! 


You can see the consistency of the cream cheese frosting here...bit of a sloppy mess!
Soon resurrected though with pretty sprinkles...!


The moment of truth...
...it worked!! Yayyyy!

I can sing a rainbow....sing a rainbow...sing a rainbow tooooo!

Beyond excited. And VERY proud!


Sunday, January 13, 2013

Lemon Meringue Cupcakes


What better way to finish off the perfect weekend than baking lemon meringue cupcakes with the housemates? And they are literally THE most incredible things ever. Which actually isn't that surprising really, because the recipe was from one of the Hummingbird Bakery recipes books, so obviously I would have expected nothing less. One of my housemates got 'Cake Days' for Christmas, which doubtless to say I am extremely jealous of (Mum, take note!) and perhaps our challenge will be to work our way through it by the end of the year. I don't know how they manage it, but the sponge is possibly the moistest I've ever tasted and it's not even difficult to make.

No words are needed to describe this book. 
However, perhaps the best part of making these cupcakes was that we got to use my other housemate's blowtorch...! Now that was exciting and it worked a treat!! And it's made them look so professional. I'm very impressed with it anyway. This is what I wished I'd had last year when I made the raspberry version of these. The blowtorch was far more effective than baking the meringues in the oven and gives them that golden finish that makes them look so attractive. 

Charlotte in action with her blowtorch!

And of course, the hidden lemon curd inside makes a delicious attempt at balancing out the sweetness of the meringue topping. Which is virtually impossible considering the amount of sugar that's in them - you could really only have one of these at once. Actually, that's a lie. I could definitely persuade myself to have another. And it wouldn't take much persuading! These will not be in our kitchen for much longer. So, basically, you must give these a go and treat yourself to a little sugary goodness to brighten up your day!


Lemon Meringue Cupcakes (makes 12)

Ingredients:
80g Unsalted Butter
280g Caster Sugar
240g Plain Flour
1tbsp Baking Powder
1/4tsp Salt
1tsp Finely Grated Lemon Zest
2 Large Eggs
240ml Whole Milk
200g Caster Sugar
4 Egg Whites
70g Lemon Curd

Method:
  1. Preheat the oven to 180 degrees and line a muffin tin with muffin cases (or use silicone ones as I did).
  2. Beat together the butter, sugar, flour, baking powder, salt and lemon zest until they are incorporated and resemble breadcrumbs. 
  3. Break the eggs into a jug and whisk in the milk. 
  4. Pour three quarters of the egg mixture into the dry ingredients and beat together (using an electric whisk if you have one).
  5. Pour the remaining egg mixture in and beat again until combined and the batter is smooth.
  6. Spoon the batter into the cases so they about two thirds full. 
  7. Bake in the oven for 18-20 minutes until they have risen and are springy to touch.
  8. Leave to cool on a wire rack.
  9. To make the frosting, put the sugar into a saucepan along with 150ml water and bring to the boil. 
  10. Meanwhile, whisk the egg whites until just foamy.
  11. Allow the sugar to boil for 5-10 minutes, until when a drop of the syrup is placed in cold water, it forms a small ball on the surface.
  12. Pour the sugar syrup onto the egg whites and beat with an electric mixer on high until the meringue has quadrupled in size and is velvety smooth. 
  13. Once the cupcakes are fully cooled, hollow out the middle about 2cm deep and wide, using a knife.
  14. Fill the hole about half full with lemon curd and then place the hollowed out sponge back in. 
  15. Place about 1tbsp of meringue on the cupcakes, swirling it on.
  16. Using a blowtorch, lightly brown the meringue so it is golden in colour.
  17. Repeat with each cupcake and enjoy!

Saturday, July 7, 2012

Berry Lemon Cake


I can't remember the last time I woke up to blue skies. Yesterday I had to walk through what seemed like a lake on the way to the hairdresser's. England, where is the summer please?  Now this little cake I made will not magically make the sun appear unfortunately, but it will hopefully give you a taste of summer! My Dad has decided to grow redcurrants this year so after hunting around for something to do with them I came across this recipe, which was quite wonderful. I've not really had anything with redcurrants in before I don't think, but I may be on the look-out for more. Who could resist having a bite of something which was brimming with these vibrant red jewels? Certainly not me anyway.


If you couldn't get your hand on any red currants though, you could definitely get away with using another berry instead - either raspberries or cranberries would be best. But I guess you could subistitute any other fruit you wanted really. In fact, if you used a fruit that was a bit sweeter, you could probably reduce the amount of sugar you put in, because I dread to think what the the sugar content of these little beauties is! Good job they're only small squares! Anyway, these are possibly one of the moistest cakes I've tasted, which I imagine is largely because of the dash (or two) of cream that you put in and the lemon syrup that is drizzled over just as it comes out of the oven. Surprisingly, they're fairly light too, so when the rain continues to pour over the next few days I'll be able to stuff myself with my Berry Lemon Cake and not feel as if I'm about to burst. Because let's be honest, it's unlikely that the sun will return any time soon. And I don't know about you, but I'll need something to cheer me up... 

Berry Lemon Cake     

Ingredients
175g Plain Flour
1 1/2 tsp Baking Powder
Pinch Salt
150g Unsalted Butter
150g Caster Sugar
2 Eggs
3tbsp Cream
150g Redcurrants (washed and stalks removed)
Juice of 2 Large Lemons (about 100ml)
100g Demerara Sugar

Method
Preheat oven to 180 degrees. Grease and line a baking tin with greaseproof paper.
Mix together the flour, baking powder and salt in a bowl.
In a separate bowl cream the butter and caster sugar togther so it is light and fluffy. 
Beat in the eggs one at a time, folding in a spoonful of flour after each egg.
Fold in the remaining flour and gently stir in the redcurrants and cream.
Bake in the oven for about 25-30 minutes until golden and a skewer inserted comes out clean.
While the cake is baking, combine the lemon juice and demerara sugar. When the cake comes out of the oven, pour this mixture onto the cake.
Allow to cool for about half an hour, then cut into slices and put onto a wire rack to finish cooling.
Enjoy (with a nice cup of hot tea in this weather!). 


Wednesday, April 4, 2012

Mini Lemon Cupakes


Apologies once again for not posting anything on here for a while. I don't know where the time seems to be going at the moment! It's April already, my goodness. Before I know it, I won't be living in France anymore and I'll be back in rainy old England. Having said that, April's been living up to its name these past few days and we've had some rather showery days in Aix. At the weekend we had absolutely gorgeous weather, but it was just tricking us into believing it will last it seems...

Anyway, enough about the weather (whoever said English people always talk about the weather is soooo right!). Let's get down to baking. These cute little Mini Lemon Cupcakes which I came across here should certainly put you in a Spring mood! Light and fluffy, moist and tangy, they are just the treat you need to put a smile on your face. And with them being so tiny, you can eat one without feeling too guilty, but a the same time it will satisfy that sweet craving I know we all get. To me, lemons scream sunshine and short dresses and transport me to summer days sipping lemonade in the garden. Now these cupcakes don't magically fast forward a few months to summer I'm afraid (oh, how I wish they would, though!), but they do taste rather yummy and will give you that taste of summer you've been craving! Try them. Go on. 

Sorry, I've gone a bit photo mad I realise!!

Mini Lemon Cupcakes  makes about 24 (but I made 8 and divided the quantities by 3)

Ingredients:
For the cupcakes:
3 Large Eggs
1 Cup Milk
2 tsp Vanilla Extract
2 Cups Plain Flour
1 1/2 Cups Sugar
4 tsp Baking Powder
10 tbsp Butter
Grated Zest 2 Lemons
For the icing:
1 Cup Icing Sugar
2 tbsp Fresh Lemon Juice (or as much as you need to make the icing the right consistency)

Method:
  1. Preheat oven to 180 degrees.
  2. In a small bowl, combine the eggs, a quarter of the milk and the vanilla. 
  3. In a large mixing bowl, combine all the dry ingredients.
  4. Add the butter and remaining milk, then combine.
  5. Beat for a minute or so, until you have a smooth mixture.
  6. Beat in the egg mixture and then stir in the lemon zest.
  7. Put spoonfuls of the mixture into cake cases so that they are nearly half full.
  8. Bake for about 20-25 minutes, until they are golden brown and a knife inserted into them comes out clean.
  9. Remove from oven and allow to cool.
  10. To make the icing, in a small bowl gradually add the lemon juice to the icing sugar so that it is not too runny (you can add more water if necessary though).
  11. Once the cupcakes are fully cooled, ice them and allow to set.
  12. Take one with you to uni or work or wherever you're going and enjoy!
The only thing is, in 4 mouthfuls...


 ...they're gone! Oh well, you'll just have to make some more!!

Saturday, March 3, 2012

Twice Cooked


Ok, so I know the last time I made biscuits it didn't quite go as planned, but as I'm not the sort of person who gives up on things easily, I thought I'd give them another go. Plus, I bought my Mum this cute little biscuit recipe book and stamp to go with it for her birthday and secretly I really wanted to give them a go for myself! And with the recipe being in French, it reminded me of being in France!


Seeing as I'm home, it's the perfect time to do some baking with my Mum and it also meant I could have a go at using our wonderful oven (sorry if the oven saga is getting a bit tiresome now...I will shut up about it soon, promise!). And it did cook the biscuits to perfection, even if I do say so myself! I chose some lemon ones which were crunchy and crisp, just like a biscuit should be. They weren't too lemony either, but the lemon curd in the middle just gave them that extra kick they needed. And I think the stamp makes them look quite professional. This time I can safely say that the biscuits were a success and I will definitely be trying them again, but perhaps with an alternative flavour. So I CAN make biscuits. And I CAN blame my stupid French oven for their lack of success last time. Give them a go. They're really easy to make and perfect for satisfying that sweet craving we all get from time to time. And of course, I don't really need to say it, but they go perfectly with a nice cup of (English) tea!


Biscuits au citron    makes about 12 biscuits

Ingredients:
1 Lemon
80g Butter
120g Sugar
1 Egg
180g Plain Flour
I Jar Lemon Curd
Icing Sugar (for decoration)

Method:
  1. Grate the zest of a lemon.
  2. Cream the butter and sugar together in a mxing bowl.
  3. When the sugar is incorporated add the egg and lemon zest and mix again.
  4. Gradually add the flour, a little at a time, whilst mixing.
  5. It should all come together to form a dough.
  6. Leave the dough to rest in the fridge for half an hour.
  7. Preheat the (fan!) oven to 180 degrees.
  8. Cover a baking tray with greaseproof paper.
  9. On a floured surface roll out the dough so it is about 4-5mm in thickness.
  10. Cut out circles from the dough using a glass about 5cm in diameter - you should get about 24.
  11. If you have a stamp, now is the time to stamp half of the circles!
  12. Place all the circles on the baking sheet and bake in the oven for 10 minutes.
  13. Leave to cool on a cooling tray.
  14. Spread half of the biscuits with lemon curd and sandwich together with their other half.
  15. Enjoy as quickly as possible before they're all eaten!
Extremely accurate scales that I have the pleasure of using when I'm at home! I must invest in some for next year.

The oven in action!!

By the way, if you're wondering what the title is all about, it's another language reference! I'm sure many of you may know this already, but the word biscuit actually comes from the French language and litterally translates as 'twice cooked' because originally there were two parts to the cooking process of biscuits - apparently first they were baked and then dried out in a slow oven. So there's a little interesting useless fact for you all! Of course, the main thing is we all like a good biscuit and it doesn't matter how they're cooked as long as they taste good!