Wednesday, February 29, 2012

Cake and a Coffee? Don't mind if I do!

First of all, I am very disappointed in myself for not writing on here sooner, but it just shows how busy I've been this past week! I must admit, being back home has been LOVELY - the snowdrops are here, I've seen a few daffodils poking their heads out and there've even been some lambs about! Can I go as far to say...Spring is officially here! Of course, as predicted, seeing my beloved home oven in action has been the highlight of my stay so far and has certainly lived up to my expectations. But actually, I haven't had time to do much baking. In fact, I mainly seem to have been eating other people's baking instead! That is one of the reasons I do love coming home and being treated to endless cups of coffee and the occasional cake in one of those gorgeous little cafés that just don't seem to exist in France. Parents are for treating you. And as I've not seen them for a good two months I think they're allowed!

I must just tell you about two of said cafés though, because they are the type of place that I would just love to own one day. And they bake pretty good treats as well. The first is more like a deli and café combined, in Chapel Allerton, an area of Leeds not too far from me. It's called Crust & Crumb and I will definitely be going back there (and actually, this wasn't my first visit!). The lunch menu looked delicious too, but we just went for a coffee and I chose a vanilla shortbread biscuit to go with it, which was just right and just what I wanted. I would recommend it! Although I get the impression that they probably change what they have on offer quite regularly so there may be another tasty treat on offer on your visit. The baskets full of an assortment of breads were very tempting too! So many different flavours and displayed beautifully. Why are there not more places like this? Friendly staff, a buzzy atmosphere and yummy baking were all the right ingredients for a lovely afternoon back in England.

Crust & Crumb
110b Harrogate Road,
Chapel Allerton,
Leeds,
LS7 4NY.


The next place I'm going to tell you about is a little more further afield. I couldn't come back home and not venture out into the Yorkshire Dales so we went on a walk around Grassington area. And the main thing that was keeping me going was knowing that we'd be stopping for a drink halfway round! And what turned out to be a gorgeous homemade cake as well. It was actually in Grassington village, a little place called Café Maison. None of us could decide which cake to have so we chose three and shared them which was possibly the best decision ever! (May I also point out here that I don't usually go for one of those massive slices of cakes that they sell in cafés, but which always look so tempting. We had just been walking though, so it seemed justified!). Between us we had a carrot cake, a coffee and walnut cake and an iced lemon cake. They were all equally delicious and I couldn't tell you which one I liked best! Perfectly light and moist, with exceedingly tasty icing and so unexpected too. If you're ever in Grassington, go to this café to try a cake and you will thank me forever!

Café Maison
51 Main Street,
Grassington,
Skipton,
North Yorkshire,
BD23 5AA.  


Go on, take my advice and treat yourself to a coffee and a cake at a café! Or better yet, get someone else to treat you!

Tuesday, February 21, 2012

Mardi Gras = PANCAKE TIME!


I could not let Shrove Tuesday go by without acknowledging it - I mean, come on, it's the one day of the year when it's justified to eat as many pancakes as you like! What is there not to love? I know, pancakes may not strictly speaking be classed as baking, but I feel these delicious snacks can be an exception because they're just so damned good! Today things are a little different in France though. For one, it's known as Mardi Gras and number two, it doesn't seem to be especially associated with pancakes. Eating is not the focal point for once and instead, it is celebrated by dressing up and carnivals. 

Just one of the crazy things we saw at the Carneval de Nice! The theme was supposed to be Roi de Sport, but I'm not too sure how this elephant fits in...
No, you're not seeing things! That really is the Queen with some of her beefeaters!! I guess as the Olympics is in London this year that's where the connection is...

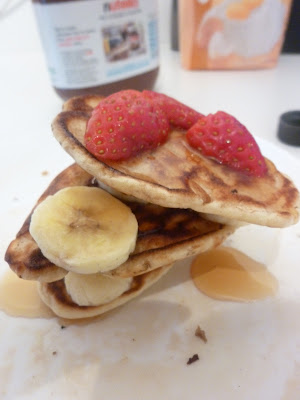
Now I can cope with a different name, and I'll even willingly attend a carnival (in fact, I'd reccommend going to the one at Nice!), but no pancakes on Pancake Day? That was when I was starting to get a little worried. Worry not though, because I managed to have my pancake fix! The question is, what will you choose to have on it? Will it be a traditional lemon and sugar one that brings flooding back all those childhood memories? Perhaps banana and Maple syrup for some to adopt the American tradition? Or strawberries and Nutella, my personal favourite. Of course, for those of you who can't make up your mind (or like me, just want everything!) the best option is to sample a bit of each, which is what we did. And I'd definitely reccommend it!

Another dilemma is which type of pancakes to make. Normally I just go for the traditional ones, but we tried making some American pancakes too this time which were rather yummy! Again, we made both, because it was so hard to decide on one. Whatever you do, just make sure you have pancakes and put as much sweet topping on them as possible. After all, the French call it 'Fat Tuesday', which surely gives us all an excuse to have a fat day, right?

Traditional Pancakes makes about 12-14, depending on pan size

Ingredients:
100g Plain Flour
Pinch of Salt
2 Large Eggs
200ml Milk mixed with 75ml Water
50g Butter
Plus whatever toppings of your choice!

Method:
  1. Mix the flour and salt in a bowl.
  2. Make a well in the centre of the flour and break the eggs into it.
  3. Whisk the eggs into the flour.
  4. Gradually add the milk and water mixture, whisking constantly, until it has formed a smooth batter, the consistency of thin cream.
  5. Melt the butter in the pan.
  6. Pour 2 tablespoons of it into the batter and put the rest into a bowl to use for greasing the pan when making the pancakes.
  7. Get the pan really hot and turn down to a medium heat and then you're ready to start cooking them!
  8. Pour about 2-3 tablespoons of the batter into the pan and tip it so it's evenly coated in the batter. 
  9. It should take only about half a minute to cook and then, if you're brave, flip it over, or if not, use a palette knife.
  10. Once the other side's cooked, it's ready!
  11. Serve with the toppings of your choice and enjoy!  


American Pancakes

Ingredients: 
200g Self Raising Flour
1tsp Baking Powder
300ml Milk
Knob of Butter
Whatever toppings of your choice!

Method:
  1. Mix the flour and baking powder in a bowl.
  2. Beat the egg into the milk.
  3. Make a well in the centre of the dry ingredients and add the egg mixture.
  4. Whisk until a smooth batter is made.
  5. Melt the butter and beat into the batter.
  6. Grease the pan by heating butter or oil.
  7. Add a large tablespoon of the batter into the pan. You should be able to fit about 3-4 pancakes in the pan at a time.
  8. Cook for about 3-4 minutes until bubbles appear on the surface of the pancake.
  9. Turn and cook for another 2-3 minutes until golden.
  10. Remove from the heat, serve with the topping of your choice and enjoy! 


On a side note...I am going back to England tomorrow and do you know what I'm looking forward to the most (aside from seeing my lovely friends and family who are still at home)? Being able to use our fan oven. Yes, really. I shall never take it for granted again!

Sunday, February 12, 2012

Raspberry Meringue Cupcakes!

The diiiivine patisserie

I just could not seem to stop baking this weekend! And this next recipe I must admit I am very proud of. It is based on possibly the best patisserie that I've had since I've been in France this year, from a Brioche Dorée in Montepellier a few weeks ago. Imagine a lemon meringue pie, swap the lemon for raspberry and shrink it...et voila, you have a tartelette aux framboises meringuée. It might even have overtaken the tarte aux fraises in the running for best French pastry. Its only downfall is that I've hardly seen it in any patisseries. But I am still on the look-out!

Anyway, I wanted to try and recreate this beautiful patisserie in cupcake form. And judging from people's reactions, I think it was a success! I made raspberry cupcakes, topped them with home-made raspberry curd and then a final layer of meringue. Of course, again, I'm going to mention my beloved oven and tell you that with a better oven (or better yet, a grill!) these cakes would end up even yummier, because the idea is that once the cupcakes are cooked they go back under the grill for 2-3 minutes to just cook the meringue. Having said that, they tasted pretty damn good. The cake part was quite tart, but the curd and the meringue were sweet enough to make you forget about that sourness in a second. They are quite fiddly to make, but believe me, it's worth it, because it will be hard to just eat one of these little packages of loveliness!


Raspberry Meringue Cupcakes makes 12

For the raspberry curd...
Ingredients:
50g Butter
1/2 cup Raspberries (if frozen, thawed)
2 Egg Yolks, lightly beaten
150g Sugar

Method:
  1. Once raspberries are fully thawed, slightly mash with a fork and strain to separate the seeds to get the juice.
  2. Beat together the butter and sugar in a saucepan.
  3. Pour in the egg yolks and mix until combined.
  4. And in the raspberry juice and mix together.
  5. On a low heat, heat until the butter is melted.
  6. Once the butter is melted turn up the heat to medium, while constantly stirring. 
  7. Cook for 15 minutes.
  8. Allow to cool for about 15 minutes and then cover with clingfilm right to the surface of the curd to prevent a skin from forming. 
  9. Refrigerate for at least a couple of hours so it can finish setting.
For the raspberry cupcakes...
Ingredients:
1 cup Butter
1 cup Sugar
2 Eggs
1/2 cup Milk
2 tsp Vanilla Extract
2 tsp Baking Powder
1 1/2 cups Plain Flour
2 cups Raspberries (fresh or frozen)

Method:
  1. Preheat oven to 180 degrees and line cake tin with cases or grease cupcake holders.
  2. Melt butter over low heat. 
  3. Remove from heat and whisk in sugar until combined. 
  4. Allow to cool for about 5 minutes, so it is lukewarm.
  5. Whisk in the eggs.
  6. Add the milk, vanilla and baking powder and whisk again to combine.
  7. Whisk in the flour until just combined.
  8. Fold in the raspberries.
  9. Fill each cupcake holder with mixture and bake for about 20-25 minutes, until a skewer inserted into the middle of the cupcake comes out clean.
  10. Allow to cool.
  11. If using cupcake holders, remove from holders.
A lovely rasberry mess.


For the meringue...
Ingredients:
2 Egg Whites
100g Sugar

Method:
  1. Whisk egg whites until soft peaks form when the whisk is removed.
  2. Gradually add the sugar and whisk continuously until stiff peaks form when the whisk is removed and the mixture is thick and glossy.
The coveted 4€ whisk from Casino...literally made my life!

And look! I got to use my brand spanking new hand-held whisk that made me oh-so-happy when it was bought for me!! Here's it in action...and look at its brilliant results. It certainly works!


For the raspberry meringue cupcakes...
Method:
  1. Spread a thin layer of the raspberry curd on the completely cooled cupcakes.
  2. Place a dollop of meringue on top of the curd.
  3. Ideally, place under the grill for 2-3 minutes until the top is lightly golden. If you don't have access to a grill, place in the oven at the highest temperature until lightly golden.
  4. Enjoy these wonderful raspberry treats!


Again, unfortunately I don't think you can appreciate the loveliness of these cupcakes to the full extent from these photos and they certainly wouldn't win any awards for beauty. But hey, it's not about what you look like on the outside, what's more important is what you're like on the inside right? And that's sooooo true for these beauties. Please please please take my word for it and prepare to be amazed by these little raspberry explosions!!


WARNING! A sweet tooth is necessary to fully appreciate these little raspberry wonders.
 

Savoury /skɒn/ or /skoʊn/?


However you pronounce this Scottish bread, it tastes the same! But as a language student I could not talk about scones without mentioning its pronunciation debate! Apparently, most pronounce it /skɒn/ to rhyme with 'con' and 'John', but others (me included) pronounce it /skoʊn/ to rhyme with 'cone' and 'Joan'. Of course, how you say it doesn't really matter (although we all know that /skoʊn/ is actually the right way), as long as everyone knows what we're talking about. Usually, they'd be something sweet that we'd have with jam and cream, but I wanted to try something new and savoury, so when I came across this red pepper and feta recipe, I thought - why not try it! My weekend with Abbey was starting to turn into a very food-orientated one. Not only does she make a good friend, but she makes a good washing up partner too!!

Anyway, jokes aside, these scones were very tasty and I'm glad I stumbled across this recipe. It's nice to bake something for an actual meal for a change, as it makes it seem like there's more point to my baking. The smell when they're cooking is divine as well! I'd definitely recommend them for lunch, served warm with butter. The saltniness of the feta was balanced out by the sweet red peppers, but it's the kind of recipe which you could adapt and change and put in the ingredients that you like. A bit like a quiche. I'd like to give it a go with a different cheese perhaps and even some ham so that you'd be having a whole meal in one bite. If only you had a portable microwave, it would be the perfect lunch to have on-the-go! Try them out and experiment with different flavours - they certianly make a nice change from a bog-standard sandwich.  

Feta and Red Pepper Scones makes 8

Ingredients:
2 cups Plain Flour
1 tbsp Baking Powder
1/2 tsp Salt
100g Butter
100g Feta Cheese, crumbled
2 Red Peppers, finely chopped and gently fried
3 Spring Onions, finely sliced
1 Egg, slightly beaten
80ml Cream

Method:
  1. Preheat oven to 180 degrees and lightly grease a baking tray.
  2. Mix together flour, baking powder and salt in a large mixing bowl.
  3. Add butter and rub into dry ingredients until it ressembles coarse breadcrumbs.
  4. Stir in feta, peppers and spring onions. 
  5. Mix in egg and cream until it forms a dough.
  6. Turn out onto a lightly floured surface to form a ball and flatten so it is about 2cm thick.
  7. Using a sharp knife, cut 8 pie wedges.
  8. Place on baking tray and put in the oven for about 20-25 minutes or until lightly browned.
  9. Cut in half lengthways and spread butter on each side.
  10. Enjoy!

Making these also gave me the chance to use this rather nifty gadget that I found in Casino, one of the nicer French supermarkets that I've found here. It's a measuring cup with various measurements for different ingredients and comes in very handy when you don't have a set of scales! I'm still not convinced that it meausres things accurately but it's better than nothing. I got very excited about it anyway. Which is probably a sign that I've become a little too obsessed with baking!


Saturday, February 11, 2012

Heavenly white hot chocolate...Italian style

Considering I'm living in the south of France, the weather has not been at all Mediterranean recently. We had another flurry of snow yesterday and I can't wait for the temperatures to start rising again. Provence is just not geared up for such cold conditions! But after spending a chilly winter's day outside what better way to warm you up than a hot chocolate? And not just any old hot chocolate either. No, this was a very special Italian style white hot chocolate. The last time Abbey was here there was an International Market on in Aix and they sold THE most delicious white hot chocolate I've ever tasted. It basically tasted just like pure white melted chocolate. Well, we wanted to recreate this rather indulgent drink and treat ourselves to a heavenly, chocolately concoction. The end result was INCREDIBLE. If you're a white chocolate lover, you must try these. And you will want to drink it for the rest of your life.
This picture does not do it justice but, believe me, I have run out of words to describe how scrumpcious this drink is. I also realise that it looks like there's hardly any hot chocolate in here - there isn't but you will not be able to eat any more than this, it is so deliciously rich!

Heavenly White Hot Chocolate serves 2

Ingredients:
1/2 cup Milk
1/2 cup Cream
3/4 tsp Cornflour
2 tbsp Sugar
100g White Chocolate

Method:
  1. Combine 3 tbsp of the milk with the cornflour and whisk together until it is smooth.
  2. Combine the rest of the milk, the cream and sugar in a saucepan and heat.
  3. When it starts to bubble round the edges add the milk and cornflour mixture and whisk until it's heated through. 
  4. Add the chocolate and whisk again until smooth, hot and thick enough to coat a spoon. 
  5. Pour into desired mug/glass and enjoy!
WARNING!! Do not think about the number of calories each hot chocolate contains before drinking. It will ruin every mouthful. 

I also think these would make the perfect dessert. Served in a shot glass, topped with a raspberry, it would finish a meal off nicely. I just might not be satisfied with the one though!

Friday, February 10, 2012

My first visit to a Salon de Thé

La Boutique du Glacier
1 rue marechal joffre
13100 Aix en Provence

The number of times I've walked past this little Salon de Thé and wanted to go in and I've finally done it! Cafés like you get in England don't really exist in France. We always end up going to a bar for a hot drink, which doesn't seem quite right. I don't mind, but even in winter everybody sits outside and at the moment it's just too cold for that! Granted, there are outside heaters, but I do associate a coffee and a sit-down with being all cosy and warm inside.  Plus, they don't sell those little pastries or cakes that you just fancy with a hot drink. This is where the Salon de Thé comes in. You can sit inside, have a hot drink AND you get to choose a French patisserie to go with it. Perfection. Now this is not something I'd do very often, but seeing as I had my friend Abbey to stay (who appreciates food and eating nearly as much as me!), I thought - why not treat ourselves? So we did. And it was beautiful.

It was a very difficult decision, but I stuck with my favourite, a tarte aux fraises, because I know you can just never go wrong. Although it was actually not a standard tarte aux fraises. No, it wasn't the usual round tart shape and the pastry was more like puff pastry. I must admit, it wasn't quite as good as the usual ones you see (I think the sweet short crust pastry that tastes more like a biscuit in fact is what makes it for me), but it was pretty close. The crème patissière was there anyway, which is really all that matters. I could literally eat that on its own. All day. Custard is probably it's English cousin, so if you're a custard lover, you'll know what I mean.

Abbey had a flan, which looked amazing. That would probably have been my second choice actually. It was huge too! Not to be confused with an English flan either. Rather than a kind of savoury pie as we'd know a flan to be in England, this French patisserie is made up of shortcrust pastry filled with a sweet custard filling. Also extremely delicious. 
Of course, it goes perfectly with a cup of tea. And it just wouldn't be right to go to a Salon de Thé and not have a tasse de thé. Now normally I have a HUGE problem with how the French serve tea, because they just don't know how to do it. Well, they don't make it how I like it anyway. Usually, you order tea and they bring you a cup of boiling (?) water and a teabag with it. Don't they understand that to make the perfect cup of tea the idea is to pour the boiling water on the teabag? I don't know! Obviously not. La Boutique du Glacier has earned my respect though, because not only does your tea come served in a teapot, but they use real tea leaves! Yes, shocking I know. I guess I would've preferred it with milk, but you can't have everything and it was a good cup of tea. I was just happy to be inside, drinking tea, eating cake and catching up with my friend. My idea of a perfect Friday afternoon.

Thursday, February 9, 2012

A quiche with a Spanish twist

I know I've already posted a quiche recipe, but I'm going to rave about them again! Their simplicity and tastiness wins me over every time. Unless you've tried making one, you might find it hard to believe how easy they are to make. But really, they are. And you can just put anything in them you like. This time, I tried adding chorizo which worked wonderfully. Chorizo is one of those ingredients that flavours the whole dish and all you have to do is chop it up and throw it in. I just swapped the lardons from the previous recipe with chorizo and took out the goat's cheese. Someone also pointed out to me that you could even swap the goat's cheese for Manchego, a Spanish cheese, to give it even more of a  Spanish theme. So there you have it, another quiche to try out. So simple but so delicious! 
Forgot to mention...best served with a cous cous salad to make the perfect light dinner. Enjoy!

Sunday, February 5, 2012

Share the Nutella Love...

...Although perhaps it is not true love at all as I only found out the other day that today is World Nutella Day! Yes, I'm not joking. There has been a day dedicated solely to Nutella. Unfortunately, I left it too late to make a Nutella creation, but watch this space because no doubt I won't be able to resist for much longer. Apparently, it was started in 2007 and is "a day to celebrate, to get creative with, and most importantly, to EAT Nutella" according to its very own website. So when you're reading this, just take a moment to thank the wonderful Italian company Ferrero who have provided us with this amazingly delicious hazlenut chocolate spread. And run to your cupboard and have a spoonful of Nutella. Go on, you know you want to!

Saturday, February 4, 2012

A sweet burst of energy to start your morning...try these Banana and Honey Muffins


There are two reasons why I decided to make these yummy muffins:
i) I've just bought these cute little silicone cake cases on a recent excursion to Ikea and I couldn't wait to try them out. Just look at them, how could anyone resist?


ii) I LOVE breakfast! But cereal everyday gets a bit boring after a while and I wanted to experiment with something different. If you make these muffins in advance, you can just heat them up in the microwave in seconds..and voilà, a quick (fairly) nutritious breakfast that fills you up. A perfect start to the day in my opinion!


Another great thing about these is that they're not dry at all. Perhaps it was the honey addition which made them more gooey than usual, but whatever it was, they have just the right texture you want from a muffin. I also added a drizzle of extra honey on them just before serving. Pop it in the microwave for about 30 seconds and then the honey will soak into the muffin, giving you that extra burst of sweetness you need in the morning. They're only small (and I tend to be quite a hungry person when I first wake up!), so have two. You can make yourself feel less guilty by telling yourself that they're healthy - I mean, they have banana in them! Of course, I had the usual problem with the oven (I'm sorry, this is getting boring now, but it's just SO frustrating). Normally, muffins take about 20 minutes to cook, but realistically, with my extremely outdated oven, they had to be in for about 45 minutes. What I thought was going to be a quick bake stretched out into the night - who needs to go out partying when you can stay in and bake all night?! Their smell and beautiful taste afterwards made it all worth it though...who says that these breakfast muffins have to be eaten for breakfast? They taste just as good (if not better) straight from the oven at 11.30pm at night. Just keep reminding yourself they're healthy and you won't feel so bad when they're gone in days!

Banana and Honey Breakfast Muffins makes 12

Ingredients:

225g Self Raising Flour
125g Butter
100g Caster Sugar 
1 Egg, beaten
1/2 tsp Baking Powder
1/2 tsp Cinnamon
300ml Milk
1 Banana (mashed)
1 1/2 tbsp Runny Honey (plus extra for drizzling when serving)

Method:

  1. Preheat oven to 180 degrees. Line cake tray with cases or grease individual silicone ones.
  2. Cream together butter and sugar.
  3. Beat in the egg.
  4. Add flour, baking powder, cinnamon, milk and honey. Stir gently until all ingredients are combined.
  5. Stir in mashed banana, but be careful to not over stir.
  6. Spoon into cases, so they're about 2/3 full.
  7. Bake in the oven for about 15 to 20 minutes. A knife should come out clean when inserted into one of the muffins. 
  8. Enjoy...straight out of the oven as a late night snack or a burst of energy in the morning!

Wednesday, February 1, 2012

Biscuit (not so)Beauties

Biscuit-making isn't usually my thing. I tend to stick to cakes or pastry. I think it's because if I'm baking I want it to be something extra special and for me, that's not normally a biscuit. However, there seems to be lots of little biscuits sold in the boulangeries round here that look quite delicious, so I guess I've been inspired! And of course, a biscuit is the perfect sidekick to a cup of tea.... 

French Jammie Dodgers


Technically, they're actually French sablés but it's more fun to call them Jammie Dodgers and they look just like them! As I've said, I don't normally make biscuits and, after making these, I remember why... I can't say this has been my most successful baking experience of all time, but then I guess not everything works out how you've planned it! The actual biscuits themselves (minus the burnt ones thanks to my silly oven! How I can't wait to get home and use a decent oven again...) had the perfect texture actually. That's probably because icing sugar is used instead of bog-standard caster, and does make a really short biscuit. Plus, the egg yolks make them very rich. Where I went wrong was misreading the recipe which I've just realised now! Gosh, I am stupid. I skipped out the step where you bake the biscuits first before adding the jam and for some reason, decided to just add the jam and bake straight away! I'll know for next time anyway. This just proves that it is extremely important to read recipes very carefully otherwise they can go very wrong (this is mainly a note to me rather than you!). Oh, I also tried putting Nutella in a few of them (I told you I have an obsession with it!) but of course, this didn't work at all because it went in the oven and just burnt because they had to be in so long. If you follow the recipe correctly though, I'm sure it would work! Having said all that, they don't look bad in the photos and they were definitely edible! Give them a go, if I haven't put you off yet!!


Sablés makes about 20

Ingredients:
 
250g plain flour
200g butter
100g icing sugar
pinch of salt
2 egg yolks
8tbsp of jam of your choice

Method:

  1. Preheat the oven to 170 degrees and grease a baking tray.
  2. Put the flour, butter, sugar and salt in a bowl and rub together with fingertips until the mixture resembles breadcrumbs.
  3. And egg yolks and mix until a dough forms.
  4. Roll out onto a floured surface to a thickness of about 0.5cm.
  5. Cut out shapes (roughly 4cm in diameter) and cut out a hole in the middle of half of them (roughly 2cm in diameter).
  6. Place on a baking tray and bake in the oven for 10-12 minutes until a light golden brown.
  7. Transfer to a wire rack to cool.
  8. Place a small dollop of jam on a whole sablé and place one with a hole on top.
  9. Repeat for each pair.
  10. Enjoy with a cuppa!


I will definitely try this recipe again...when I have learnt to read the recipe properly and I'll let you know how they turn out! In the mean time, I think I'll just go to my local boulangerie and buy some proper sablés from there - I might be more impressed.

Lemon Shortbread

Now for something a little more English. Shortbread. Although again, I'm a little bit disappointed with how these have turned out. When I was little, there were a few certain cafés that we went to and I always used to have the same thing at each one for some reason...don't ask me why! Anyway, the Canal Gardens Café in Roundhay, Leeds, was shortbread. And it was good shortbread. Crumbly and buttery - all the right sort of flavours and textures shortbread should be. They served it on one of those paper doilies and it was a triangle from a big circular shortbread that had been cut out. It's funny the things you remember from your childhood! Anyway, I wanted to try and recreate it, but with a slight variation as it's flavoured with lemon. Not too strong either so it doesn't take away that wonderful buttery taste. However, the texture's just not quite right. I'm not sure why. I found it really hard to get the dough together as there's no liquid ingredient (which is normal for shortbread), so maybe the quantities weren't quite accurate enough. But again, I'm going to blame it on my silly oven instead of me, because I never know whether it's got to the right temperature or if I need to leave things in for longer. It's probably just me not having the knack for making biscuits, but I can always pretend... I'd give them a go though, because it hardly needs any ingredients and I'm sure you'll have better luck than me! Perhaps I'll leave biscuits alone for now...


Lemon Shortbread makes about 12 'slices'

Ingredients:
250g plain flour
175g butter
75g caster sugar
zest of 1 lemon


Method:
  1. Preheat oven to 180 degrees and grease a baking tray.
  2. Place flour and butter into a bowl and run together with fingertips until the mixture ressembles fine breadcrumbs.
  3. Stir in the sugar and lemon zest.
  4. Gather together into a dough (it doesn't look like it will, but it will eventually!).
  5. Press dough into baking tray so it is just under 1cm in thickness and cut lines into dough in desired shapes.
  6. Bake in the oven for 30 minutes.
  7. Allow to cool then remove from baking tray and enjoy! 

I'm glad I experiemented with biscuits, but I don't think I'll be making them again in a hurry! Far too much hassle for what it's worth in my opinion. But by all means, don't let me put you off. You'll probably have better luck than me. And don't get me wrong - I do love eating biscuits! (I've just eaten about three in one sitting and these are very rich biscuits). I think I'll stick to cakes and other sweet treats in the future though!